

My Floret Zinnias This Past Summer
Hello friends,
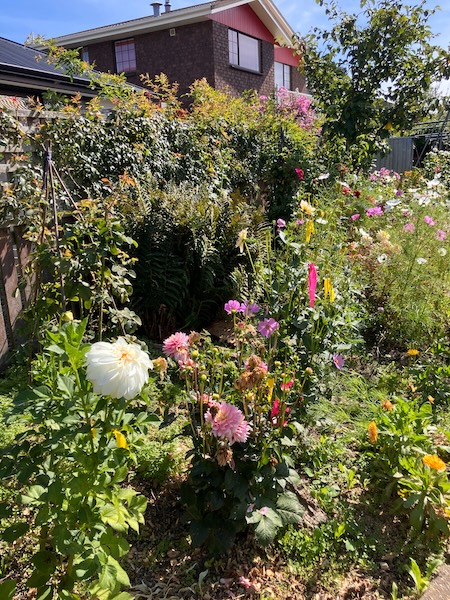
Last spring I sowed all the remaining Floret Zinnia seeds I had in storage, which I had bought from Emerden in 2024. The Floret Previous Metals, Dawn Creek Blush, and Unicorn zinnia varieties were sown into seed raising mix, grown on until they had two sets of true leaves, and then they were potted up into bigger containers with potting mix until I was sure the risk of frost was over.
I planted them in two vegetable garden beds close together, so that I could easily save seed for my own personal stash for the coming years.

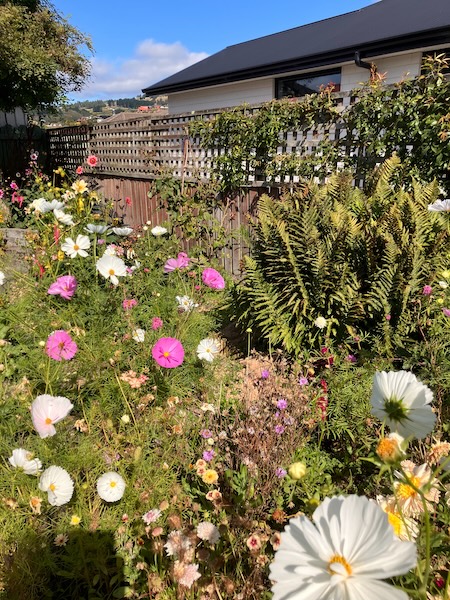
And then it was time to wait for them to flower. Due to our horrible summer, which wasn't really a summer, my zinnia plants didn't begin to start flowering until late January, but they were well worth the wait. I had hundreds of flowers in such gorgeous colours ranging from cream, pinks, and orange, all the way to bright red. The range of zinnia flower types flowering varied from singles, to cactus shapes, all the way through to frilly doubles.

Dawns Creek Blush flowers varied from dusky pinks, to pinks, and to purples.


Precious Metals gave me lots of metallics in shades of orange, pinks and purples, and there was even ombré colouring in some of the flowers.


And finally, the Floret Unicorn variety gave me florescent bright pinks and orange and red flowers, with a lot of double flowers amongst them.


I was so happy with my zinnia patch, and I wasn't the only one. Bees and butterflies swarmed over my zinnias all summer and autumn long, and that made it just it that much better in my opinion.


I shared my Floret zinnias on social media, and soon found myself becoming a very small scale flower farmer, as I provided buckets of zinnias to a local flower farmer florist. I very much enjoyed going out into my garden on summer mornings to fill up buckets of zinnias to send away to their new homes.


Unfortunately though thanks to the terrible summer we had, all too soon I had to start seed saving by letting the blooming flowers set seed and turn brown. I managed to save seed from a lot of mature flowers, before the looming threat of a decent frost forced me to save as many older flowers (but not quite mature flowers) in mid-April.

On the 22nd of April we had our first proper frost, and all my lovely zinnias sparkled in the cold autumn sunrise as frost coated them all. By the afternoon the zinnia plants had all turned brown and died.


And so the zinnia season for 2025/2026 has come to an end. I have 5 trays of zinnia flower heads to process over the winter, so I can harvest the seed and store it away until next spring. I am very much looking forward to seeing which zinnia flowers bloom next summer. Zinnias are known to have complex and highly plastic genomes, and have transposons, aka jumping genes, which can lead to unstable genetics, so who knows what I'll end up with. But I'm excited to find out...
Have a wonderful day
Julie-Ann
Want to discuss my post? Feel free to chat with me on Instagram or Mastodon or Bluesky, and now also Facebook.
Our Lilac Tree Died
Hello friends,
Our lilac tree stood in the right hand side of our backyard, a fully grown tree already when we moved into our home in 2019. Each year in spring it would bud out and produce leaves followed by stunning purple scented flowers, but unfortunately this past spring was its last.
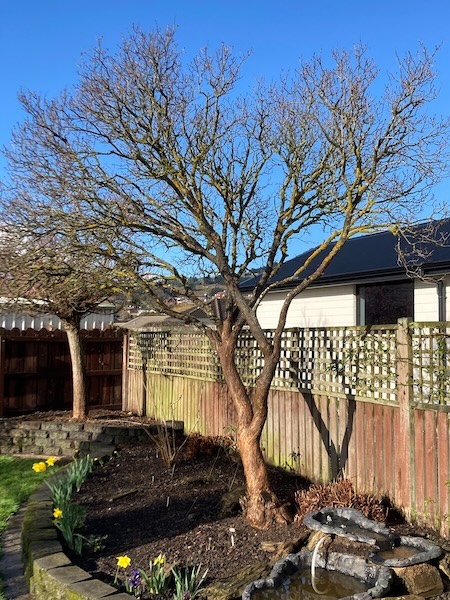
In the third week of October in 2025, a large wind storm blew through the South Island of New Zealand, causing wind damage throughout Otago and Southland, and cutting off power to thousands. At the time I thought my only plant casualties were some limbs coming off my quince tree, and my Avalanche camellia bush being snapped off at its base, but unknown to us at the time, my lilac tree had been damaged as well.
A week after the storm I'd noticed that our lilac tree hadn't burst its buds, and when I touched the buds they crumbled, having been turned brown and crispy by the wind storm. The tree had gotten wind blasted to the point that it was in serious trouble. We left it for a while to see if it would bounce back, and eventually a couple of leaf buds on the south side of the tree burst open, showing that at that time the tree was still alive (well only barely).
We left it over the summer to see if it would grow more leaf buds, but it didn't, and then around early February 2026 the few remaining leaves on the plant turned brown and fell off. After carefully checking multiple branches at points around the tree, and the suckers which usually came up from the base of the tree each summer, they were all dead and brown. I also checked with a few knowledgeable plant friends, and they also agreed that our lilac tree had died.
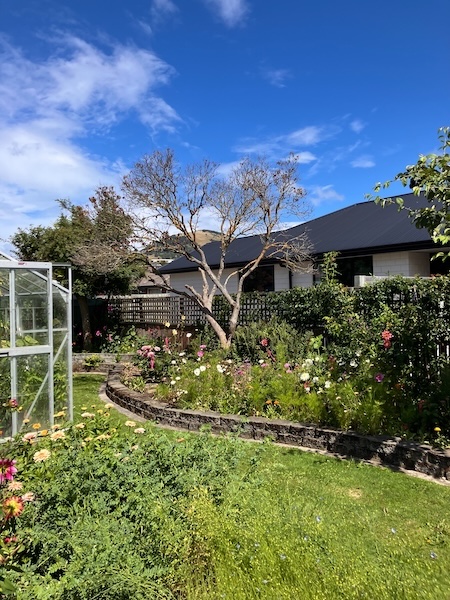
I was really upset over this, but also practical, because sometimes these things just happen. Nature gives and it takes away. The next weekend hubby got out our saw and began cutting down the tree limbs. Our first priority was to remove dead branches that could possibly hit the glasshouse or the fence, and then after that we cut the tree down to the ground. Hubby mulched what tree material he could with our wood chipper, and mulched around that area of the garden to help with weed suppression.
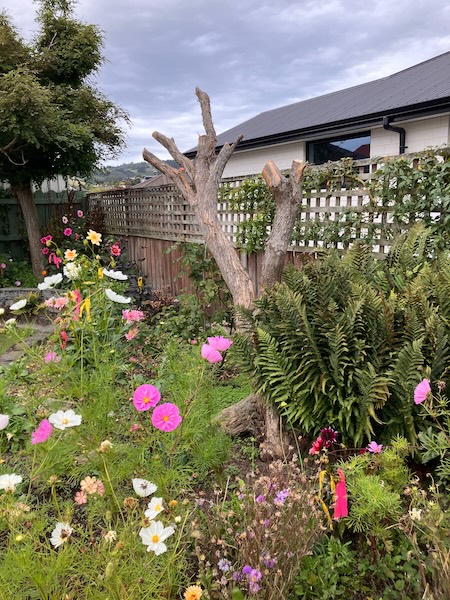
We also dug up the old fern plant beside the tree, as in the past a wasp nest had been buried in there, so I wanted to remove the plant to ensure it wouldn't happen again.
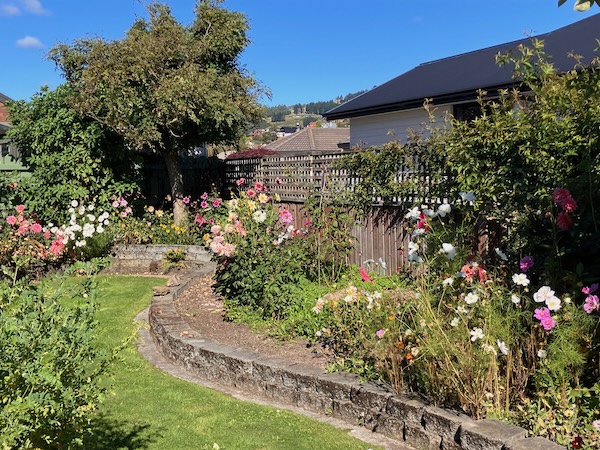
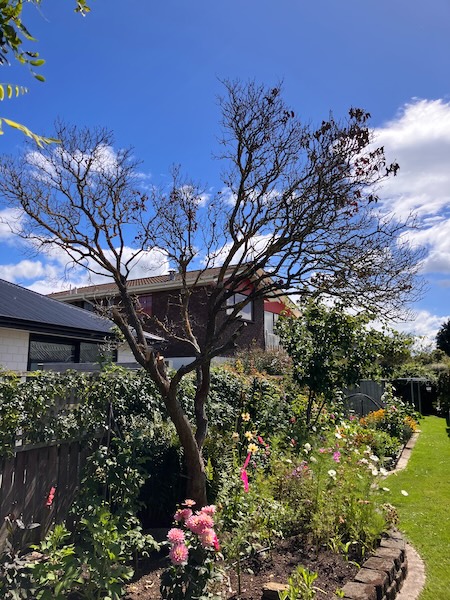
The resulting sunlight in this area of the garden after the tree had been taken down, is just amazing. There is now a lot more sun in the garden bed from early morning until early evening. Dahlia plants that had grown under the tree grew vigorously, and have even flowered.
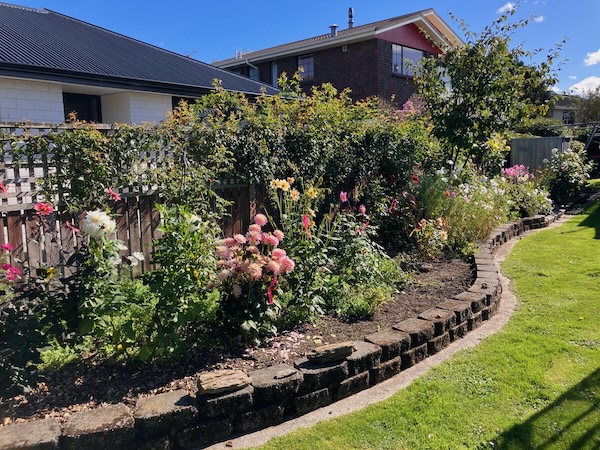
At the moment in mid-autumn there are dahlias and damask roses still growing in this area. As soon as the first big autumn frost comes, and knocks back the dahlias growing there (after I've finished seed saving from them), I think I will rearrange this whole area of the garden, in preparation for the next growing season. And I already have some ideas on what I could do...
Have a wonderful day
Julie-Ann
Want to discuss my post? Feel free to chat with me on Instagram or Mastodon or Bluesky, and now also Facebook.
End Of Year 2025 Spinning Projects
Hello friends,
In the spring of 2025 I managed to accomplish a couple of spinning projects using my drop spindle and spinning wheel, spinning up two braids of fibre I had in my stash.
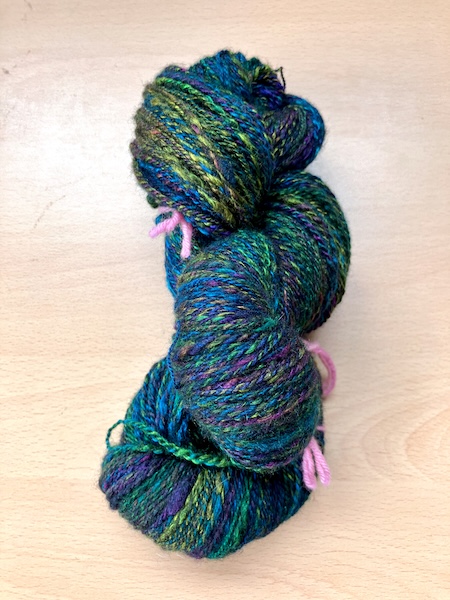
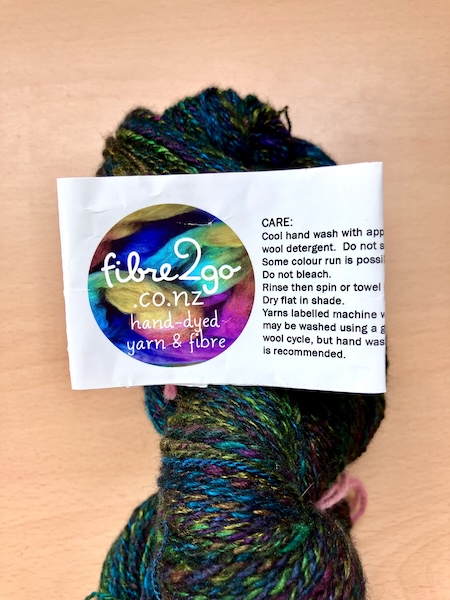
First up was 100 grams of Fibre to Go "In The Shade Jewels" braid, made from 70% merino and 30% Silk, that my best friend Karyn picked up for me at Fibretron in Hamilton in the winter of 2025. Unfortunately after searching through all my photos I couldn't find any pictures of the braid, or of it being spun up on my drop spindle, but here is the finished yarn in all it's glory.
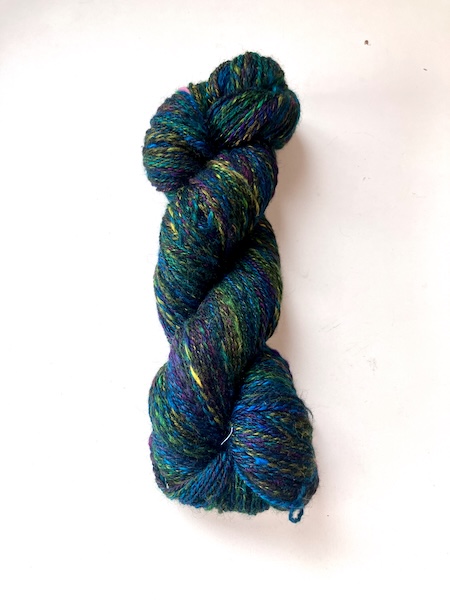
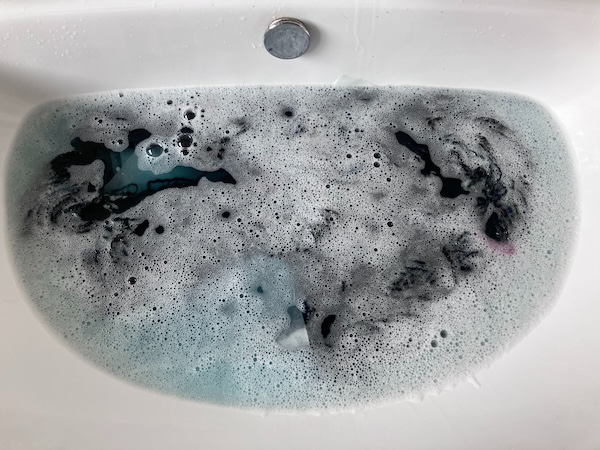
The rainbow jewel shades against the black are just so pretty, and I can't wait to use it in a weaving project in the near future. Unfortunately the yarn colours ran when I washed the skein of yarn after plying, but it did clear up in the rinses afterward. This yarn ended up being fingering weight width.
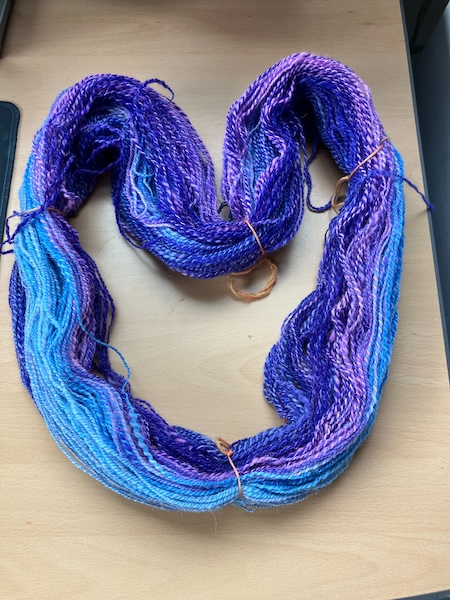
And secondly, I spun up a 100 gram braid from Handmaiden's July 2025 Fibre Club, containing 75% Corriedale, 15% Llama, and 10% Rayon, in shades of graduated pink, purple, blue and white.
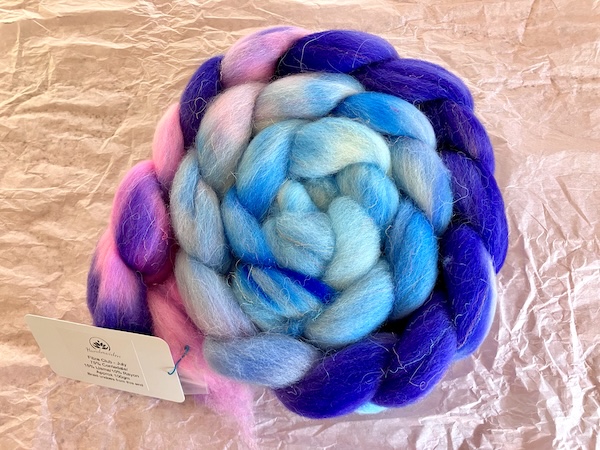
With the rayon content being flecks of fibre that would come out easily all over the place while spinning, I decided to spin it with a high twist on my spinning wheel, in order to reduce the amount of mess all over me and my craft room floor. I split the braid vertically down middle to retain the colour changes in the braid, and then spun up the two singles in the same direction, followed by plying them together as a simple 2-ply yarn. The resulting yarn was my usual fingering weight yarn width.
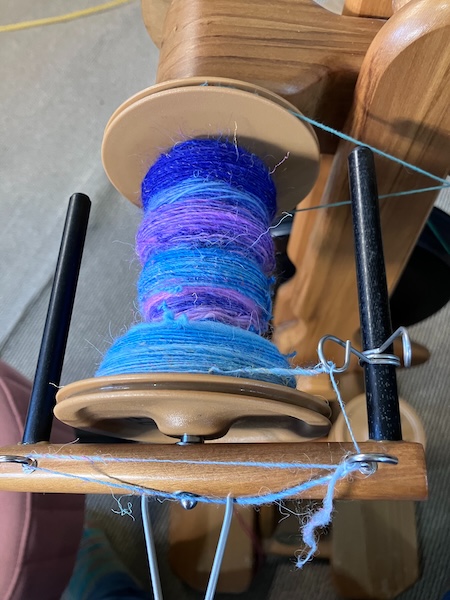
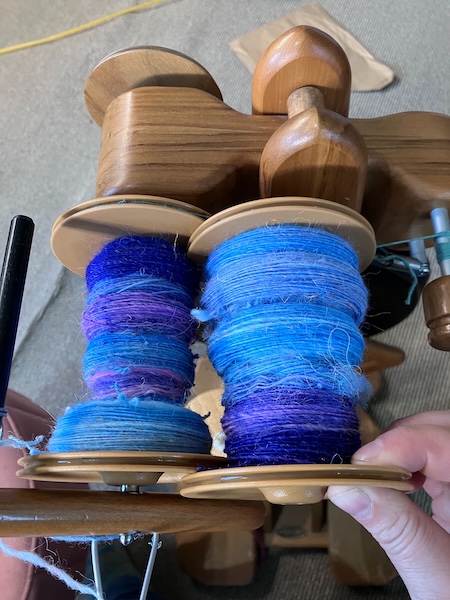
The resulting yarn mostly kept the colours and colour graduation together, but there is always some sort of shifting that happens due to unbalanced dyeing on each side of the braid, as well as uneven splitting of the braid when pulled apart.
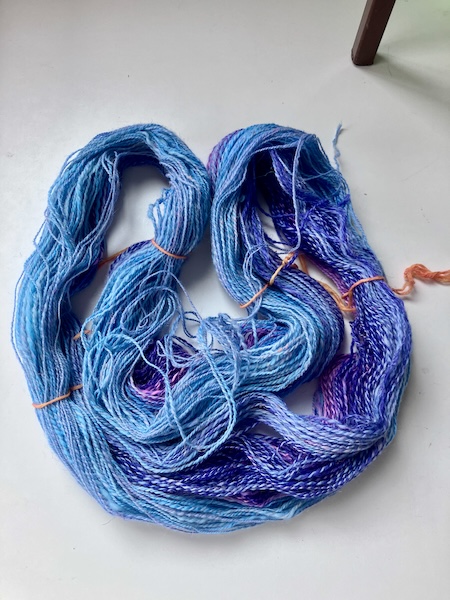
The yarn was then set in place using a gentle wool wash, and then dried, before being stored away in my large pile of hand spun yarn.
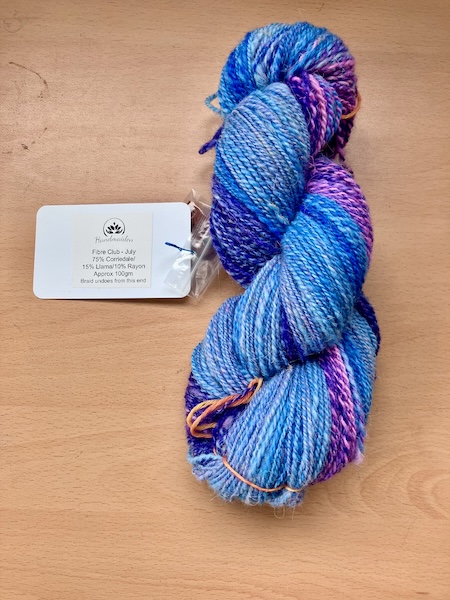
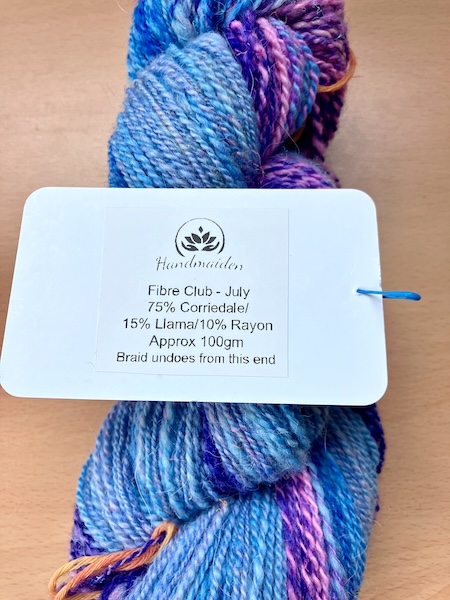
I'm very happy with the resulting yarn, and plan to use this yarn as a warp in an experiment to create a stained glass scarf for my online store Hearth and Oak. It is always very fulfilling to take a braid of fibre, and spin it, before weaving it into a finished project.
Have a wonderful day
Julie-Ann
Want to discuss my post? Feel free to chat with me on Instagram or Mastodon or Bluesky, and now also Facebook.
Ranunculus And Peonies Flowering
Hello friends,
Today I wanted to share with you some of the ranunculus and peony plants that flowered in the garden this November, bringing such wonderful colour into the garden after the daffodil and tulip flowers finished, but before the dahlias started flowering this summer.
First up are the ranunculus varieties that I grew from seed last autumn. I bought a bunch of imported seeds from Buds & Bloom, including the varieties French Amandine Purple Jean, Italian Rosa Chairo, Italian Rosa, Italian Pastello 1, Italian Pastello 2, and Italian Bianco Sfumato.
Ranunculus corms are almost impossible to import into New Zealand due to strict biosecurity laws, but seed stocks are much easier to get into the country, which is what Buds & Bloom did last summer this year. Ranunculus plants from seeds are pretty tricky to grow, but I managed to get some germinating in autumn, and then grew them up over the winter, before planting them into the ground very early this spring. It didn't take them very long to grow and begin flowering, and here are a few that I photographed.
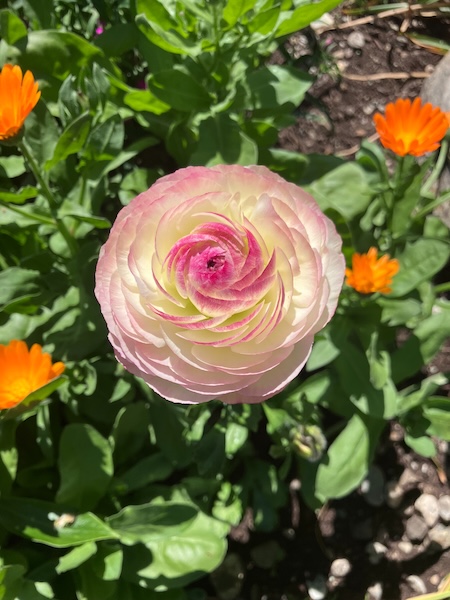
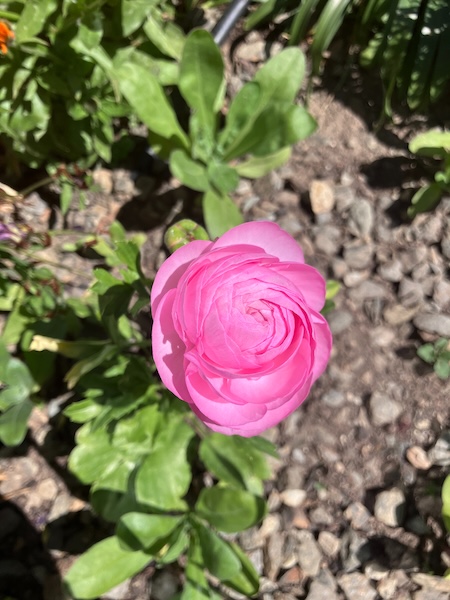
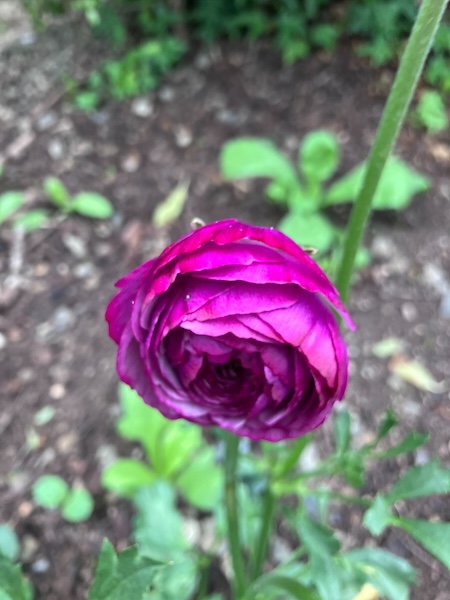
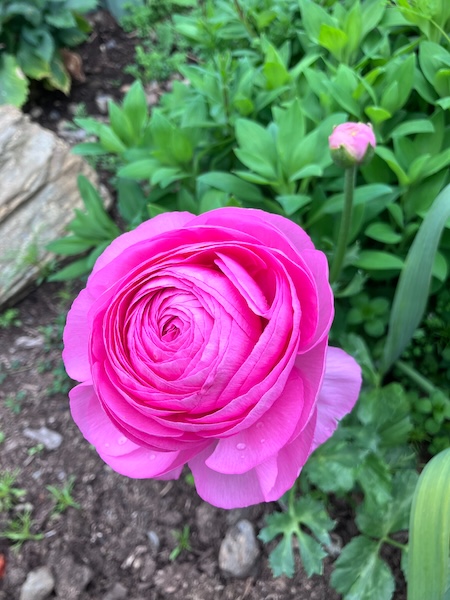
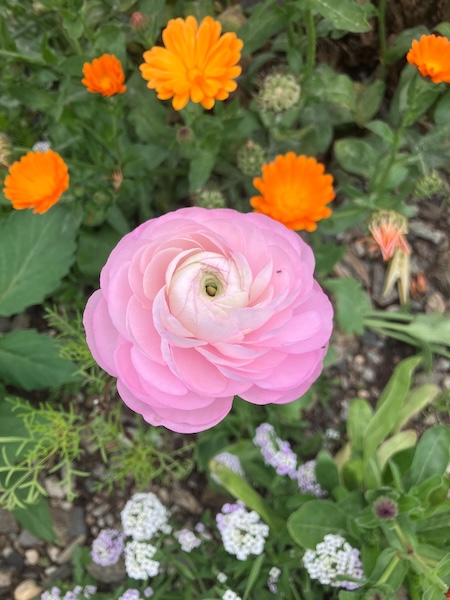
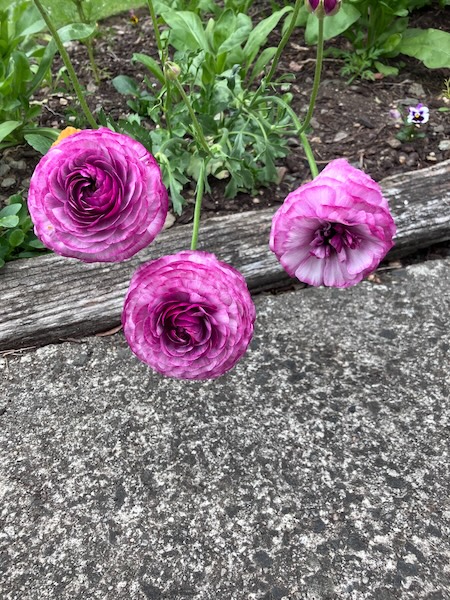
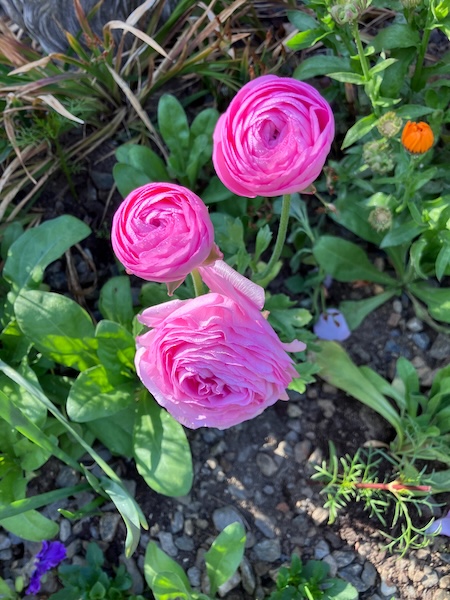
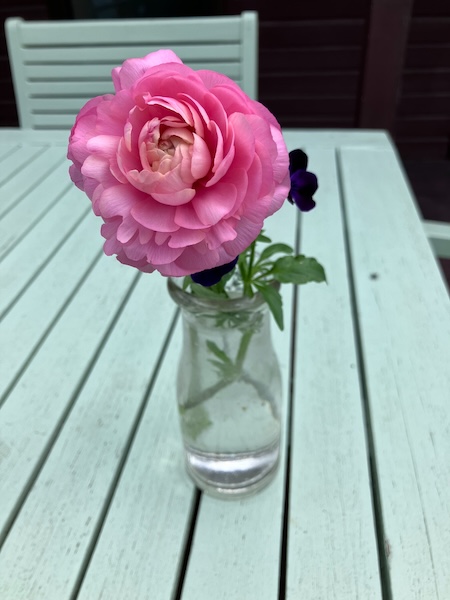
The range of colours from the imported ranunculus varieties was just stunning, with lots of pastel marshmallow like colours, and the flowers themselves were just very soft and squishy, perfect for cutting and then putting into a vase to enjoy inside the home.
Flowering at the same time were all my unknown peony varieties. Most of them were already in the garden when we moved here in 2019, and a couple of others are peonies that I bought but then have moved a couple of times over the years, and now I can't remember any of their names...
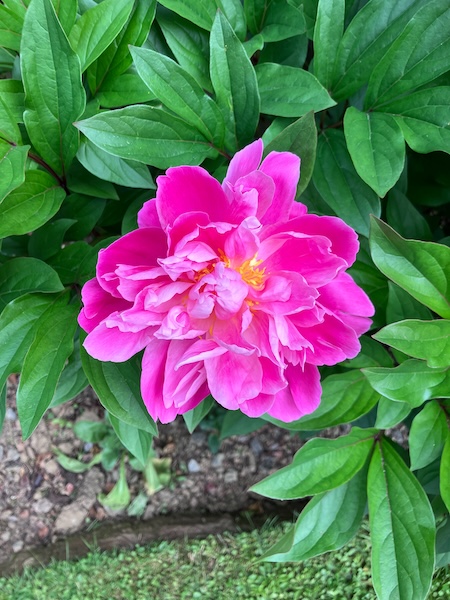
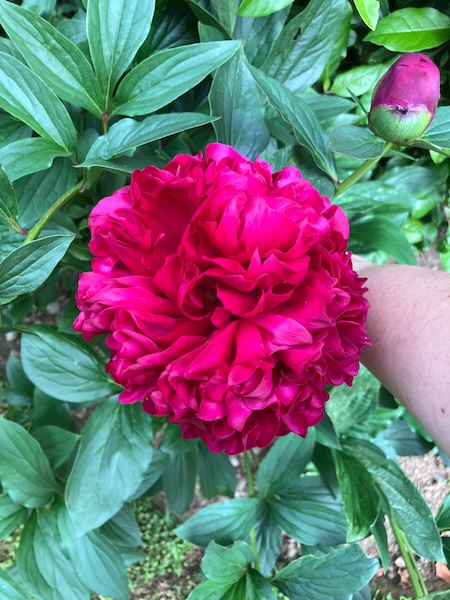
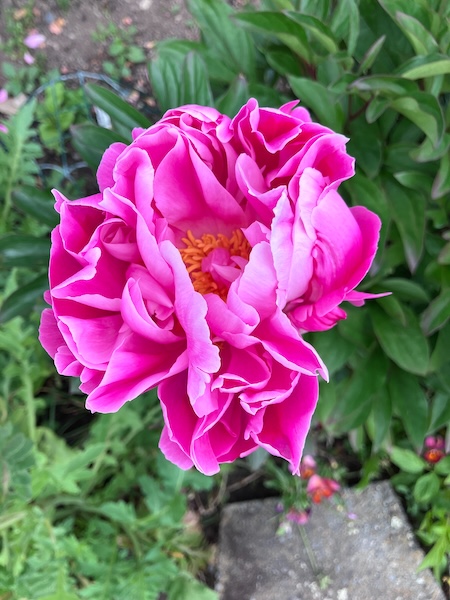
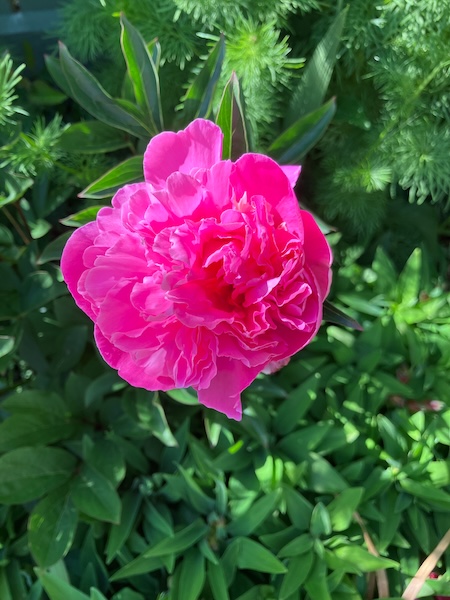
I leave them to flower in the garden rather than bringing them inside our home because hubby and my allergies are too severe to tolerate them, and also we have two very bitey indoor cats (Missy and Rosie) who would love to eat them if the blooms were brought inside.
I also have three new peonies growing this year, Duchesse de Nemours, Dr Alexander Fleming, and Sarah Bernhardt, but it will be a few years before they will be flowering and putting on a show in the garden. I can't wait to see them bud and bloom in a couple of years time...
Have a wonderful day
Julie-Ann
Want to discuss my post? Feel free to chat with me on Instagram or Mastodon or Bluesky, and now also Facebook.
Social Media


Archives