

Random Farm's Tilda and Biscuit Fleece Project - Washing and Storing
Hello friends,
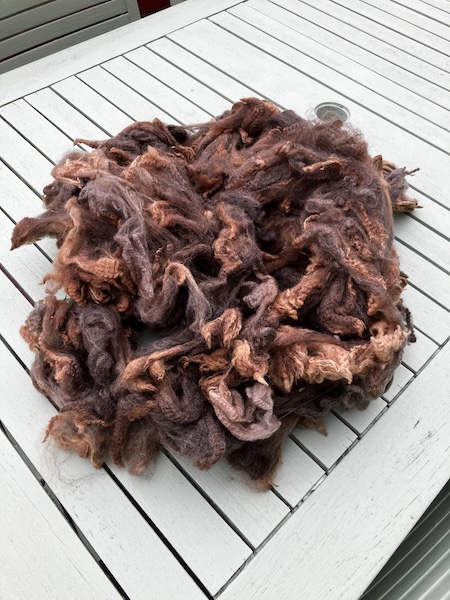
Yes, I went and bought two more raw fleeces, but in my defense, it was only 500 grams of fleece each. I saw a social media post from Random Farm in April announcing the release of their raw fleeces after they'd been taken to the 2025 National Black and Coloured Sheep Breeders Association Competition. After searching through the photos of their fleeces available, I was really tempted by two raw fleeces, from the sheep Tilda and Biscuit, so I bought 500 grams of each of them.
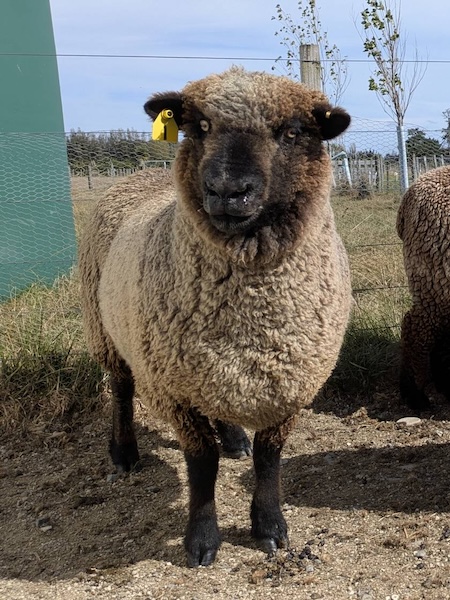
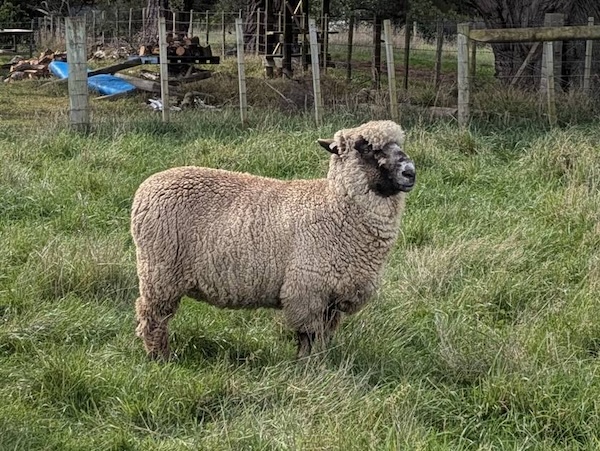
First up we have Tilda the sheep, who is a silver grey pure-bred Romney, with fleece of 34 microns across and a staple length of 13 cm. Her fleece came second in the Strong Handcraft Fleece section at the National Black and Coloured Sheep Breeders Association Competition in 2025.
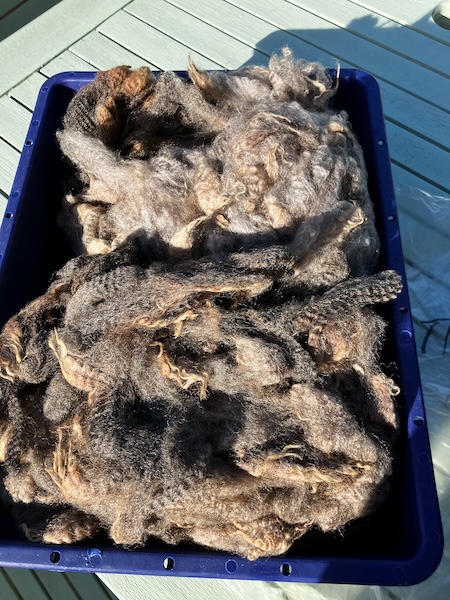
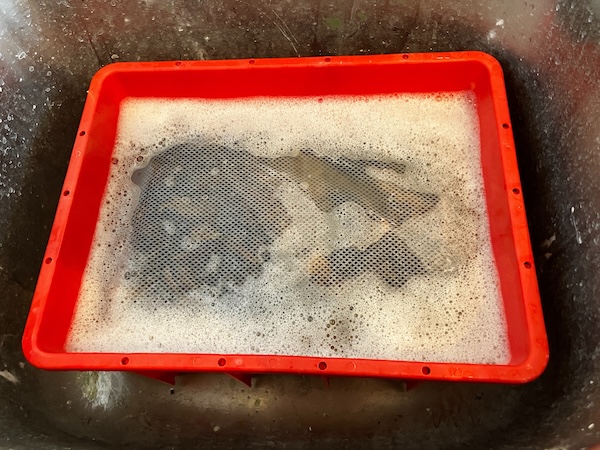
With her fleece I scoured it using my previous method of scouring wool using Unicorn Scour Power, but this time I used a new drying method.
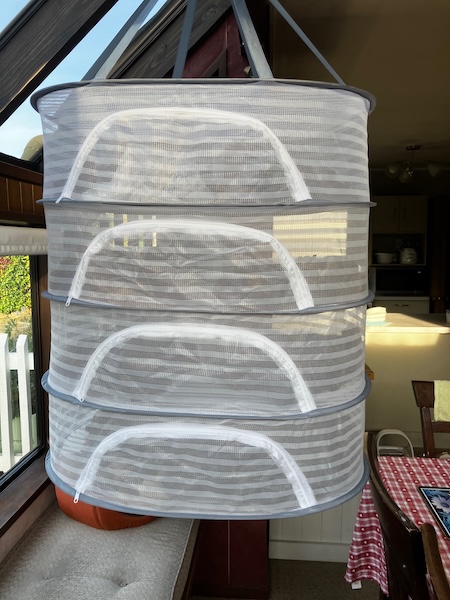
Usually I put scoured fleeces into plastic trays to dry while outside, but I have the problem of fleece trying to blow away in high winds, and also when I bring it inside Missy and Rosie cats think of them as warm and fluffy cat beds. I saw a social media post a while ago of someone using a foldable fish drying mesh rack to dry fleeces and yarn, so I was interested in buying one, and I eventually found it on Temu after I couldn't find any for sale locally in New Zealand. I opted for the four tier rack with zip closures as it gave me many options for drying fleece, fibre, and yarn. It also folds down into a very small space for storage.

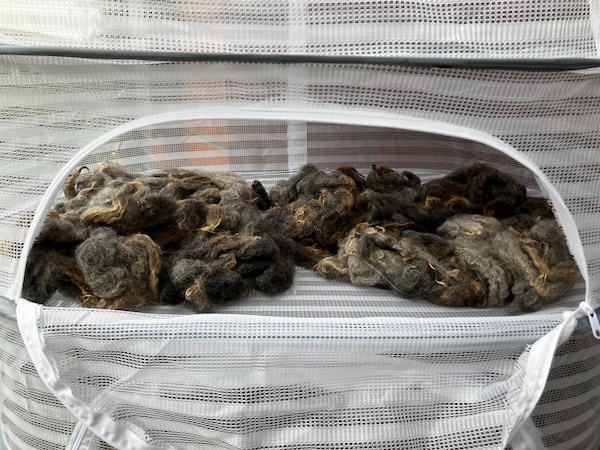
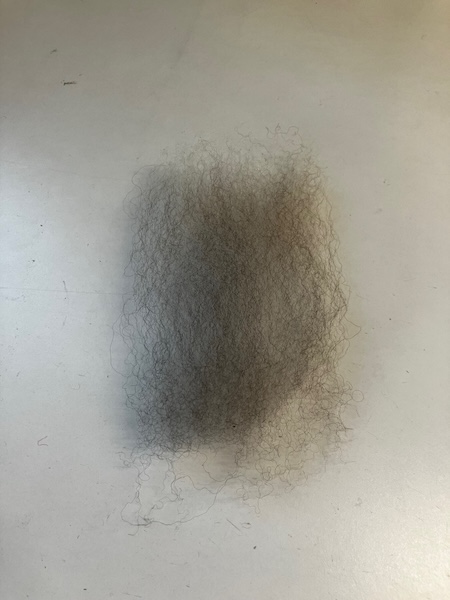
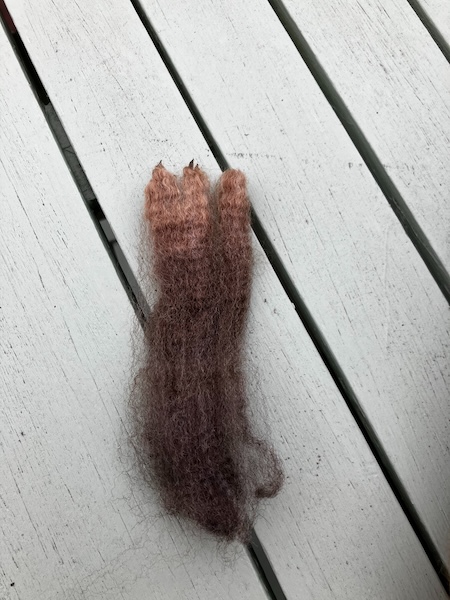
And the new system works great for both outside the house, and also for hanging inside near the fireplace on cold nights. It didn't take very long at all to dry, hung up safe from both winds and cats. A quick flick carding of Tilda's dried fleece shows a nice clean and long staple with great crimp in the fleece.
Biscuit the sheep is a silvery-grey romney/corriedale fleece, with romney lustre and corriedale softness. Her fleece was shorn when she was 18 months old, so this is her two-tooth fleece, at 31 microns and a staple length of 14 cm. Biscuit's fleece came 4th in the Mature Strong Handcraft Fleece section at the National Black and Coloured Sheep Breeders Association Competition in 2025.
Random Farm suggests spinning this fleece semi-worsted/worsted style, which require wool combs to align all the fleece in the same direction. I have actually have a set of wool combs ordered from Majacraft, but I'm waiting for them to arrive so I can try this method of fleece preparation.
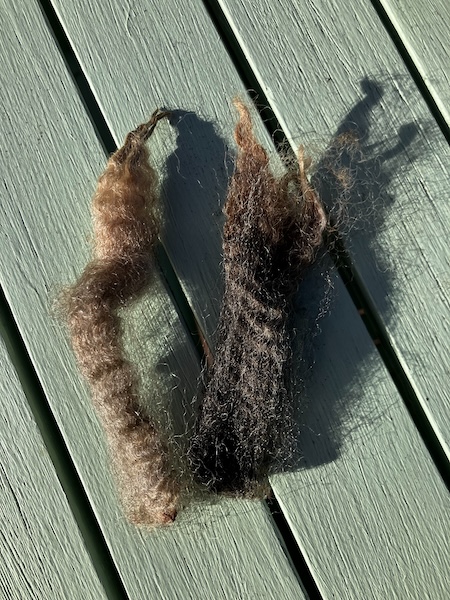
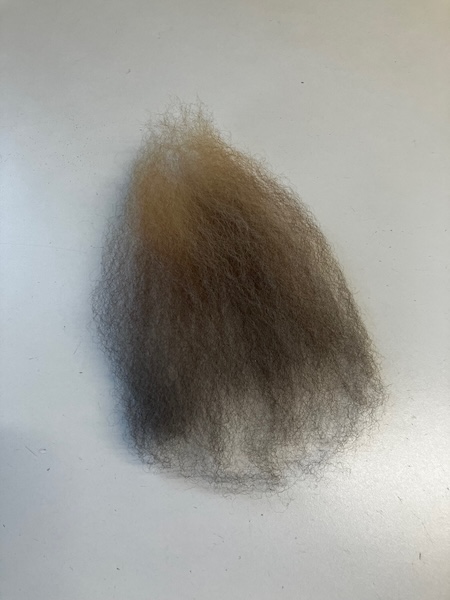
When dried I flick carded a lock of Biscuit's scoured and washed fleece, and it turned out just beautiful, with two toned colours on a long staple. I'm looking forward to using my new wool combs with this fleece when they arrive.
With four scoured and clean fleeces now in storage, I will not buying any more fleece for quite a while. The next step for all these fleeces is to process them for spinning, by either drum carding them, or using my wool combs.
And I just wanted to say a big thank you to Random Farm, who gave me permission to use their photos of Tilda and Biscuit the sheep in this blog post. Please check out Random Farm's Facebook and Felt pages to see all their lovely fleece available.
There won't be a blog post next Thursday, as I'm having cataract surgery on my left eye next Wednesday. I am planning on posting a blog a week after that if all goes to plan.
Have a wonderful day.
Julie-Ann
Want to discuss my post? Feel free to chat with me on Instagram or Mastodon or Bluesky.
Winter Aurora Cabin Cross Stitch Project Update
Hello friends,
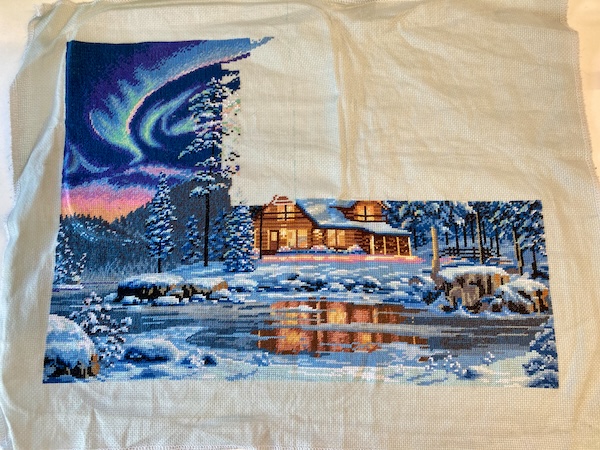
Each winter I pull out my Aurora Cabin cross stitch kit by Dimensions, and stitch the lovely aurora and snow scene while the weather is cold. I never feel like stitching it in the other seasons, so it's now my winter cross stitching project.
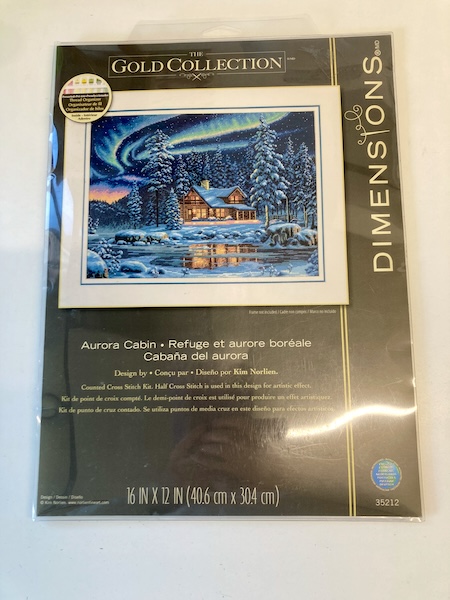
At the beginning of winter I was only 25% finished, but now at the start of spring I think I'm at around 66% finished. I'm hoping to get the Aurora Cabin cross stitch project finished next winter.
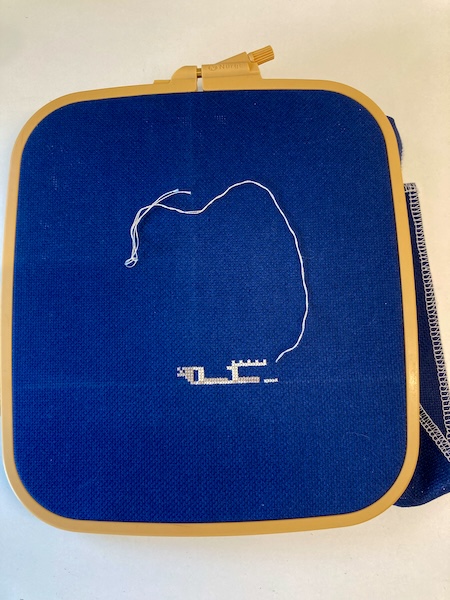
And now that it's spring, I've begun a new cross stitch project, another Dimensions kit, Victorian Charm. My sister and I are both fans of the TV show Charmed, and this cross stitch kit reminds us of the house in the TV show.
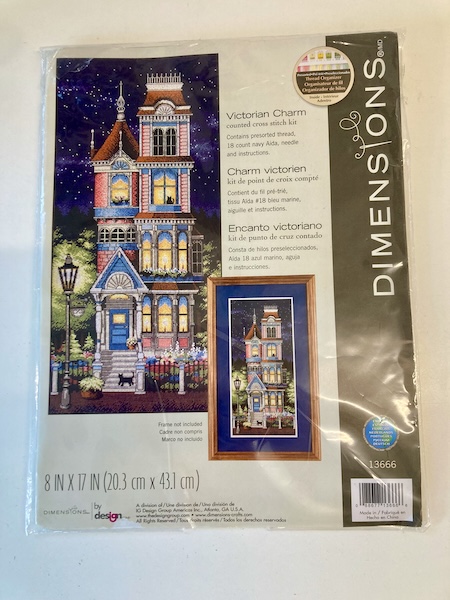
Our plan is to stitch on this together over the spring and summer, and see how much progress we get. Luckily the aida fabric is a dark navy blue, so we don't have to fill in the night sky in full cross stitch. And I've made a very small start on this so far.
As this is a small project, not as big as the Aurora Cabin kit, I should make some good headway this year.
Have a wonderful day
Julie-Ann
Want to discuss my post? Feel free to chat with me on Instagram or Mastodon or Bluesky
Gathering Acorns Cross Stitch Project
Hello friends,
I had an autumn cross stitch start and a finish!
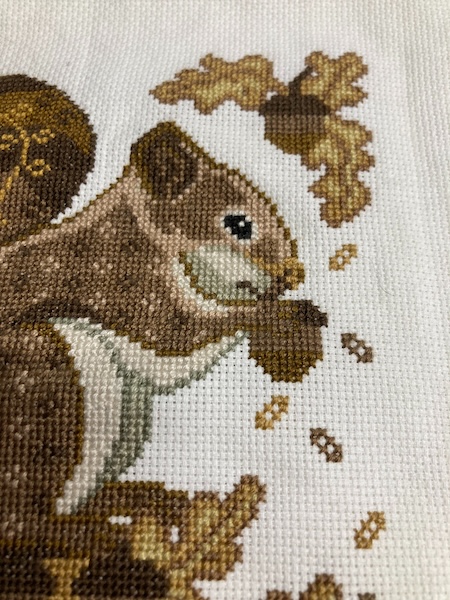
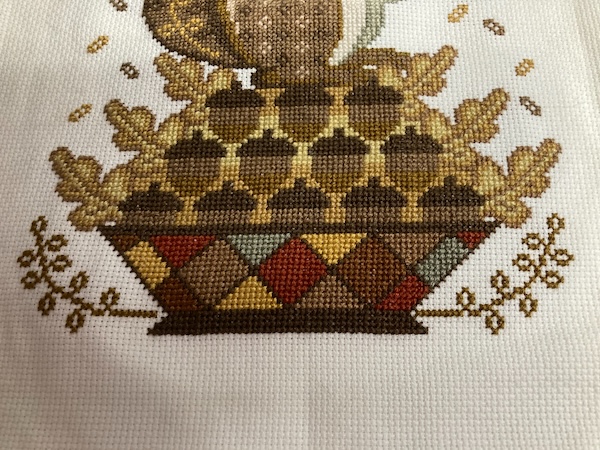
After completing the Tonight We Ride cross stitch project in early autumn, I pulled out the Gathering Acorns cross stitch pattern from Cottage Garden Samplings, which I've had in storage for a while. I decided to use a fat quarter of 18 count Aida in the colour Antique White from Stitch NZ I also had lying around. Stitch NZ are my favorite cross stitch supplier in NZ, as they have a large range of fabric in many sizes. I also bought Gentle Arts Sampler Thread in the colour of Maple Syrup from them, which was the main background colour for the squirrel. The rest of the thread colours used in the project were DMC that I had in stash.
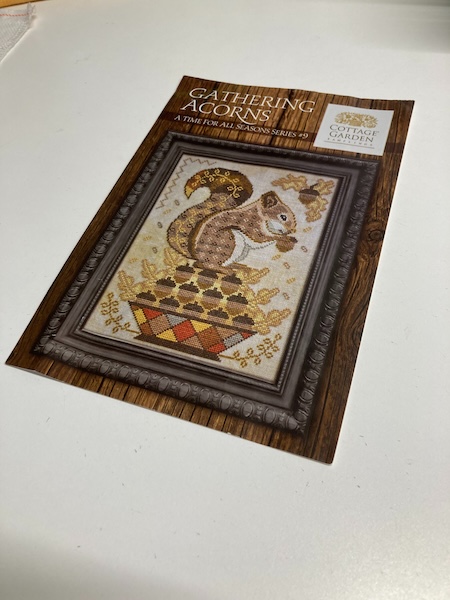
The stitch count for the project was only 100 stitches wide by 130 stitches tall, so it didn't take very long at all to stitch up 2x1. I started in the middle, which was in the lower part of the squirrel, and worked my way out. I managed to finish stitching Gathering Acorns a couple of days before winter started on the 1st of June.
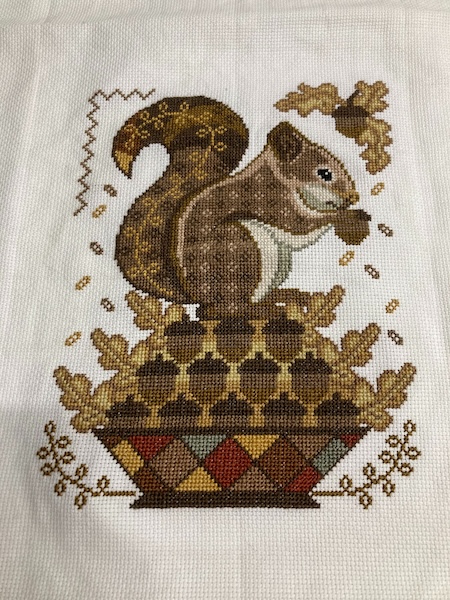
I really love the autumnal colours of the squirrel and the pie dish, and the pattern was very easy to follow.


I'm really happy with how the project looks, and I hope to frame it soon, along with the Tonight We Ride project. In the mean time I'm moved onto a winter cross stitch project, which is a Dimensions Gold Collection kit called Aurora Cabin. I had previously started this a couple of years ago, and I like to pull it out of storage each winter to work on it.
Hubby and I will be on holiday next week, so there won't be a blog post out. I'll see you all in July.
Have a wonderful day
Julie-Ann
Want to discuss my post? Feel free to chat with me on Instagram or Mastodon or Bluesky.
Growing and Harvesting European Linen for the 2023-2024 Season
Hello friends,
As a crafter and a gardener, I like to combine my hobbies in interesting ways. In this case it was growing and harvesting European flax (Linum usitatissimum) in order to prepare some linen for spinning and weaving.
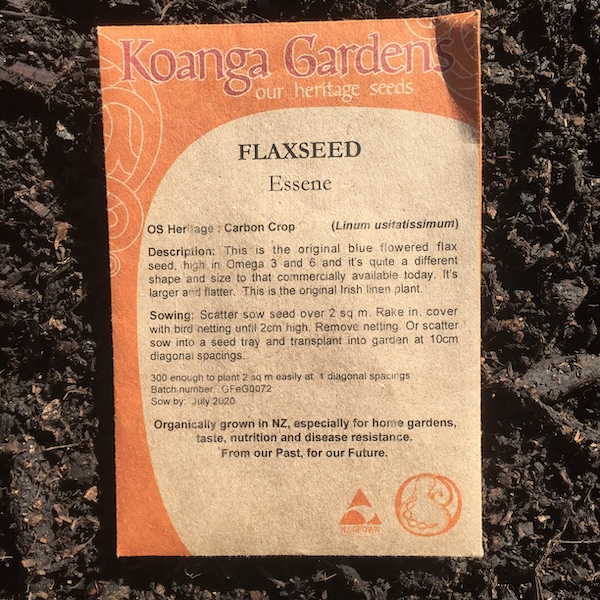
Back when we lived in Wellington I bought some Essene European flax seed (Linum usitatissimum) from Koanga Gardens. In the first year I sowed half the seed packet into a 1 m x 2 m space, and grew the linen plants mainly for producing seeds, so in years afterward I could grow even more flax for linen. My linen harvests thereafter would be self-sustaining. I now grow linen every couple of years for collecting seeds, and stockpiling flax stalks for making linen.
This blog post is showing the process of growing linen from seed sowing to harvesting. In later blog posts I'll share as I go through the flax processing and then spinning and weaving it.
The first thing I did was buy the book "Homegrown Linen: Transforming flax seed into Fiber." by Raven Ranson. This book is very detailed, and shows all the necessary steps in growing homegrown flax for linen. I then used it to calculate how to grow it in New Zealand seasons.
The first step in growing flax seed is deciding when to sow the seed. Flax seed is sown in spring when oats and barley are sown, and in our case it was in mid-October. If flax is grown for linen then the seeds are grown very close together so that long tall stalks are produced, but if flax are grown for seeds, they are planted further apart to allow for branching and more flower production.
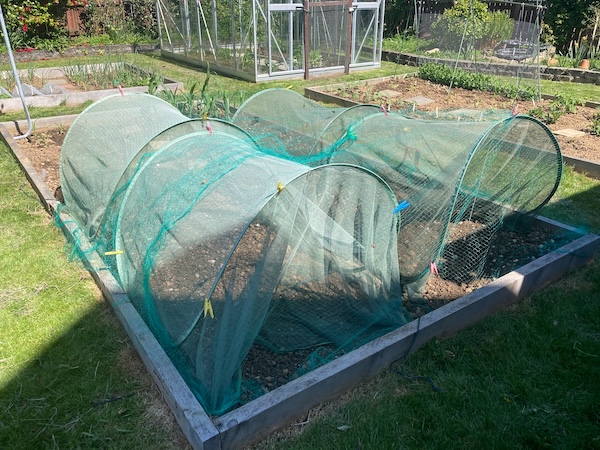
After weeding the patch of ground it was to go into in spring last year, I fertilized it with a high nitrogen fertilizer in the form of sheep pellets, and then prepared the soil to a fine tilth. I then sowed the flax seed in a broadcast fashion very close together, so that the linen plants would grow very tall, with little to no branching. After covering the seeds over with a fine layer of soil using a rake, I watered the seeds in, and then covered the crop with bird netting to protect the seeds from the local very hungry avians. It takes approximately 100 days from seed sowing until plant harvest, so this was classed as day 0.
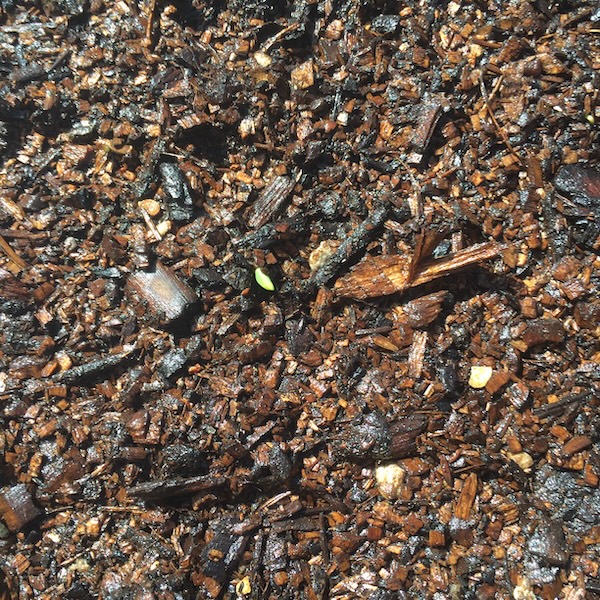
Within a few days of watering each day, the flax seedlings began to appear. It is always very exciting to see them come up.
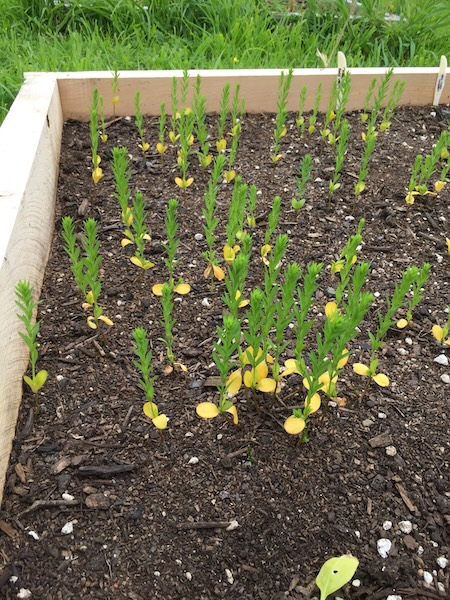
And within a week, the seedlings were actively reaching for the sky. In the photo below I was growing the linen plants for seed, but as you can see, I spread them a little too far apart.
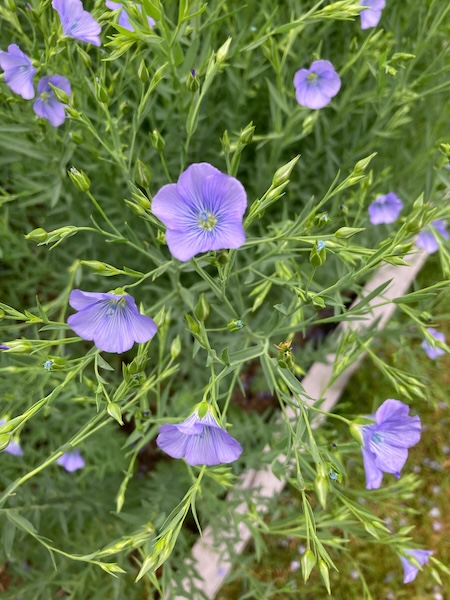
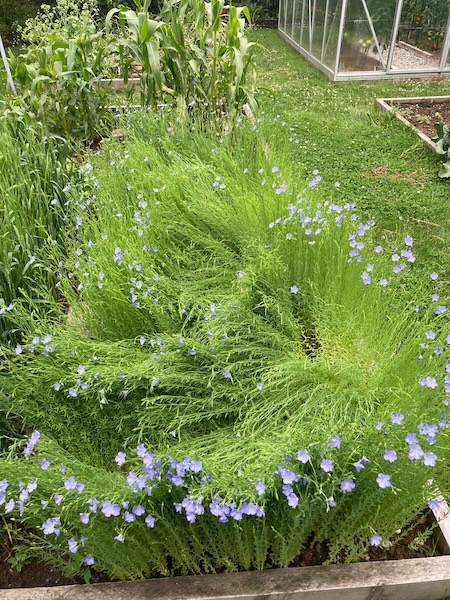
Once the flax starts growing, it basically fends for itself. If sown very close together no weeds will grow, making it an easy crop to take care of, as long as it gets enough water. And once the flax reaches about 50 cm tall, it begins flowering at around day 60. The beautiful blue flowers open during the day, and close again at night. And now that the plants are tall, they sway very prettily in the breeze.
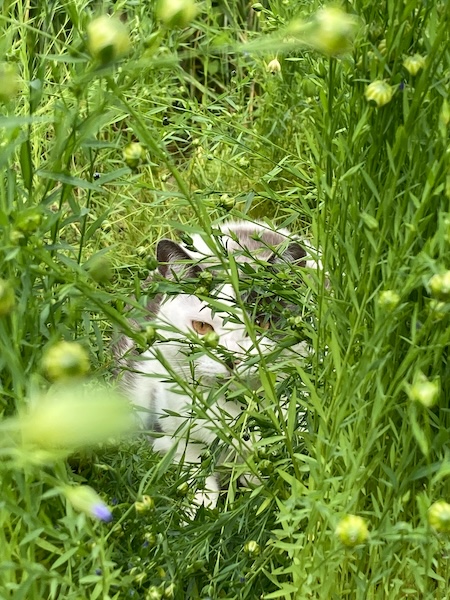
Flowering and setting seed boils takes around a month. One of our neighbourhood cats, who we call Patches, decided to make their snoozing spot inside the linen crop. No matter how many times I tried to shoo them away, they kept coming back, so I let them be. It's a good thing they're cute because they ended up squishing a bunch of linen...
Once the seed heads (boils) have set, now is the time to think about when to harvest. It's a good idea to set aside a section of your crop to let the boils (seed heads) mature and turn brown, which means they are then ready to harvest for next years seeds. Their plant parts will be dry and thick and yellow, and they won't make good linen.
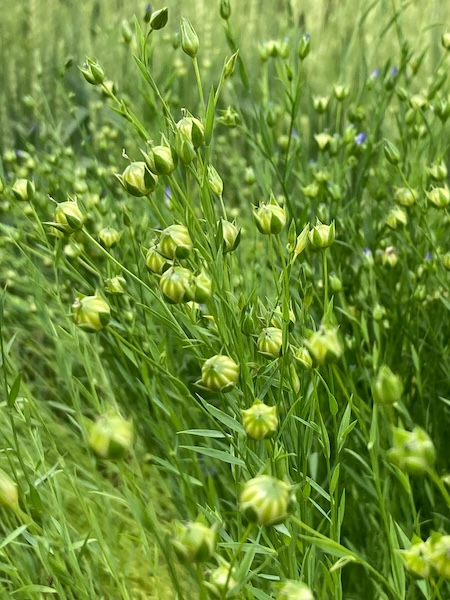
The rest of your crop will be used for producing linen. When the bottom half the plant has turned golden, it is time to harvest the plants. The seed heads will not usually be viable for collecting seed, but I've found in the past that some of them can be.
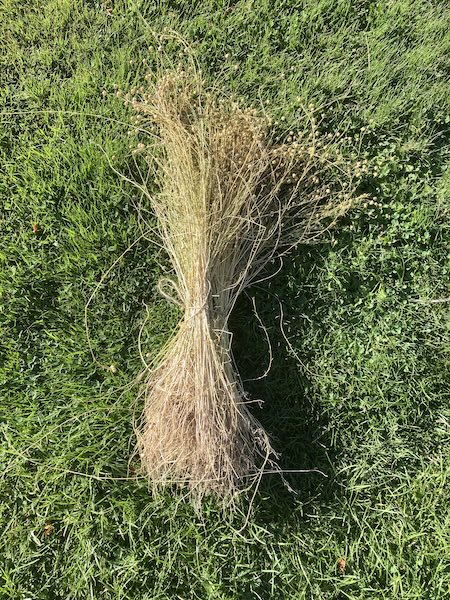
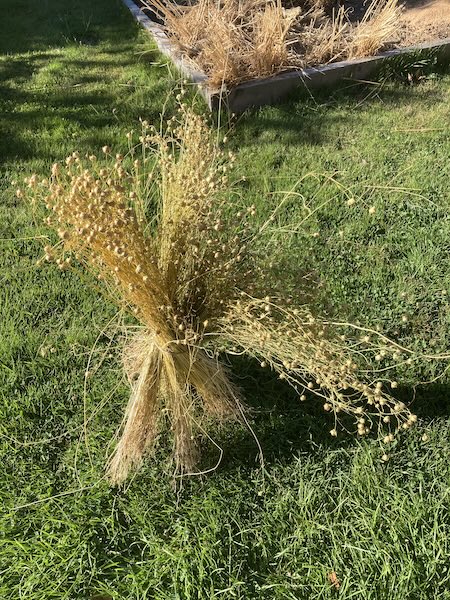
The best way to harvest linen is to pull them out by hand in clumps. Lay the harvested linen plants out on the grass, all facing the same way, with the roots at one end, and the boils at the other. Once you've harvested all the linen plants, it's time to stook the plants, which means creating bunches of sheafs, and then tying them in the middle like the poles of a teepee. You want air to get up into the middle of the sheaf to dry it out. Place the sheafs upright with the roots at the bottom and let them dry in the sun on sunny days.
Once the linen plant sheafs are dry you can store them until you want to begin processing your linen. The next step is processing my current linen crop, and this will occur in a couple of weeks after autumn starts...
Have you ever tried experimental gardening? I've done this in the past with growing wheat, and it's very interesting to see how food and fibers are processed. It makes you appreciate how complicated food and textile production is.
Have a wonderful day
Julie-Ann
Want to discuss my post? Feel free to chat with me on Instagram or Mastodon or Bluesky
Social Media


Archives