
Soil Testing in My Garden
Hello friends,
As part of the Floret Flower Farming workshop, it was suggested that we get soil testing done in our gardens/flower farms to check what our growing conditions are like.
So I dug out my horticulture course book on Soil Properties, and got to work. If you are ever thinking about studying horticulture, I do really recommend Open Polytechnic's "New Zealand Certificate in Horticulture", which is a free online course for anyone in New Zealand. I completed this course over a period of two years from 2016, and it was really worth it in my opinion.

First up was looking at the soil profile in my back garden by cutting a vertical profile through the soil with a spade. The organic horizon was 3 cm deep, followed by the topsoil (A horizon) which was 9 cm deep. Next, was the subsoil which was at 12 cm (B Horizon), and only was 3 cm deep. And lastly was horizon C, which is the weathered parent material.

Things to note in the soil profile: the top soil was dark brown in colour, but contained no earth worms, and the roots from plants only penetrated 10 cm down into the ground. The subsoil layers were yellow/orange in colour and formed very dense clods that were sticky when wet. This means there is not a deep topsoil layer for plants to grow in, and the lack of earthworms means that they are not bringing stuff down into the soil to improve the soil structure. This can be amended with compost and mulch, and hopefully with time earth worms will come into the garden.
Next up was the soil composition tests, which are the thread test, the ribbon test, and the soil settling tests. The thread and ribbon tests are qualitative, and the soil settling test is quantitative. Both the thread and ribbon tests (not shown), predicted the soil type was silty clay. This wasn't surprising because the suburb of Mosgiel sits on a flood plain.
The soil settling test was next, and it's a very simple experiment to do. First, dig down to 10 - 15 cm in the garden, and get a long bottle or cylinder with a lid, and fill the container half fill with soil at that layer. To the soil add 1 tablespoon of dish washing soap (this will help break the soil down into its components). Then fill to the top with water. Shake for 30 minutes, or until the soil is completely broken down to it's individual particles and no clumps remain. Let the particles settle at the bottom of the container, and as a warning, this may take weeks to happen if there is a high clay content in your soil.
Here is the result for my backyard soil, and my sample did indeed take weeks to settle because of the clay content.


The bottom layer in the bottle is the sand layer (usually only takes about a minute to settle). The middle layer in the sample is the silt layer (which takes 1 - 2 hours to settle). And finally the top layer is the clay layer (and this took about 3 weeks to settle). Qualitatively the silt layer is the thickest, followed by clay, and then sand. To measure it quantitatively you just need to measure the total depth of the sample, and then each of component layers, and then work out the percentages of the sand, silt and clay in the sample compared to the total soil measurement.

The quantitative results show that silt makes up 61.5% of the soil, clay makes up 23.1% of the soil, and sand makes up only 15.4% of the soil. This indeed makes it a silty clay soil.
The good thing about silty clay soil is that there are a lot of nutrients, but the bad thing about silty clay soil is that it dries as hard as a rock in summer, and is sticky and wet in winter. This means that in summer it's hard for the plants to take up water. And in the winter, the wet and sticky soil means that the plants can very easily rot, especially dahlia tubers...
The best ways to improve silty clay soils is by doing the following: add organic matter in the forms of compost and mulch, add a clay breaker (to help break up the clay and silt), avoid compaction of the soil by not walking on it wherever possible, and plant strategically with plants that will tolerate the current conditions. I plan to do all of these things in my garden beds in the coming years. I am already adding Tui Mulch and Feed to some of my front garden beds (I've been picking up some bags whenever I go into Mitre 10), but this will take a long period of time over the coming year as I can afford to buy the 40L bags. The thing I like about Tui Mulch and Feed is that it contains "A two-in-one combination provides the benefits of mulching whilst the healthy additions of blood and bone, mulching straw and sheep pellets replace vital nutrients used by your plants."
The next soil testing I wanted to do was using the soil test kit "Soil Check Now Kit" (which I purchased from Gubba when they had a sale) to check pH levels, along with Nitrogen, Phosphorous and Potassium levels. Each kit comes with a bottle of demineralised water, which is enough to do 10 tests each for pH, nitrogen, phosphorous, and potassium.


After reading all the instructions, and making sure I had the materials needed (like paper cups, measuring spoons, and mixing spoons), it was time to take the soil samples. I decided to test a sample of back garden soil, and also some glasshouse soil. I dug down to a depth of 15 cm of soil in the back garden and the glass house, and took soil samples of each equivalent to a large handful, before laying each of them out on some newspaper, crushing any lumps with the back of a spoon, and leaving them to dry overnight. After this, it was time to begin soil testing...
Glasshouse results:
The pH in the glasshouse was 6.5, making it slightly acidic, and it is the perfect pH for growing most plants.

The phosphorous levels in the glasshouse is high, at around 7 g/m², which is good for plant growth. This high level means I do not need to amend the soil in the glasshouse for my tomatoes, cucumbers, and capsicums.

The nitrogen levels in the glasshouse are high, at around 36 g/m², thanks to compost addition in the glasshouse each spring.

Potassium levels in the glasshouse are also high thanks to compost addition, at around 7 g/m². No amendments need to be done for potassium in the glasshouse at the moment.

Overall in the glasshouse has had significant amendments done to the soil each spring, with the addition of compost before tomato, capsicum, and cucumber plants are planted into the ground. At the end of this growing season I will repeat the soil testing to see if the levels have changed, and then I can make a decision whether more compost needs to be added to the soil in the glasshouse next spring.
Back garden results:
The pH of the back garden is pH 6.75, making it very slightly acidic. Most plants prefer it slightly more acidic than this, so I'll think about how to amend the pH in the back garden at the end of this growing season.

In the back garden nitrogen levels are at a medium level, around 18 g/m².

Phosphorous levels in the back garden are at a medium level, which is around 2 g/m².

And finally, potassium levels in the back yard are high, at around 18 g/m².

For the back garden, the medium levels of nitrogen and phosphorous in the soil, along with the high levels of potassium in the soil, means that the soil only requires moderate levels of fertiliser added over the season as plants take up nutrients from the soil. I will also be adding compost and mulch to all the garden beds in my garden over the coming year to build up the top soil and organic soil layers. Hopefully these soil amendments will improve the soil structure and bring earth worms into the soil.
In the meantime I have bought two organic fertilisers from Seacliff Organics (which is near Dunedin), to test their products on my garden.
First up is their Seacliff Opulent Bloom Mix, which is a topdressing powder to sprinkle on soil around flowering plants, and I plan to use this on my Floret zinnia beds this summer. It contains Fish Bone Meal, Langbeinite, Gypsum, Potash, TM7, BioPhos, and has an NPK of 1.7 : 9 : 5. It also contains a good dose of magnesium which is needed for flowering plants.
I also bought some horticultural coconut water to try, which contains "Naturally occurring bioactive
enzymes, including acid phosphatase, catalase, dehydrogenase, diastase,
peroxides, and RNA polymerases. Coconut water is rich in b-vitamins, sugars, minerals and traces of
calcium, iron, manganese, magnesium and zinc. Coconut Water Powder is
fairly innocuous, making it an awesome candidate for regular watering to
aid general plant health."
Overall, I can't wait to get started in improving the soil health in my garden over the coming years.
Have a wonderful day
Julie-Ann
Want to discuss my post? Feel free to chat with me on Instagram or Mastodon or Bluesky, and now also Facebook.
Harvesting, Cooking, And Then Eating A Dahlia Tuber
Hello friends,
Yes, I finally did it. I finally had the opportunity to try harvesting, cooking, and then eating one of my dahlia tubers.
I've been growing dahlias from seed this year as part of my dahlia breeding program, and a lot of the dahlias that flower just don't have the characteristics I'm looking for in a great seedling. Either they're single dahlias, or they have very plain and boring colours, or their flower heads are weak (and they droop), so I pull them out of the ground once I'm sure I know what sort of dahlia they are like.
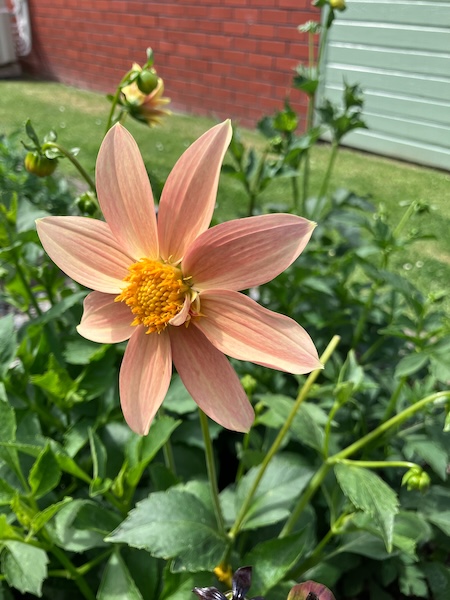
I plant my dahlia seedlings very close together for spacing reasons, and when I decide that a dahlia is not what I'm looking for, that's when the dahlia seedling is pulled out of the ground, giving more space for other dahlia seedlings to grow in the garden bed.
All ornamental dahlias are edible, particularly the tubers, and their taste apparently is reminiscent of a potato crossed with celery, depending on which dahlia variety you harvest and cook. Dahlia tubers contain inulin (a prebiotic carbohydrate), other carbohydrates, have four times the amount of potassium than bananas have, and are high in fiber, making them a great food source if needed (Dahlia nutrition information (Nsabimana and Bo Jiang 2011).

With all this in mind, the next time I had to remove an unwanted dahlia seedling, I decided it was the time to try cooking and then eating a dahlia myself. The seedling dahlia donating its tubers was Dahlia SR 11, a boring single apricot dahlia variety that had flowered a few times, but its flower hadn't improved at all...
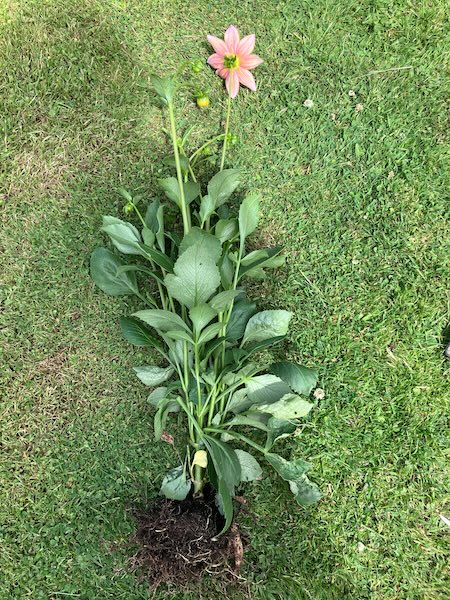
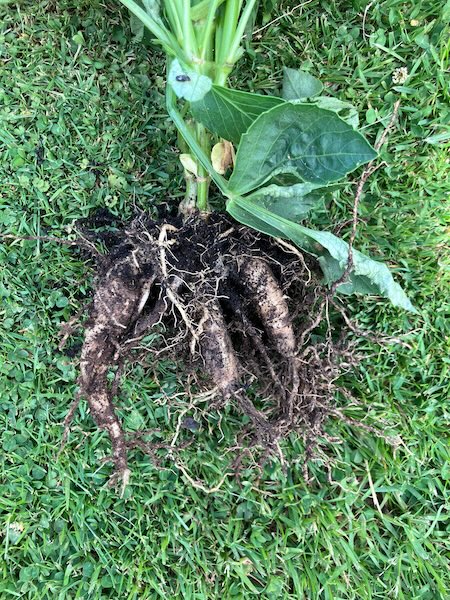
I dug the dahlia out of the ground, removed the stems and leaves, and then washed out as much dirt as possible from the tubers and roots. After bringing the root system of the dahlia into our kitchen, I cut off the small tubers the dahlia seedling had begun to grow. Small dahlia tubers we thought would be less fibrous, and more easy to cook with, compared to older and bigger tubers.
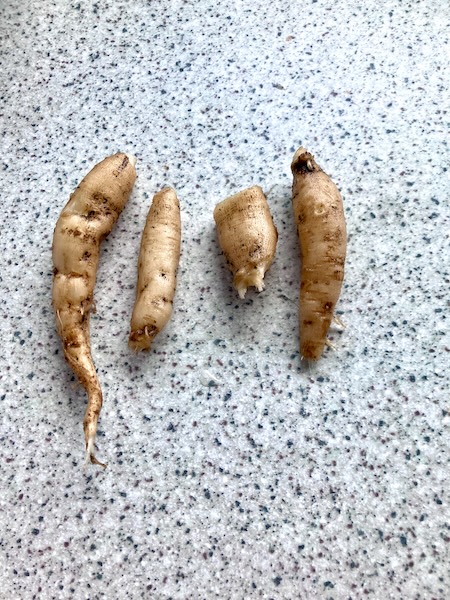
After giving the tubers another wash to remove all the dirt, I peeled the dahlia tubers as was suggested on the internet by other sources. With them now clean, I put the tubers into a small pot containing water, and added a bit of salt (similar to when boiling potatoes).
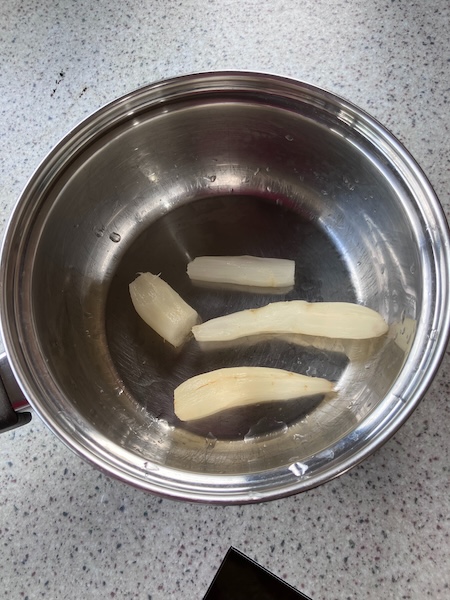
We brought the pot of water up to a boil, and let the dahlia tubers simmer for 10 minutes. At that point we tested the tubers with a knife and found them to be al dente, which was what my research suggested meant that the dahlia tubers were ready for eating. We cut one of the dahlia tubers up into thin slices and ate the slice plain...
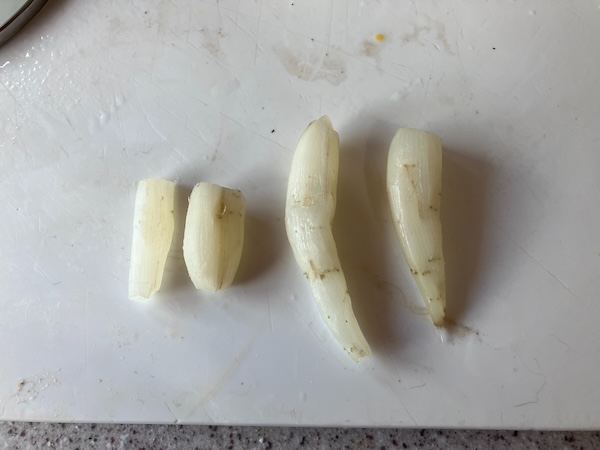
The dahlia tuber was okay to eat, and did indeed taste like a potato crossed with celery (and it was a little earthy tasting too, a bit like beetroot). A bit plain, but okay. We sprinkled a little salt on top of the dahlia tuber slices, and it definitely improved the taste.
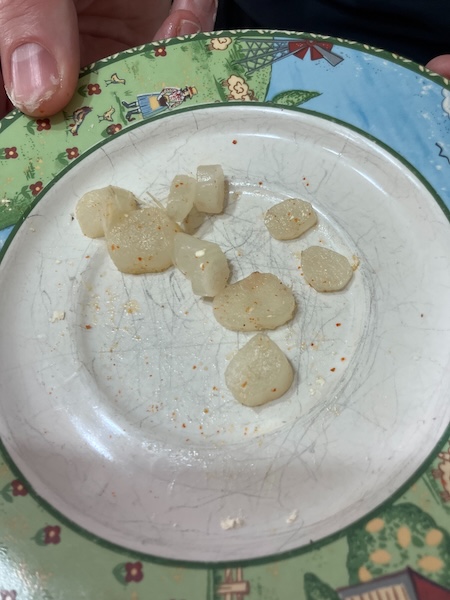
Wanting to explore eating the dahlia tubers further, we decided to pan fry the rest of the cooked and sliced tubers, to try out other flavor combinations with them, using ingredients we already had in the kitchen...
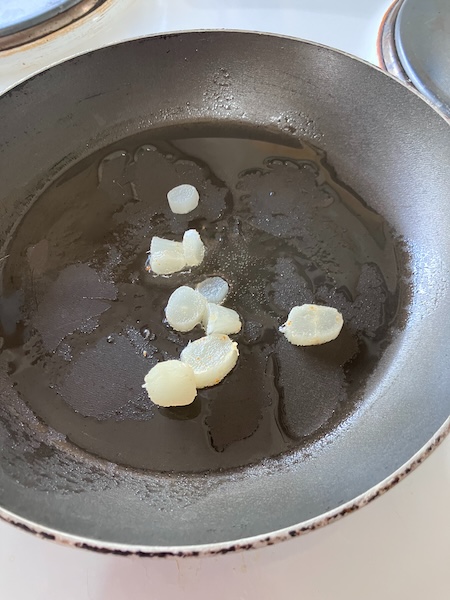
Here are the dahlia tuber flavor combinations we tried:
- Chilli and Garlic - Definitely more tasty than plain, the flavor was improved by sprinkling a tiny bit of salt on top to finish.
- Parmesan and Salt - Super tasty when fried plain and then sprinkled with parmesan and salt at the end.
- Basil and Olive Oil and Salt - Quite pleasant, but not as nice as the Parmesan and Salt.
- Fried in Butter with Chilli and Lemon Juice and Garlic - Definitely my favorite. The chilli and lemon and garlic combination made the dahlia tuber super tasty. We think it would've been better with lime juice instead of lemon, but we didn't have any available at the time.
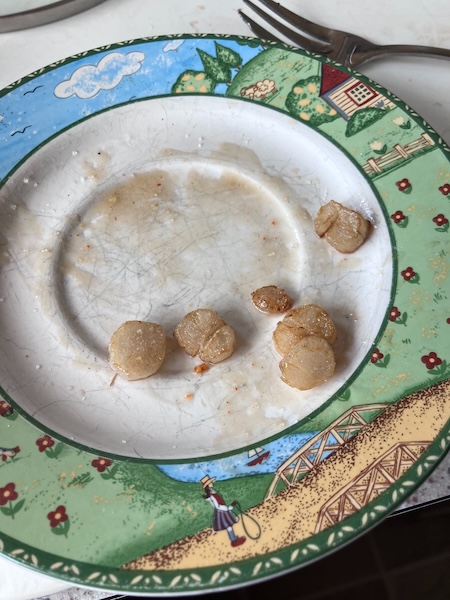
With all those flavor combinations completed, we were out of dahlia tubers to eat, and that was perfectly okay for ending our experiment in dahlia cooking and eating.
I think that doing this experiment in dahlia cooking and eating was a good experience to try once. It was okay to eat, but if it came to a choice between eating potatoes and eating dahlia tubers, potatoes would be my choice every single time. If it ever came to a point that there was no choice but to eat dahlia tubers to survive (like during a zombie apocalypse), I would very happily do it, as long as I didn't need to eat any of my precious named dahlia varieties to do so. Those are sacrosanct, but they would make great seed producing dahlias, and those seeds could then go onto produce seedling dahlias tubers which I would happily to eat in the long term...
Have a wonderful day
Julie-Ann
Want to discuss my post? Feel free to chat with me on Instagram or Mastodon or Bluesky, and now also Facebook.
Floret Flower Farming Online Workshop 2026
Hello friends,
By the time you've read this blog post, I will have already been studying for one week in the 6 week online Floret Flower Farming Workshop.
Every year in October, Floret Flower Farm opens registrations for their yearly online Floret Flower Farming Workshop. It's an in depth 6 week workshop covering all things flower farming: including whether flower farming is right for you (and what you might want it to look like), planning and mapping out your flower farming operation, making a start at flower farming, growing your flowers, sales and marketing, and finally harvesting cut flowers and selling them in whichever way works for you.
Their online workshop has a massive course book, and hundreds of video lessons to go through, along with question and answer video sessions, and an online community for those learning together in the workshop.
I've wanted to do this workshop for many years, and when registrations opened last October, hubby encouraged me to register and finally fulfill my dream to study with Floret. After registering, it wasn't long before a heavy package arrived in the mail from Floret, containing the course book and other workshop goodies.

I spent a long time flicking through the pages of the workshop course book, getting excited for the workshop starting in early January 2026, and then in early December it was time for workshop orientation. There were some online videos to watch about what was to happen in the workshop, along with some administration tasks to accomplish ahead of the starting date. One exciting part was a trip to a stationery store to buy workshop supplies including a poster board, graph paper and tracing paper, and a new A4 binder to hold all the worksheets I would be downloading and filling out...

And now it's January, and the Floret Flower Farming Workshop has begun. I'll be super busy with the workshop for the next 5 weeks, but I already have enough blog posts lined up to cover this period (hopefully, if everything goes to plan...).
Have a wonderful day
Julie-Ann
Want to discuss my post? Feel free to chat with me on Instagram or Mastodon or Bluesky, and now also Facebook.
New Roses Flowering In The Garden
Hello friends,
And welcome to the last blog post of the year. Today I thought I'd share with you the new rose bush varieties flowering in the garden at the moment, that I've been waiting impatiently to flower ever since I planted them last winter (and even early this month in one case...).
First up we have my new 'Cuppa Tea' floribunda rose bred in New Zealand by Bob Matthews, from his popular for picking rose 'Cappuccino'.
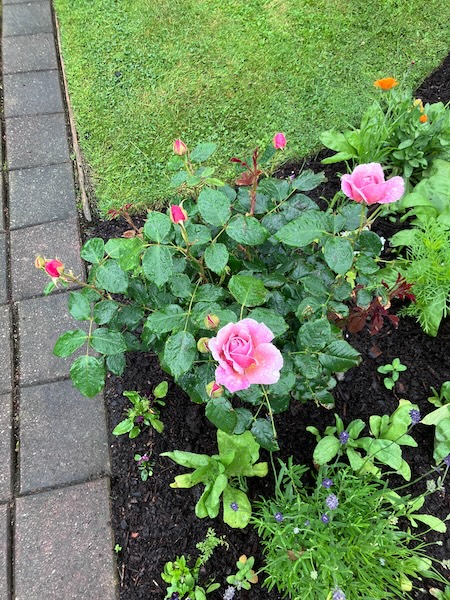
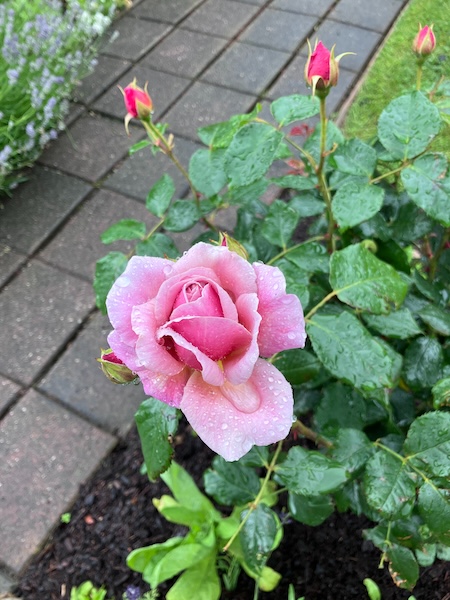
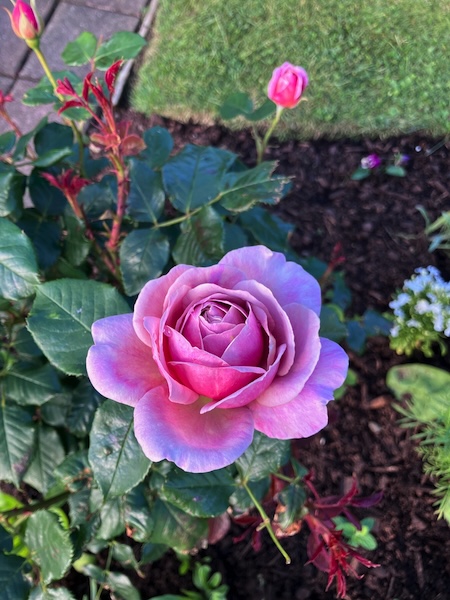
I'm so pleased to have purchased this new rose variety this past winter, the muted pink/purple/bronze shading is just so stunning, and is unlike any other rose colour I've ever seen. I can't wait for her to be covered in flowers all throughout the summer.
Next up we have my new climbing rose Azubis. This is the second Azubis rose bush that I have bought this year, the original one was wind blasted during the big North Westerly storm we had in October, and then it slowly died over the weeks afterward, no matter how hard I tried to save it. Luckily, the garden center I purchased it from had one Azubis bush remaining in late October, so I picked it up and planted it straight away into a more sheltered part of the garden. Azubis is a beautiful climber, producing large lilac blue blooms with a huge fragrance.
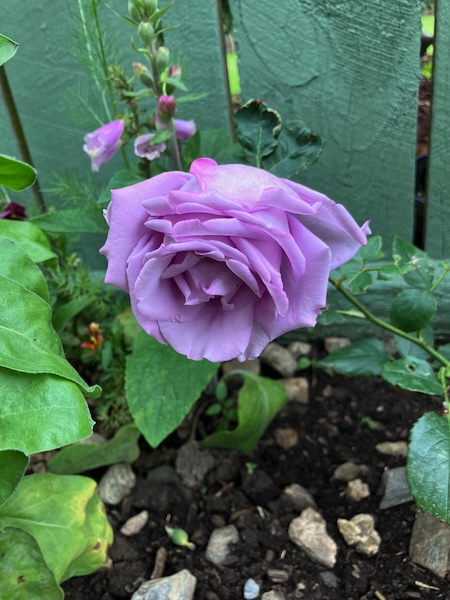
My Azubis rose bush may be very small at the moment, but she has already flowered once, and her single lilac bloom is huge and smells like heaven. I can't wait for her to grow up and cover our back garden fence in years to come.
And finally we have my newest rose, Chawton Cottage, another climbing rose, bred in England by Harkness Roses, and named for Jane Austen’s House which is now a museum. Chawton Cottage has sensational pearl pink blooms with a distinctive raspberry purple eye. These unique flower clusters are delicately fragrant and fantastic for picking.
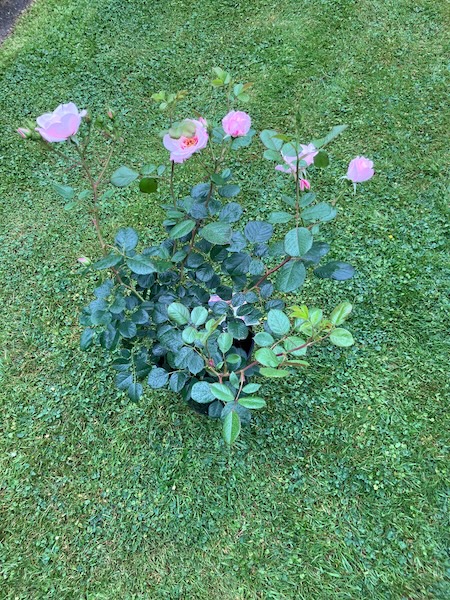
I was walking through our local Mitre 10 when Chawton Cottage caught my eye. She was flowering with multiple blooms in early December. Her unusual single flowers with a pearl pink outer flower and a deep raspberry inner, was just stunning, and bees swarmed around her. Before you could blink an eye, I had Chawton Cottage in my arms, and handed over my debit card to the cashier.
I bought her home and wandered around the garden with her until I found the perfect spot for her, up against our trellis fence at the end of the driveway.
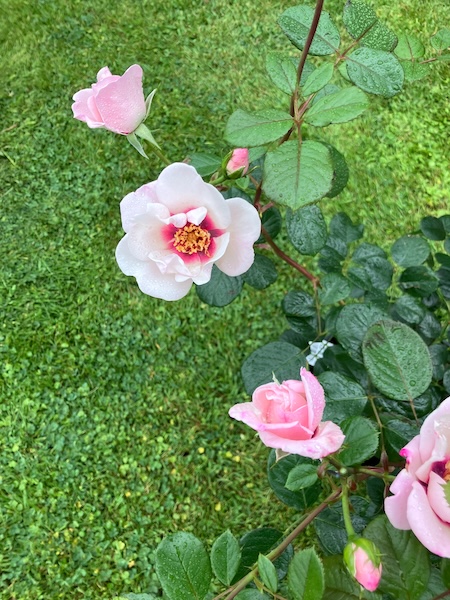
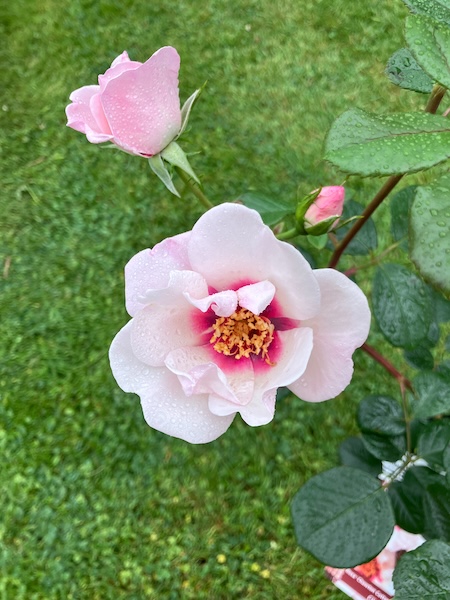
I had to do some pruning to get her to fit up against the trellis, and over the coming years I will trail her along and up the fence line to produce a wall of flowers at the end of the driveway.
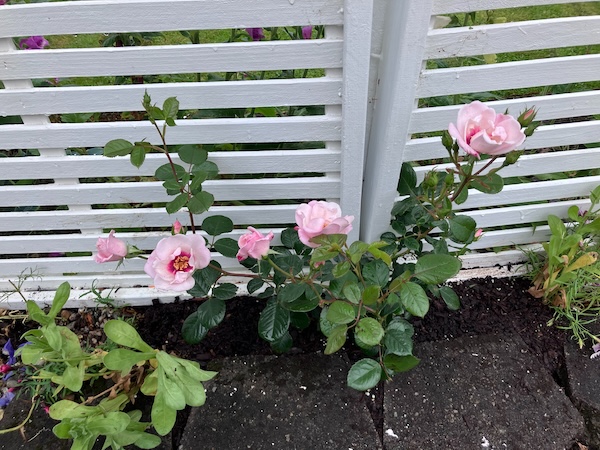
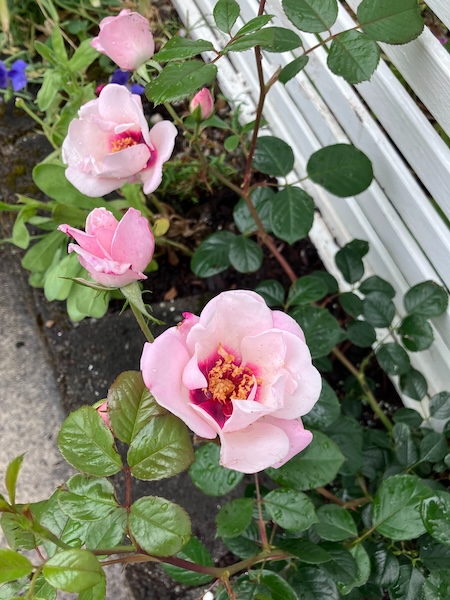
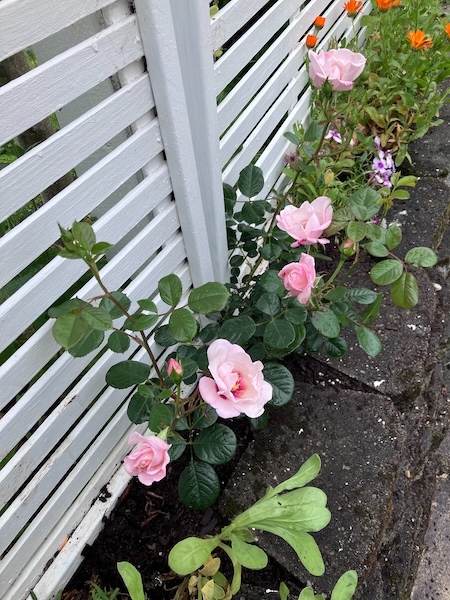
She just looks so pretty in pearl pink and green and raspberry up against the trellis, adding a lot of joy to a space that has been difficult to garden in over the years.
I hope you enjoyed a look at my new flowering rose varieties from this year. And I hope you have a wonderful Christmas and New Year period, and I'll see you again soon in January 2026...
Have a wonderful day
Julie-Ann
Want to discuss my post? Feel free to chat with me on Instagram or Mastodon or Bluesky, and now also Facebook.


