

Dimensions Gold Aurora Cabin Cross Stitch Kit Finish
Hello friends,
Recently I finished cross stitching the Dimensions Aurora Cabin Cross Stitch kit. I bought this kit back in autumn of 2022, and have slowly been working on it every winter since then as a seasonal project.


Last year due to me having two cataract surgeries over winter, I was unable to work on it, so in spring last year I decided to finish cross stitching the project out of season.

Unfortunately due to it having a lot of back stitching, which I hate doing, it went on the back burner once I had finished cross stitching the project. But hubby came to my rescue and back stitched the project for me this past summer.

All that was left to do was all the many french knots for the stars, and I hate stitching those too. After some pondering about how to overcome this problem, this autumn I went along to my local Spotlight store and bought some small shiny beads that could replace the french knots. It didn't take very long at all to sew on all the beads, and after a couple of days working on it, my Dimensions Gold Aurora Cabin Cross Stitch kit was finished.


It looks so good all finished, and I can't wait to get a chance to frame it and put it up in our stairway wall. There's nothing more satisfying than seeing the end result of all your hard work.
Have a wonderful day
Julie-Ann
Want to discuss my post? Feel free to chat with me on Instagram or Mastodon or Bluesky, and now also Facebook.
Gimli Fibre Spinning Project
Hello friends,
Over the summer I spun up some 100% Corriedale combed top in the colourway Gimli from Dye Happy Yarn. My friend Karyn picked it up for me at a fibre festival last year, and I chose this colourway to spin because it reminds me of autumnal shades, which I love.

Not wanting to think too hard about the process, I split the combed top in half, and spun up two singles on my spinning wheel using my default drafting method.

The 2 plied yarn ended up being approximately fingering weight width, and a total 215 metres long.

The washed and dried yarn is now in storage, along with many other handspun project yarns, ready for me to eventually decide what to do with them all.


I find spinning to be one of my favorite crafts, as I find the whole process very relaxing, but deciding what to do with the yarn afterward, and getting a chance to actually knit or weave with it, never usually happens. Maybe one day I may decide to sell some of my excess spinning projects to make space for more fiber projects in my life, but at the moment I'm just happy to squish the yarn whenever I walk past it.
Have a wonderful day
Julie-Ann
Want to discuss my post? Feel free to chat with me on Instagram or Mastodon or Bluesky, and now also Facebook.
Unwind Fibrecraft Retreat 2026 Haul
Hello friends,
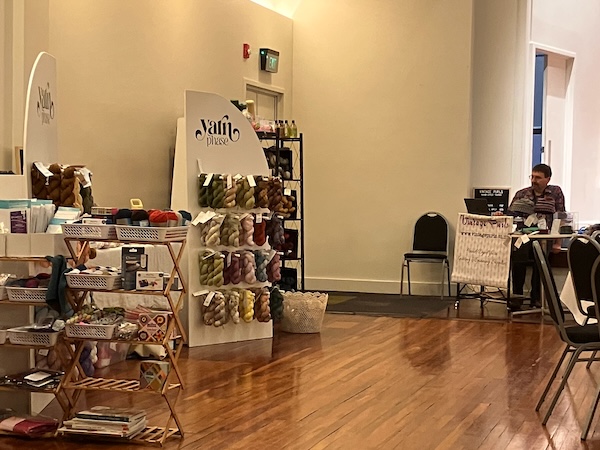
On the weekend of Friday the 6th of March I excitedly went along to the 2026 Unwind Fibrecraft Retreat, a three day biennial fibre festival held in my hometown of Dunedin, New Zealand.
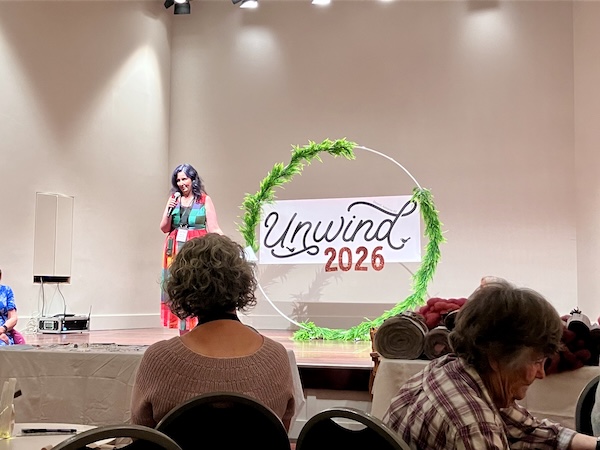
It's a chance to catch up with fibre friends from all around New Zealand, and to also attend talks and workshops, along with some shopping from local New Zealand indie dyers and yarn sellers. And after saving up my crafting pocket money for 6 months, it was time for me to buy a bunch of fibre and yarn to keep me all stocked up for a year at least.
First up, was doing a quick reconnoiter of all the traders to see what was for sale, and to start planning what I wanted to purchase...

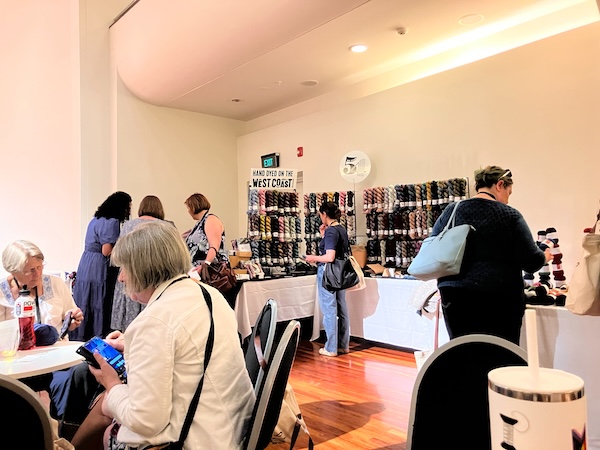
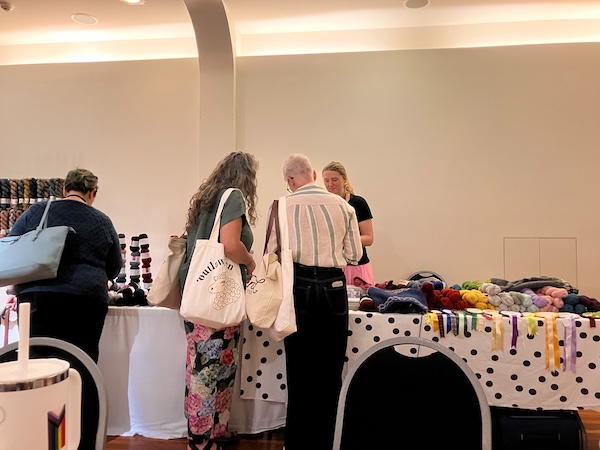
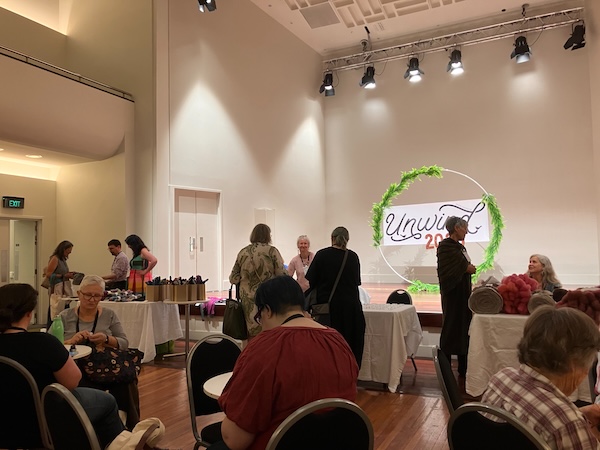
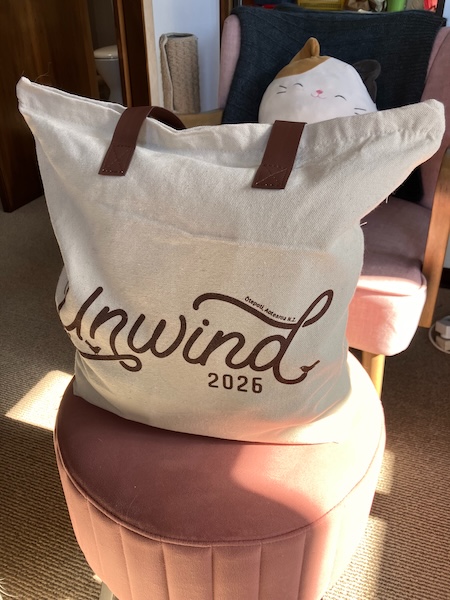
Then it was shopping time, and luckily as part of the Unwind Retreat you're given a bag for carrying all your pretty new yarn, fibre, and accessories.
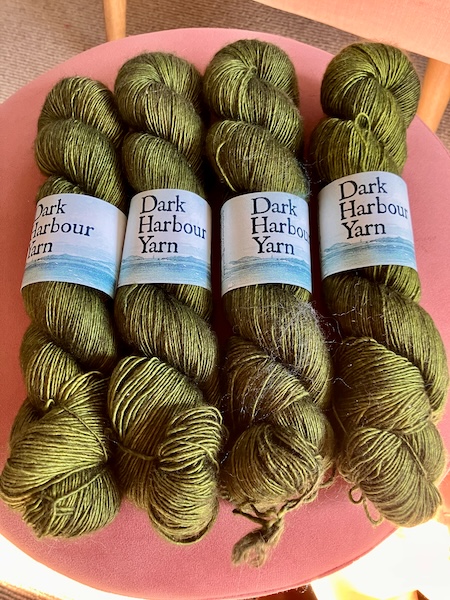
First up I bought two autumnal shades of 100 gram skeins of fingering weight merino dyed yarn by Dark Harbour Yarns. I have no idea what I'll do with them, but for now I'm happy to pat them periodically.

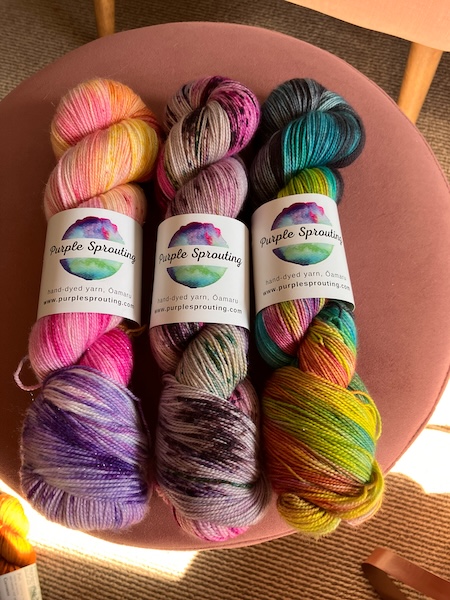
Next we have three 100 gram fingering weight skeins of merino/nylon sock yarns from Purple Sprouting, with the one on the left even containing sparkles. I plan to make two pairs of socks with the left and middle yarns for myself, and the skein on the right is to make a pair of socks for my sister for her birthday.
I also bought 400 grams of fingering weight merino/silk singles for a light weight jersey project for myself for this winter.
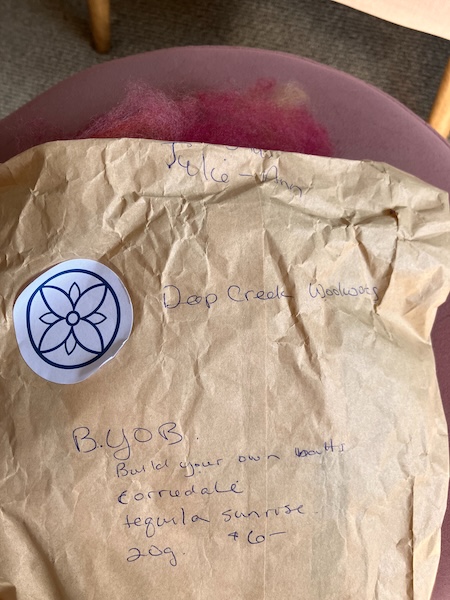
Next up is 20 grams of Corriedale fiber in the shade Tequila Sunrise from a new NZ fiber seller, Deep Creek Woolworks.
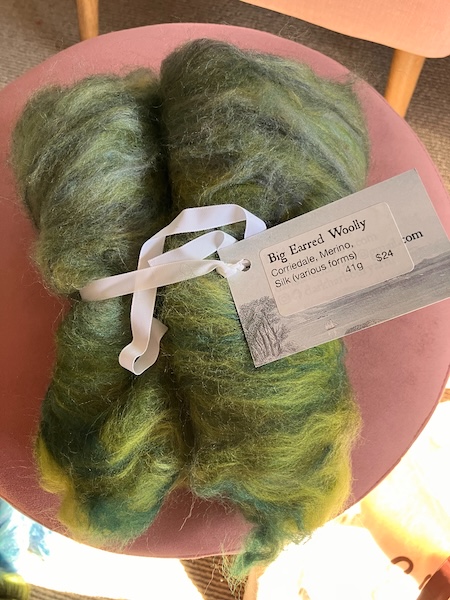
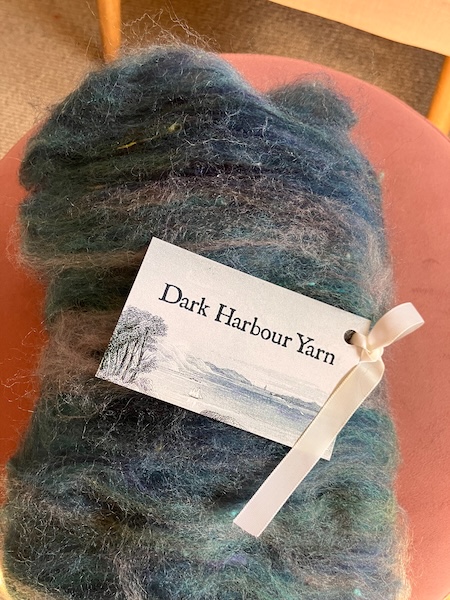
I also bought two fiber batts from Dark Harbor Yarns, in green and blue shades made from corriedale/merino/silk. My plan is to spin them separately and then ply them together.
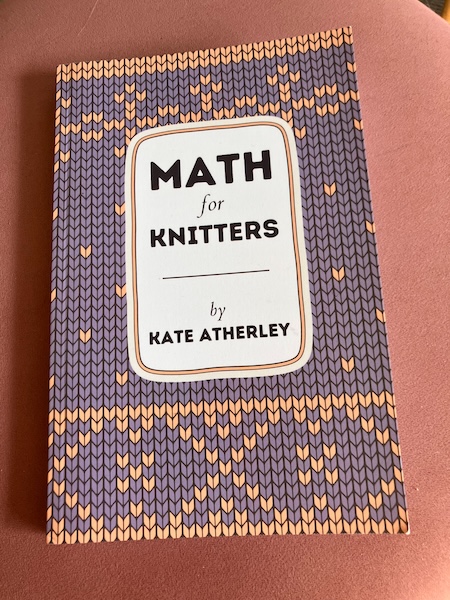
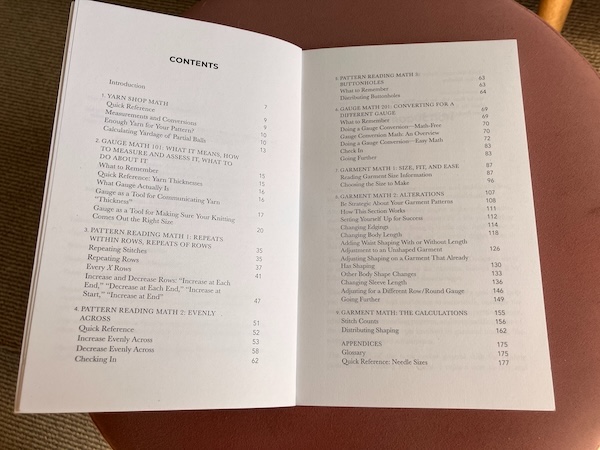
I bought the book "Maths for Knitters" by Kate Atherley from Holland Road Yarn Company, and I can't wait to dive in and see all the knitting information inside.
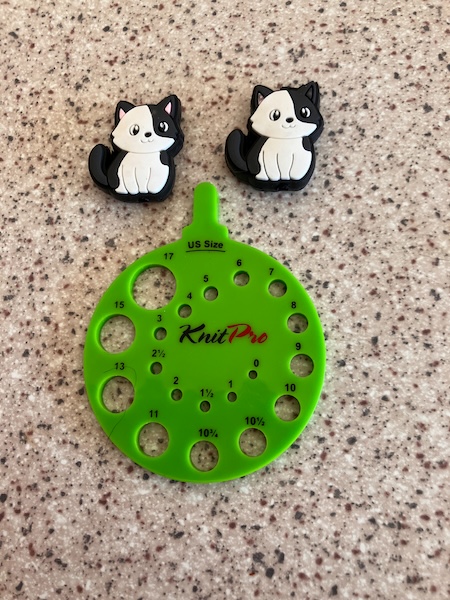
From The Yarn Queen I bought a pair of cat knitting needle protectors along with a new KnitPro needle measurer.
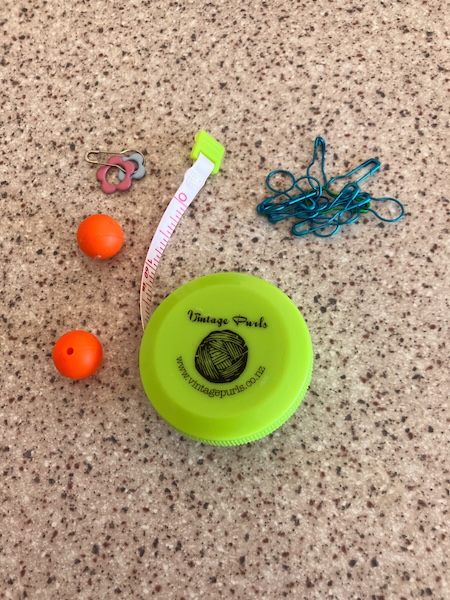
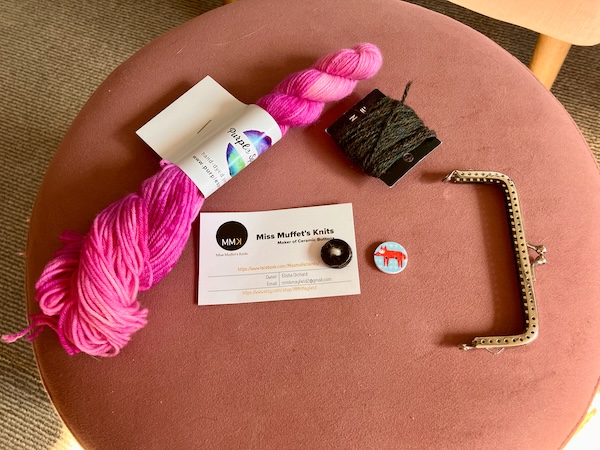
And finally, it's not a yarn festival without the traders giving away small goodies. Extra knitting stitch markers, tape measures, buttons, and even small skeins of yarn are always welcome.
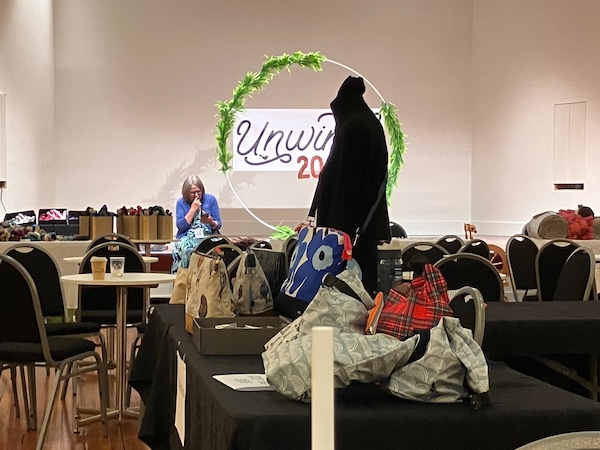
Overall it was a great weekend with fiber friends, and doing some shopping, but as always as an introvert, I was pleased to be back home in the peace and quiet with my husband and kitties. And now I'm looking forward to a serene autumn quietly knitting and spinning in my craft room.
Have a wonderful day
Julie-Ann
Want to discuss my post? Feel free to chat with me on Instagram or Mastodon or Bluesky, and now also Facebook.
End Of Year 2025 Spinning Projects
Hello friends,
In the spring of 2025 I managed to accomplish a couple of spinning projects using my drop spindle and spinning wheel, spinning up two braids of fibre I had in my stash.
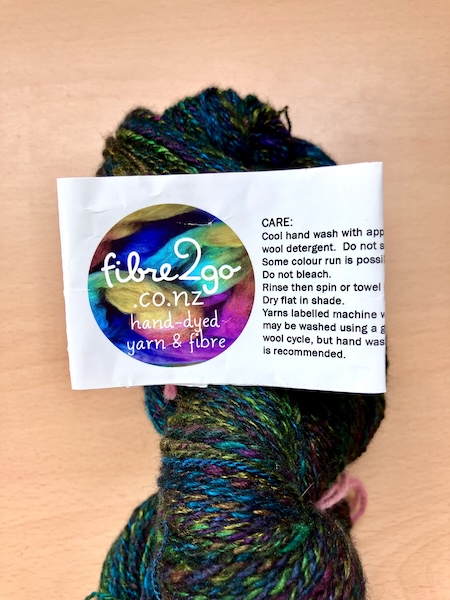
First up was 100 grams of Fibre to Go "In The Shade Jewels" braid, made from 70% merino and 30% Silk, that my best friend Karyn picked up for me at Fibretron in Hamilton in the winter of 2025. Unfortunately after searching through all my photos I couldn't find any pictures of the braid, or of it being spun up on my drop spindle, but here is the finished yarn in all it's glory.
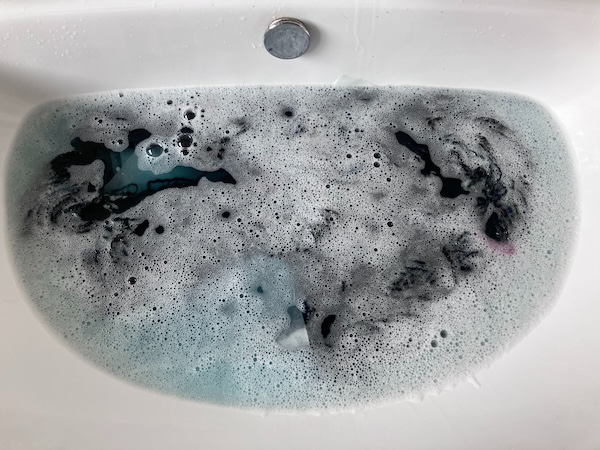
The rainbow jewel shades against the black are just so pretty, and I can't wait to use it in a weaving project in the near future. Unfortunately the yarn colours ran when I washed the skein of yarn after plying, but it did clear up in the rinses afterward. This yarn ended up being fingering weight width.
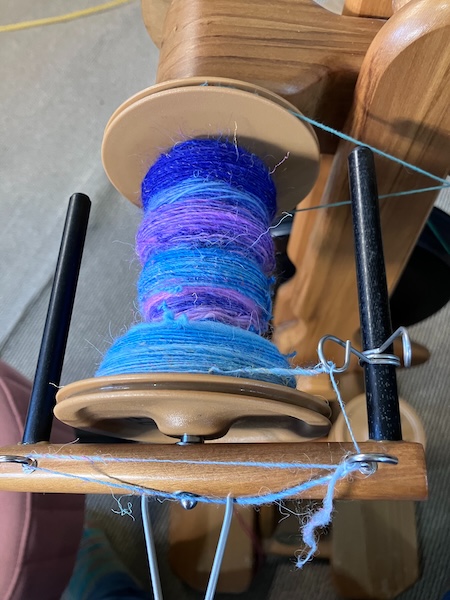
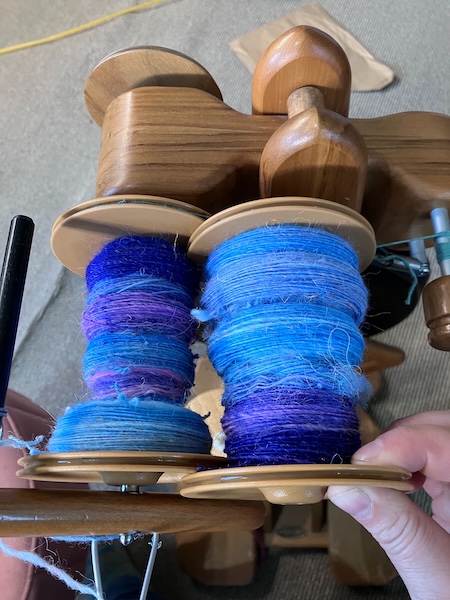
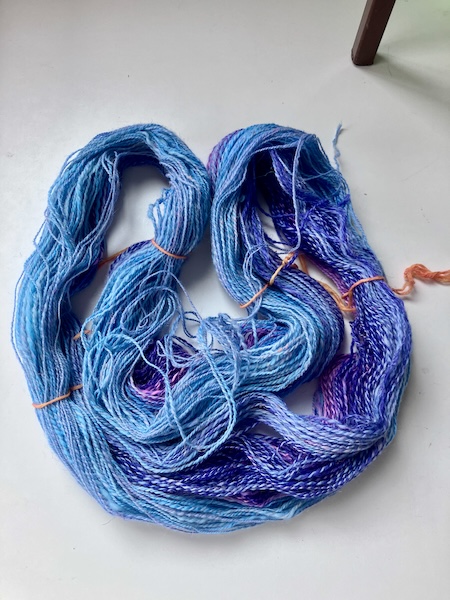
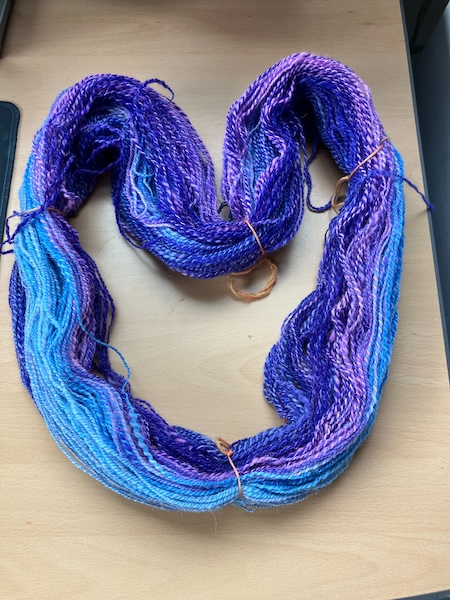
And secondly, I spun up a 100 gram braid from Handmaiden's July 2025 Fibre Club, containing 75% Corriedale, 15% Llama, and 10% Rayon, in shades of graduated pink, purple, blue and white.
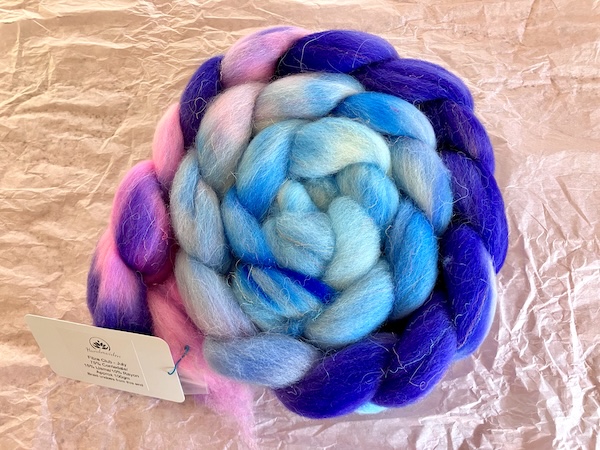
With the rayon content being flecks of fibre that would come out easily all over the place while spinning, I decided to spin it with a high twist on my spinning wheel, in order to reduce the amount of mess all over me and my craft room floor. I split the braid vertically down middle to retain the colour changes in the braid, and then spun up the two singles in the same direction, followed by plying them together as a simple 2-ply yarn. The resulting yarn was my usual fingering weight yarn width.
The resulting yarn mostly kept the colours and colour graduation together, but there is always some sort of shifting that happens due to unbalanced dyeing on each side of the braid, as well as uneven splitting of the braid when pulled apart.
The yarn was then set in place using a gentle wool wash, and then dried, before being stored away in my large pile of hand spun yarn.
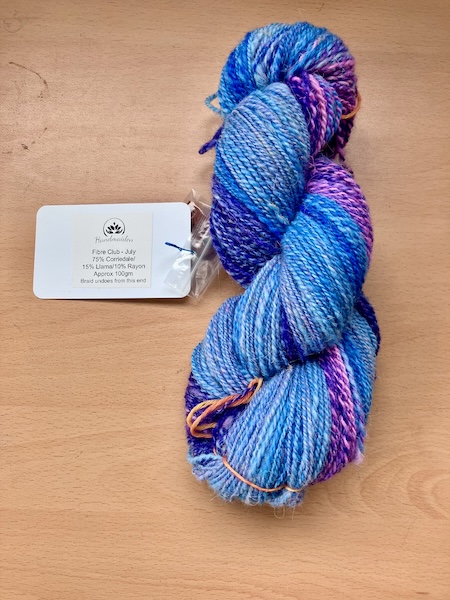
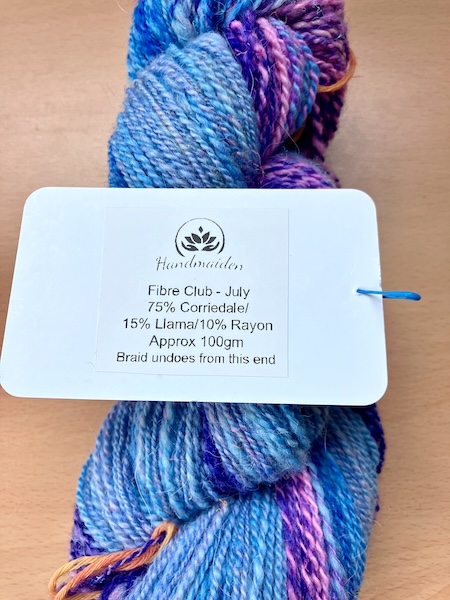
I'm very happy with the resulting yarn, and plan to use this yarn as a warp in an experiment to create a stained glass scarf for my online store Hearth and Oak. It is always very fulfilling to take a braid of fibre, and spin it, before weaving it into a finished project.
Have a wonderful day
Julie-Ann
Want to discuss my post? Feel free to chat with me on Instagram or Mastodon or Bluesky, and now also Facebook.
Social Media


Archives