
Making Lime Syrup With A Glut of Limes
Hello friends,
As it's now winter, it's peak citrus fruit season for our lemon and lime bushes. The lime fruit ripened on the bush first, so we've been using them in various baking and cooking recipes for the last couple of months (wherever citrus is needed), and I've even been giving away limes to anyone who comes to visit us...
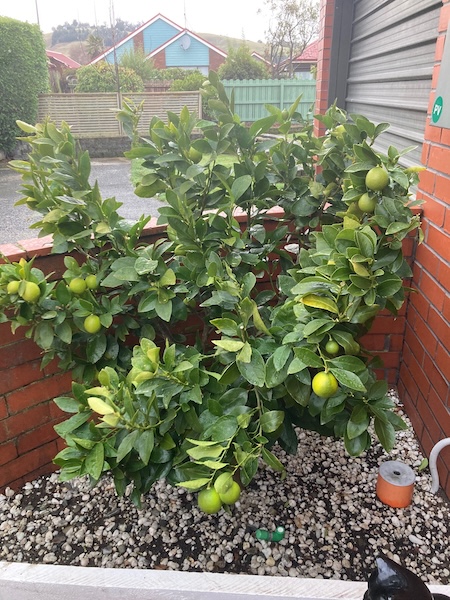
But even after doing all that, we still have too many limes sitting on our kitchen window sill and also on the bush, so I searched the internet for ideas for what to do with all the limes.
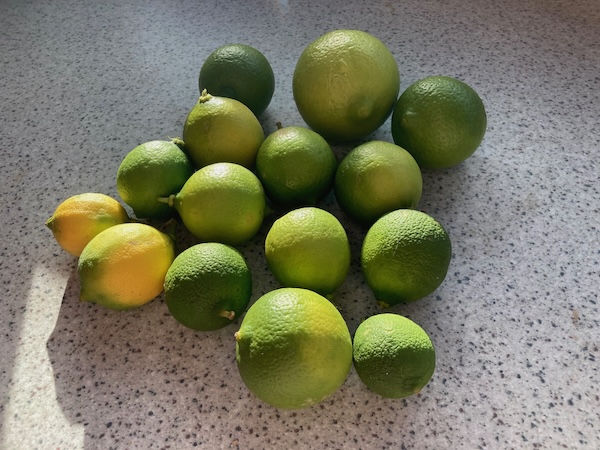
After searching for a while, I settled on making some simple lime syrup. It uses up a lot of limes, and it means I have homegrown syrup for hot and cold drinks, and also for using in baking recipes.
Simple Lime Syrup
Ingredients
1/2 Cup of Fresh Lime Juice
Zest of Those Limes
1 + 1/2 Cups of Water
1 Cup of Sugar
1/2 Teaspoon of Citric Acid (citric acid makes the lime syrup flavor more intense)
Recipe
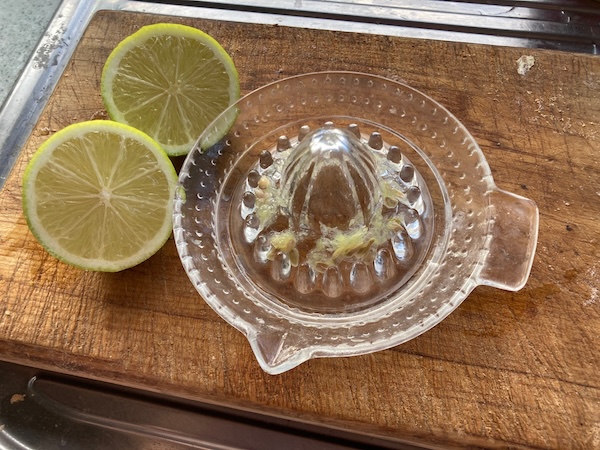
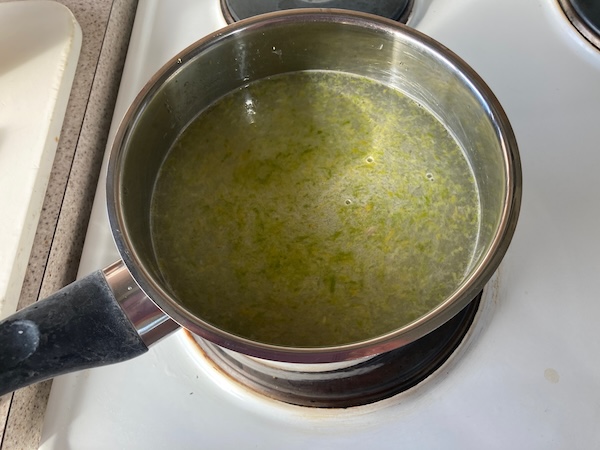
(1) Zest limes one by one before you juice them, aiming to have 1/2 a cup of lime juice, plus the zest from them at the end. This step is not exact, depending on how much juice is in the limes. As I had a lot of limes, I just kept juicing them until I had enough juice and zest. It's always easiest to zest the limes first before cutting them in half and zesting them.
(2) To a pot, add 1 + 1/2 cups of water and heat to a simmer, add the sugar and citric acid, and mix until the sugar is completely dissolved. Add in the lime zest and juice, and cover the pot, and simmer for 15 minutes.
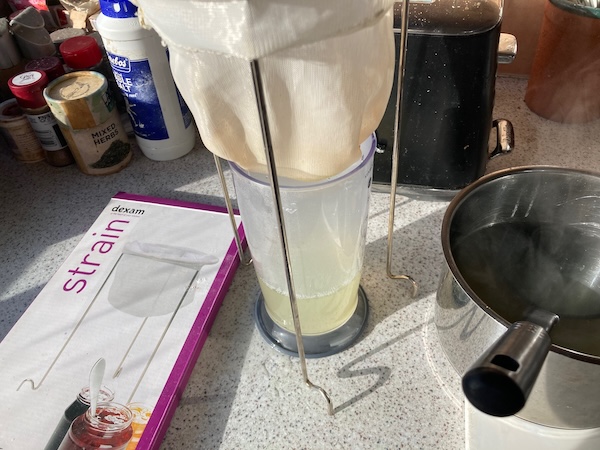
(3) Remove the syrup from the heat and allow it cool. When the syrup is cool enough to handle safely, strain the lime syrup to remove the zest and any stray lime pieces. I used a dexam strainer that I got from Moore Wilsons when we lived in Wellington. (The dexam strainer is very useful for many cooking, bottling, juicing, and jam making projects, as the strainer is super fine.)
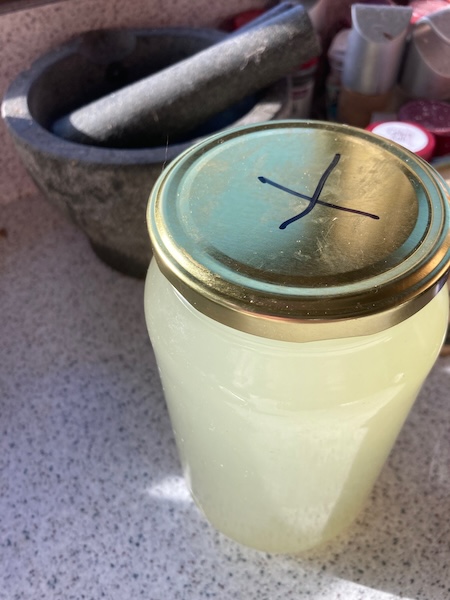
(4) Collect the lime syrup in a container, and store it in the fridge, where it will last for up to a month.
You can also use this recipe to make a simple syrup with other citrus fruit like lemons and mandarins and oranges. I've found that the lime syrup is great for making a hot citrus drink, similar to making a hot lemon, and you can add honey to it as well. It's quite refreshing and warm on a cold frosty day.
Have a wonderful day
Julie-Ann
Want to discuss my post? Feel free to chat with me on Instagram or Mastodon or Bluesky.
Tomato, Capsicum, and Lime Soup Recipe
Hello friends,
Happy winter solstice, soon the days will become much lighter again!
We're heading into the coldest time of the year, so I thought I'd share with you my favorite soup recipe, which is Tomato, Capsicum, and Lime soup. The ingredient list is pretty small, and most years I've grown my own tomatoes, lime, garlic, onion, and chilli for the recipe. I've had a bad run of growing my own capsicums, so I buy frozen capsicums from Frozen Direct for the recipe, as it's much cheaper and it comes pre-chopped.

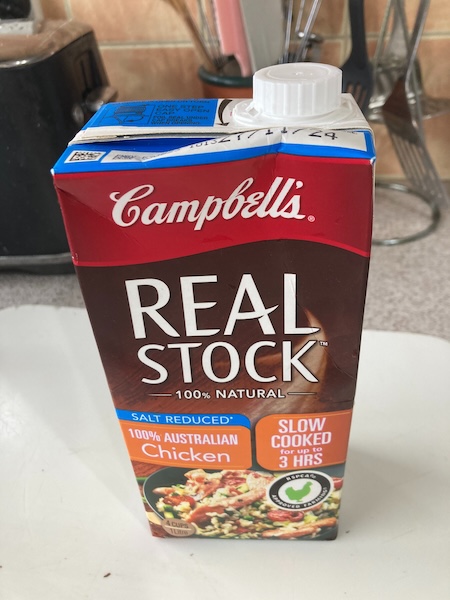
In this recipe you can choose whichever stock you want, we usually use a salt reduced chicken stock, or if you want a vegetarian option, go for a vegetable stock.
Tomato, Capsicum, and Lime Soup
Ingredients
1 tablespoon Olive Oil
1 large Onion
1 clove of Crushed Garlic
1L Chicken Stock (Vegetable stock works great also)
4 Red Capsicums deseeded and chopped, OR
600 grams frozen Red Capsicums
1 small red Chilli or ½ teaspoon Chilli powder (this is approx, it depends on what heat level you like)
3 tins of tinned 400 gram tomatoes OR
one 2L ice cream container of frozen homegrown tomatoes
1 Tablespoon of tomato puree (This is purely optional. It depends on how tasty the tomatoes are in the recipe. My advice is to do the recipe up to step 4 without the tomato puree, and do a taste test, and if it’s not tomatoey enough, then try adding tomato puree by the tablespoon)
1 Lime – Juice + Zest
Salt and Pepper to taste
Recipe
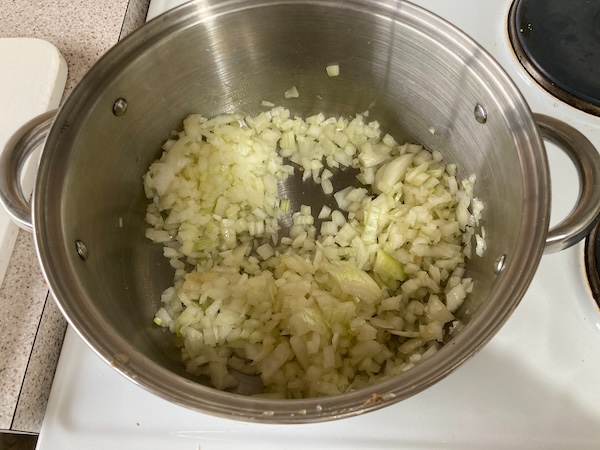
(1) Cook chopped onion and garlic gently in olive oil in a covered pot for approximately 5 minutes until softened, stirring occasionally.
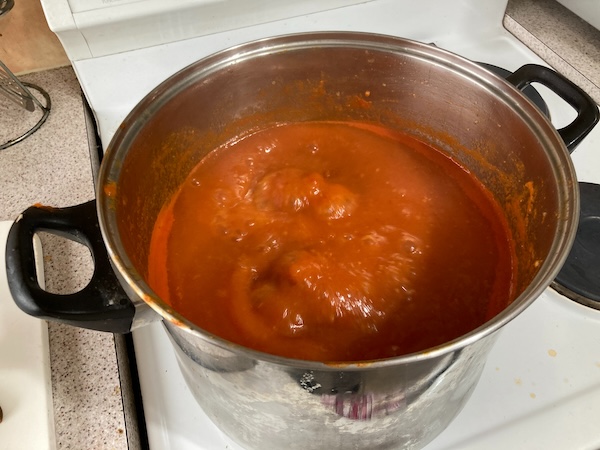
(2) Stir in chopped capsicum, chilli, tomatoes, and chicken stock. Bring to the boil and simmer for 20 minutes.

(3) Puree the mixture with a stick blender until smooth.
(4) Do a taste test once the soup is at a smooth consistency, to see if tomato puree needs to be added. Add the juice and zest of the lime.

(5) Simmer for 10 minutes, and then do a taste test to see if salt and pepper is needed. Add salt and pepper and simmer for 5 more minutes.
(6) Enjoy the soup straight away, or freeze if you have any excess. This recipe gives approximately 4 - 6 serves depending on how big your soup bowl is.
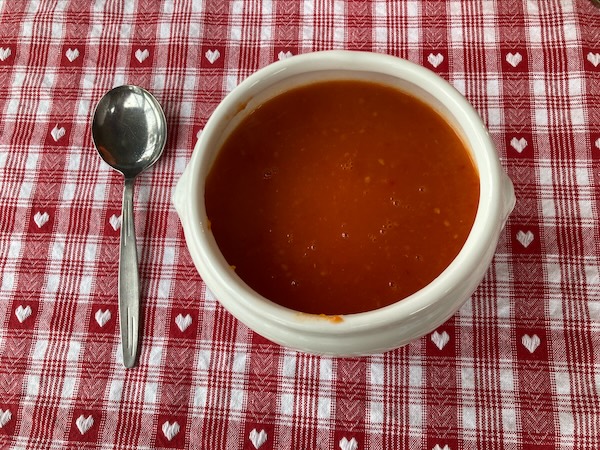
This soup recipe, is my favorite of all time, and I look forward to eating it each autumn and winter. We usually have it with toasted ciabatta and a sprinkling of Parmesan cheese, but it is wonderful just on it's own. I usually also make a double batch, so that we have plenty of this soup over winter whenever I have a hankering for it. I hope you give this wonderful soup a go, and please let me know what you think of the recipe...
Have a wonderful day
Julie-Ann
Want to discuss my post? Feel free to chat with me on Instagram
or Mastodon or Bluesky.
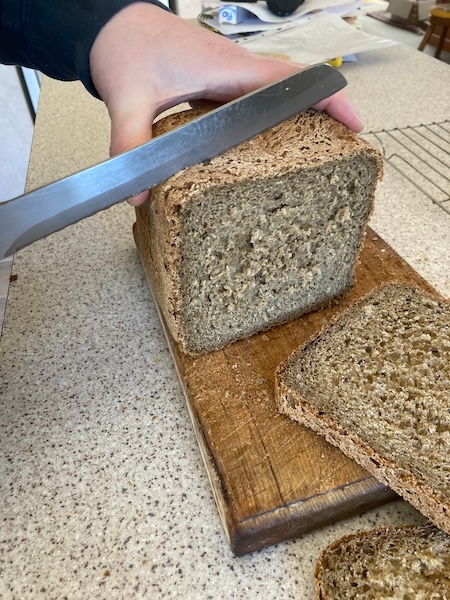
Milling and Baking Our Own Homegrown Bread
Hello friends,
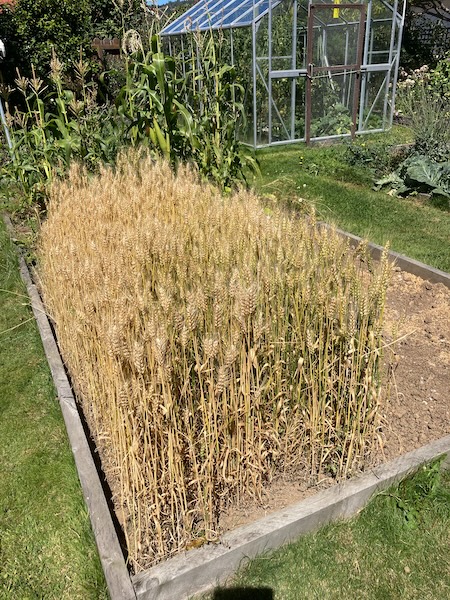
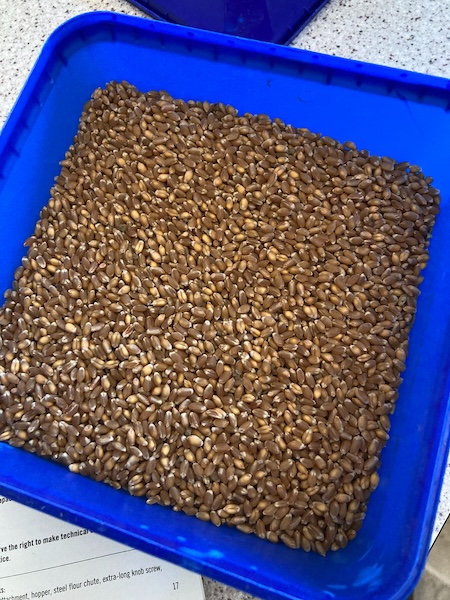
After harvesting and processing the 2023/2024 season's wheat, we were ready to mill our grain, and then bake our own homegrown bread.
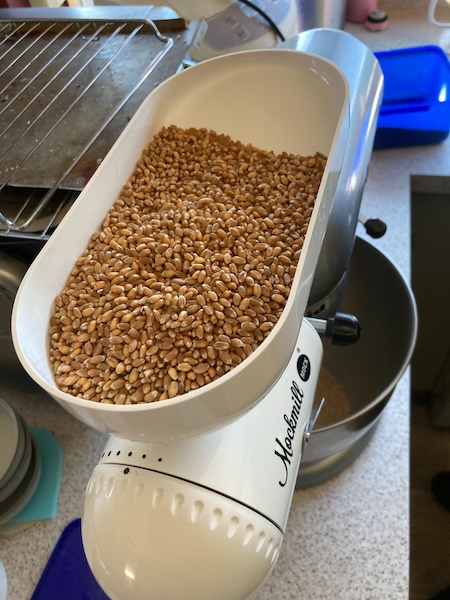
The first step was to mill the wheat grain using our Mockmill Stone Mill which attaches to our Kitchenaid stand mixer. You can find out more information about our Mockmill milling set up in last year's blog post.
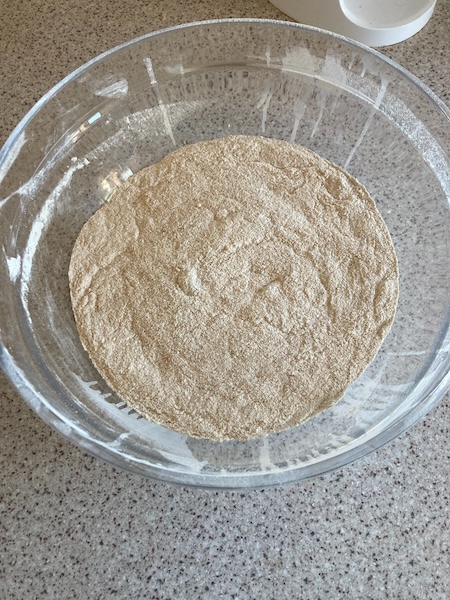
It only took a few minutes to mill all of this year's grain into flour (and some of last year's leftover grain), in the stone mill using a fine milling setting.
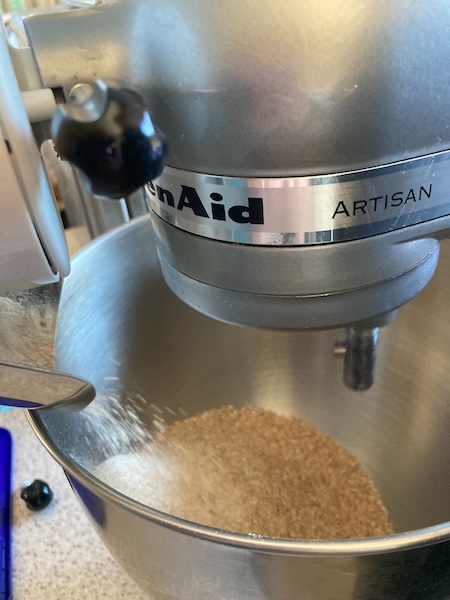
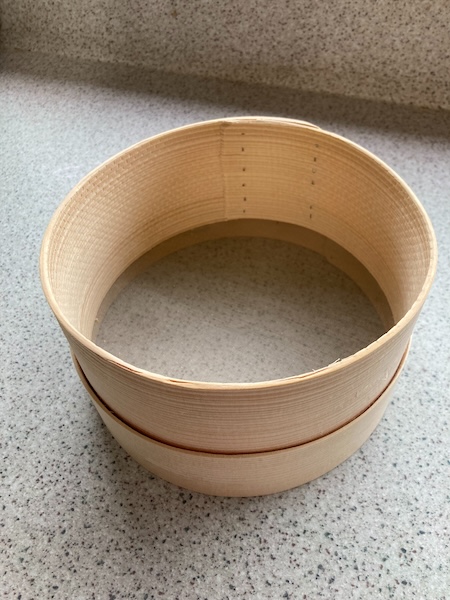
The next step was to separate the white flour from the majority of the wheatgerm and bran. Last year we used the sieve we have at home, but the sieve was too coarse, and most of the wheat germ and bran still got through. So this year we invested in a super fine manual flour sieve from Flour Power Mills. When sieving was completed we were left with a light brown super fine flour, which still contained some fine wheatgerm and bran. The coarser wheatgerm and bran is now stored away for other baking and cooking projects during the year.
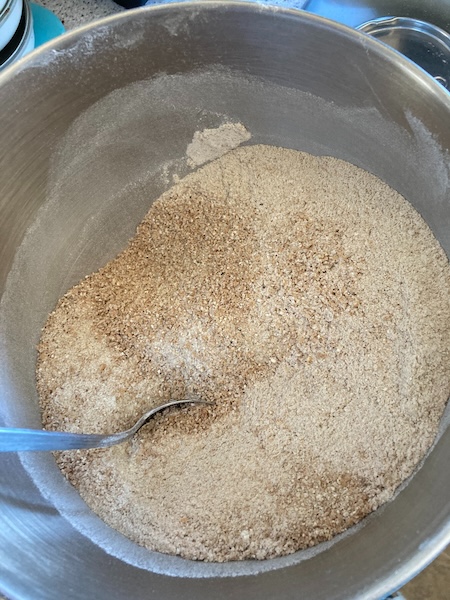
All that remained was to bake a loaf of bread. After milling we had 4 cups of flour, which we used in our standard wholegrain bread recipe.
Wholegrain Bread Recipe for use in a Bread Maker
Ingredients
1.25 cups of hot tap water
1 teaspoon of salt
1 tablespoon + 1 teaspoon of sugar
2 tablespoons of vegetable oil (canola or any other neutral seed oil)
1/3 cup of milk (can be from milk powder, but the liquid volume is important)
1/3-1/2 cup of 7-seed-mix, whole-grain, or other similar tasty grains (we get ours from Bin Inn)
3 cups of strong/bread flour (or in our case homegrown and milled flour)
2 teaspoons of supabake yeast (i.e. mixed yeast with bread improver)
Recipe
(1) Place in the baking tin in the order above, it is important to have:
* The grains *in* the liquid (to soak)
* The flour on top of the first 6 ingredients
* The yeast on top of the flour (so it's not in the water, or in contact with the salt or sugar until it starts mixing)
(2) Place the baking tin in the bread maker, and set the bread maker to the "wholegrain" program in your bread maker. Start baking your bread.
(3) We have a 10+year old Sunbeam bread maker, but we have reports this recipe works well in others. The bread maker should have a first period where it keeps the water warm to soak/soften the grains (which is why you do not want the yeast in the water, with warmth and sugar it'll activate far too soon).
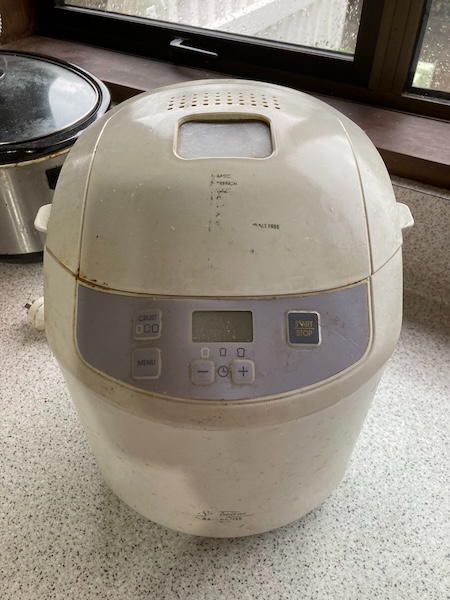
And two hours and twenty minutes later our homegrown bread was out of the bread maker. It wasn't quite as fluffy as commercially grown bread, but the bread had a wonderful nutty flavor which was great fresh, as well as toasted.
We've found that growing our own wheat, and then processing and milling our own flour is a very fulfilling thing to do. It's nice to see how processed food is made, and to appreciate the hard work that goes into making flour and bread.
Have a wonderful day
Julie-Ann
Want to discuss my post? Feel free to chat with me on Instagram or Mastodon or Bluesky.
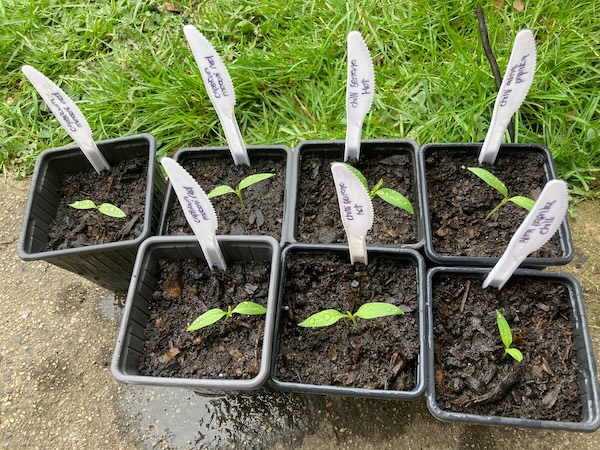
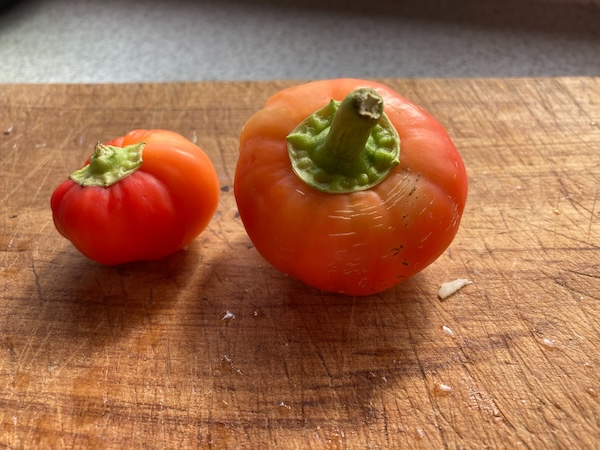
Harvesting and Drying Alma Paprika
Hello friends,
This is our second year growing alma paprika plants. It's really satisfying to sow them as little tiny seeds, see them grow up into seedlings, and then onto big pepper plants with red peppers that you can dry into mild paprika.
The process for growing alma paprika plants is pretty much the same as any other capsicums or chillies. The seeds need to be sown in late winter, at the same time as tomatoes, and they need consistent steady heat in order to germinate. At that time of the year we have them sitting in the dining room where we have the fire going each day. Within a couple of weeks they germinate, and slowly over a couple of months they grow into seedlings which need to be potted on.
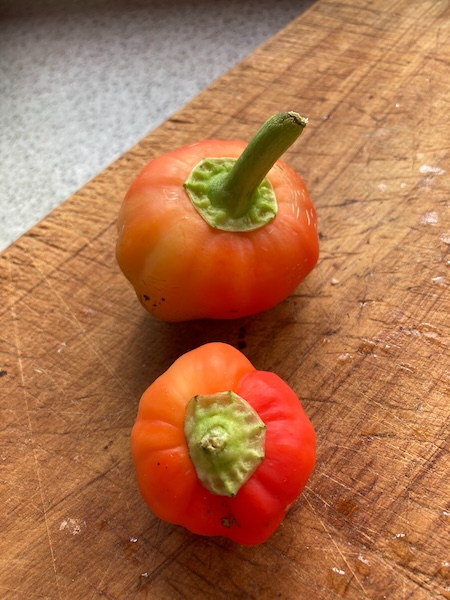
I move the alma paprika seedlings into the glasshouse in early October, and once it gets to Labour weekend, it's time to plant them into the ground in the glasshouse. Over the next few months they get bigger, and need staking, and at around Christmas they begin to flower. The rounded alma paprika fruits begin to grow, and then it's a wait over late summer and early autumn for the growing fruits to begin to change colour to a bright red hue.
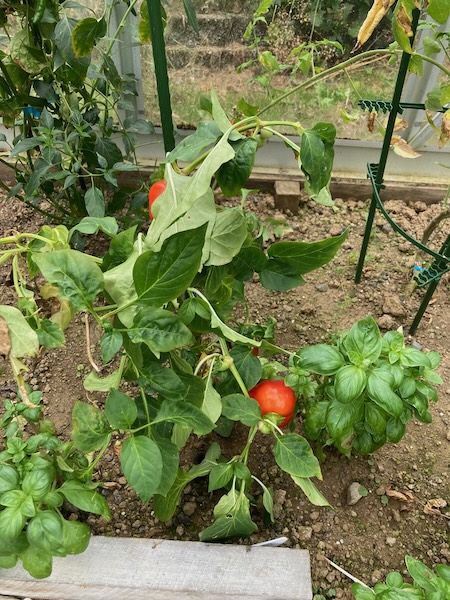
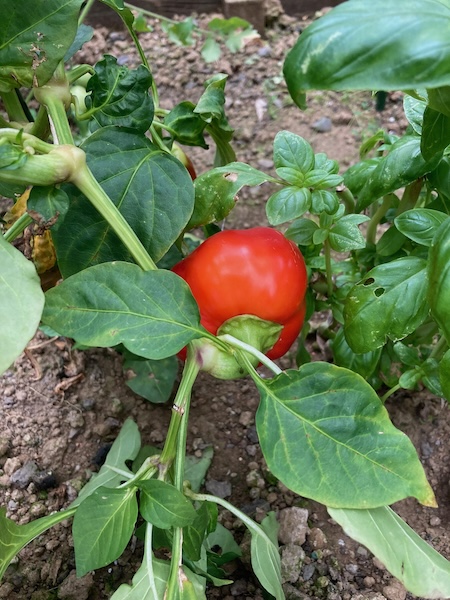
Once the alma paprika fruit has turned red, it's finally time to pick them. I cut them off the plant using a pair of secateurs, and then take them into the kitchen to begin processing them.
After chopping them in half, cutting off the stalks, and removing all the seeds, I slice the alma paprika fruit into thin slices and lay them out on a tray.
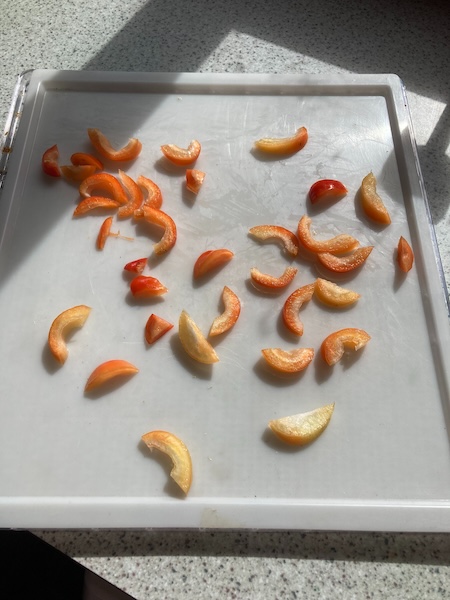
Then they go straight into the dehydrator at 35˚C, and I dry them until the slices are bone dry and brittle, ready for turning into paprika powder.
After a quick whizz in our spice grinder, the paprika powder is ready to use in cooking. The spice is tasty and mild, and works great in a number of dishes. The whole process is really easy, and satisfying, so it's now yet another yearly thing for me to do in the garden and kitchen.
Do you have any yearly tasks you enjoy? There's great satisfaction in accomplishing them when it means you have tasty food over the cold winter season.
Have a wonderful day
Julie-Ann
Want to discuss my post? Feel free to chat with me on Instagram or Mastodon or Bluesky.
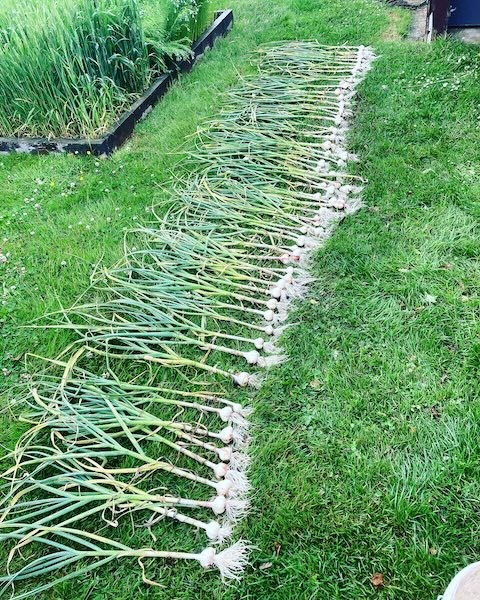
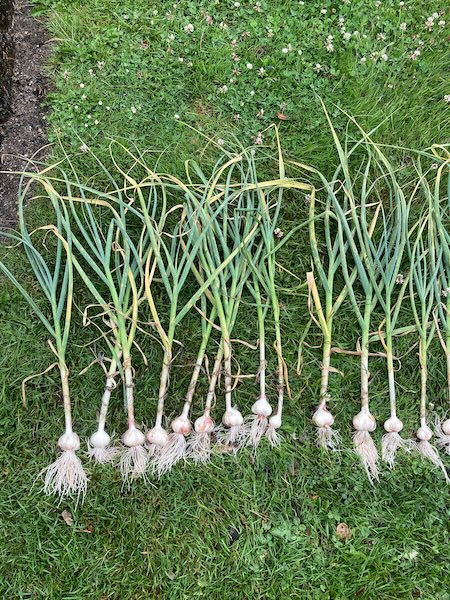
My 2023 Garlic Harvest
Hello friends,
According to one of last year's blog posts, I sowed my garlic bulbs for this season on Friday the 2nd of June 2023. Apparently, at that time I planted 60 Printanor bulbs, and in my naive state back then, claimed that we hadn't had any problem with garlic rust in all the years since we returned to Dunedin, so I wasn't worried about it happening at all.
Well it turns out I was really wrong about this. Normally, the humidity in Dunedin in spring usually isn't too bad, but unfortunately in mid-December 2023 the tell tale signs of garlic rust began appearing on my garlic plants after a period of rainy, humid days. I was devastated to say the least, but it was only a few weeks until the garlic harvest, so I prayed for lots of dry and sunny weather, and hoped my garlic plants had already formed decent bulbs while I waited impatiently for harvest day.
A couple of days after Christmas, my garlic plants were ready to harvest. It was a gray, drizzly day, but hubby and I got to work, and began lifting all the garlic bulbs. It wasn't the biggest garlic bulb haul in the world, but it was good enough for us. I had been hoping for lots of large bulbs, so I could swap some of our harvest for other things like apples and pears etc in autumn, but due to their smallish size, we ended up only with enough to last us for the year.

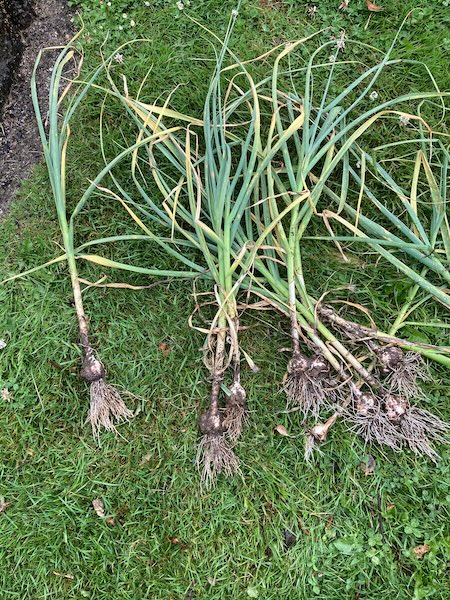
After a quick spray with water to clean off all the dirt, we made the decision to harvest the garlic then and there. Garlic plants with rust don't tend to keep very long while stored dry and whole, so we harvested the garlic bulbs and froze the cloves in our chest freezer. When we cook with garlic we just use the cloves, or we dehydrate the garlic to get flakes and powder.
The thing about growing underground vegetable crops is that you're not entirely sure what the harvest will be like until you dig them up. It's really just a case of making do with what you get, and then planning accordingly. If gardening life was predictable all the time, it would probably be boring...but I still would've loved to have a bigger harvest. So instead, I'll just have to buy autumnal fruit the normal way, at the supermarket.
Have a wonderful day
Julie-Ann
Want to discuss my post? Feel free to chat with me on Instagram or Mastodon or Bluesky.
Social Media


Archives