

I've Gone Completely Dahlia Crazy
Hello friends,
If you were to ask me about my top 5 favorite flowers of all time, the list would be something like this: Roses, Lavender, Dahlias, Daffodils, and Cosmos.
But over the last couple of years dahlias have crept up to the top that list, as each of the gardening projects around our home ended up giving me more and more space to grow dahlias. It also didn't help that I started following a bunch of dahlia growers on social media, and also especially, Floret Flower Farm in the USA, on both Instagram and YouTube. I became especially fond of anemone dahlias, collarette dahlias, and single dahlia varieties, of course in a large number of colours and sizes.

It got to a point that I had developed a wish list of some very cool, but rare dahlias I just had to have...and come dahlia bulb pre-sale time this winter I went a little nuts buying them.
The next problem was figuring out where to put them, so out came my trusty Instax photo printer, and I got to work printing out photos of all the dahlia varieties I had, and also the ones on their way to me, and then I got to work organizing them. First up was developing a dahlia database based on type and colour and size.

The colour coding in the database give me a quick idea of where my dahlias are in terms of where they are in the world. Sage green are dahlias already in place. Bright green are dahlias which have to be moved. Apricot means that the dahlia is in storage in the garage. Peach means that the dahlia has not arrived yet.
Next up was to break down our garden into sections, and then arrange the dahlia photos in each area of the garden to get an overall plan. I'm going to use the following abbreviations for the different dahlia types: Anemone (A), Collarette (C), Decorative (D), Dinner Plate (DP), and Single (S), Waterlily (W).
Front Garden Right: Peaches and Cream (D), Penhill Dark Monarch (DP), Totally Tangerine (A). I grouped these based on similar colouring.

Front Garden Middle: Iced Tea (D), Keith Hammett Dream Seeker (C), Joal Kaitlyn (D), and Sweet Nathalie (D). These all have similarish apricot colouring.

Front Driveway Road: Yelno Harmony (W), Cafe Au Lait (DP). These have light apricot colouring.

Front Driveway Middle: Lucky Number (D), Aporo Road Strawberry (D), Molly Raven (D), Cafe Au Lait Twist (DP). All these have dark pink shades, and should look amazing together.

Patio: Zahra (A), Floorinoor (A), Misses Amy (A). Three anemone dahlias I bought very recently, so they go into pots this year because I have no more space in the garden.

Back Driveway: Silver Years (D), Strawberry and Cream (D), Dutch Pearl (D), Muchacha (D). A gradient from light pink to dark pink.

Back Garden Back Fence: Rosemary Webb (W), Islander (DP), Bonesta (D), Bumble Rumble (C), Cafe Au Lait Royal (DP), Sweet Sanne (D), Cafe Au Lait Rose (DP), Arthur Hammerly (DP), Mambo (A), Misses Miley (D), Impression Famoso (C), Fenna Baij (A), Julie-Ann (S, a dahlia I hybridised last year), Keith Hammett Mystic Sparkler (S). A gradient of colour from left to right along the back fence. It's a bit more loose in terms of shading toward the right side, with dahlias I didn't know where to put elsewhere.


Back Garden Far Right Corner: Keith Hammett Butterscotch (C), The Phantom (A), Dark Tiger (C). Collarette and anemone dahlias that are small and fit under the small tree in that space.

Back Garden Right Fence Back: Keith Hammett Protegee (S), Keith Hammett Delicacy (C), Pink Magic (D), Keith Hammett Tranquility (C), Lady Liberty (D), and Polka (A). Shades of pink and white.

Back Garden Right Fence Front: Great Silence (D), Fancy Pants (C), Salmon River (D), and Fairway Pilot (DP). More peachy tones.

As you can see I now have 48 dahlias in my garden (which don't include the seedling dahlias I'm growing in pots right now). In this second spreadsheet I've organised the dahlias based on where they are in the garden, and which direction they are in. It's a good idea for when labels come off the dahlias, and I can't figure out which ones they are after they die back in winter...

With this large amount of dahlias in my garden, I now have no space for any more dahlias (or any other plants really), even though I do have some more dahlias on my wish list like Rhubarb and Cream, Appleblossom, Thomas Edison, Marshmallow Baby, Negroni Sunset, Klara Zak, Dutch Delight, Breakout, Purple Flame, and Labyrinth.
Either I need to dig up what little grass space we have left, or I would need to get rid of our long, side hedge, and then build a new fence between us and the neighbours, and then make another garden...
For now I'll just have to pit the dahlias up against each other Hunger Games style, and see which plants survive each year.
Have a wonderful day
Julie-Ann
PS - After this post was written I got word from NZ Bulbs that one of the dahlias that hadn't arrived yet, Dark Tiger, was unavailable, so I had to choose another dahlia to replace it with. I chose the waterlily dahlia "Twiggy", but then had to rearrange a couple of dahlias in that area of the garden to fit this change, as Twiggy grows much bigger in size than the space I had chosen Dark Tiger for...
Want to discuss my post? Feel free to chat with me on Instagram or Mastodon or Bluesky.
Side Garden Project - Planning and Building Raised Garden Beds
Hello friends,
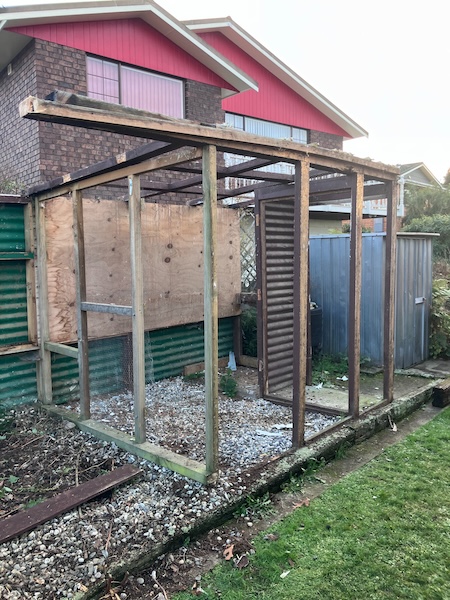
After we had taken down the old aviary/berry cage, it was time to get to work turning this space into garden beds.
The first task was to weed the area, tidy up the fence line, and move two concrete pavers. Once I pulled out all the weeds and then tidied the fence line by putting old pieces of wood up against it for protection, hubby and I maneuvered the pavers into the space next door, where I have my worm farm located.

With all that done I ordered macrocarpa sleepers from our local garden centre for creating the new garden beds. The sleepers are 1.8 m long, which was the exact size we needed for that space.

The next step was to first put up some old trellises for our raspberry bushes, so we could train them along the fence line. We then create 90 cm wide beds using the macrocarpa sleepers, with 50 cm pathways in between for easy access to the garden beds. It was a lot of hard work considering there was a lot of river pebbles in the area. We transferred those river pebbles into the pathways between the garden beds when we were finished.


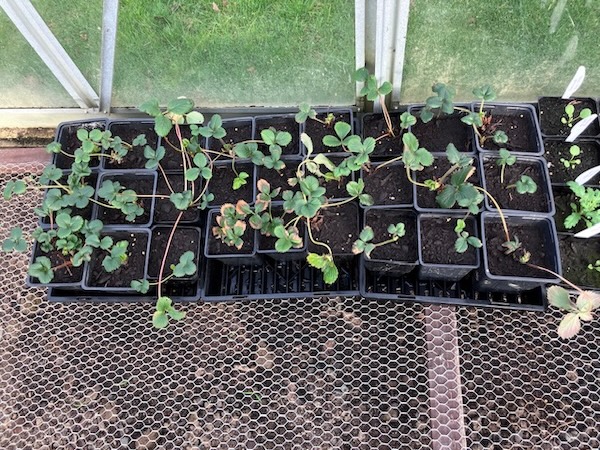
Once all the beds were in place, hubby did the hard work of digging over the garden beds and adding compost. The first bed closest to the garden shed was set aside for the strawberry plants I had put into pots in the glasshouse before the aviary was removed.


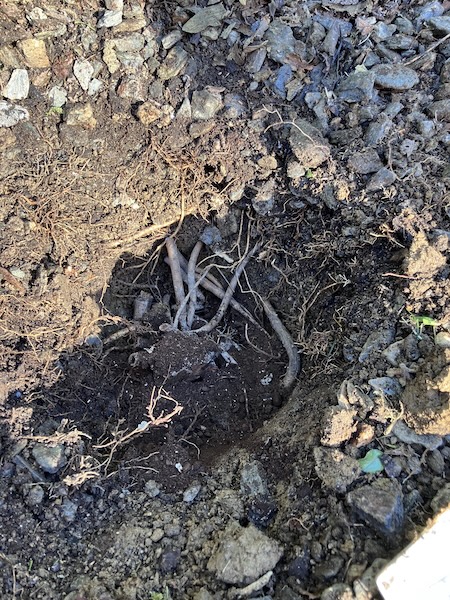
The next garden bed was set aside for my natural dyeing plants including Madder, Woad, St John's Wort, Tomentil, and Lemon Sorrel, which I had squeezed in another garden bed down the side of the house. While transferring the plants I was able to harvest some of the madder roots for natural dyeing. I have enough space leftover now to put more natural dyeing plants in the other half of the garden bed this spring.


Garden beds 3 and 4 are currently empty, and they still need to have compost added, before being prepared to a fine tilth for spring.


My plan is to grow Linen and Japanese indigo plants in bed 3: I have my own homegrown flax linen seeds in storage from last year, and I bought Japanese indigo seeds from Growing Textiles last autumn with the intention to grow my own indigo plants for natural dyeing, and also for indigo seed production.


In bed 4 I want to start my own breeding experiments with dahlias. I've wanted to do my own plant breeding for ages, and I now have the space to start this. I have dahlia seeds set aside from last year's plants to do this. I'm very excited about this project and can't wait to get started in spring.
Have a wonderful day
Julie-Ann
Want to discuss my post? Feel free to chat with me on Instagram or Mastodon or Bluesky.
New Peonies and a Rose Bush
Hello friends,
Recently I purchased some wish list plants for my garden, three peonies, and a recently released rose bush.
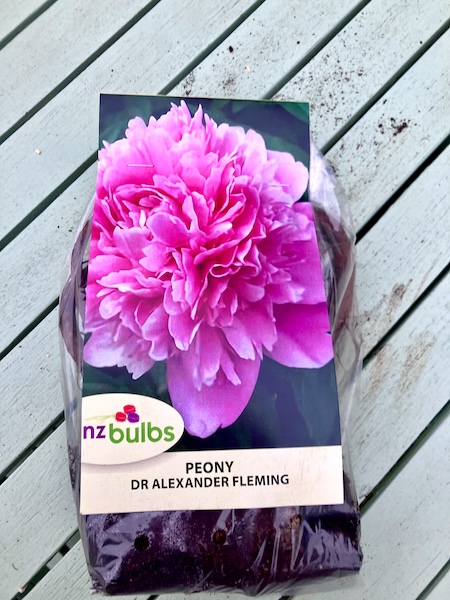
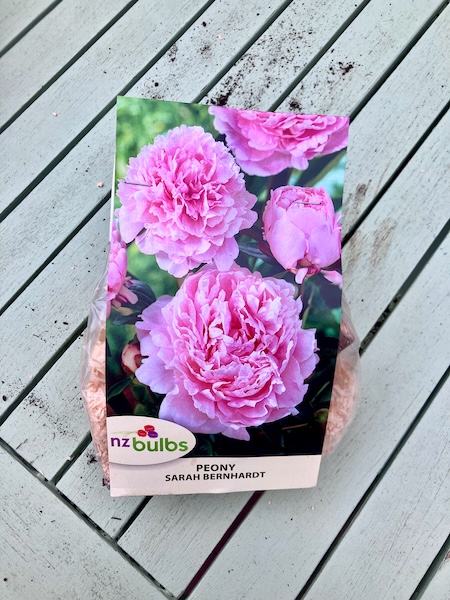
When NZ Bulbs released their peonies for the 2025 - 2026 season, I bought Duchesse de Nemours, Dr Alexander Fleming, and Sarah Bernhardt.
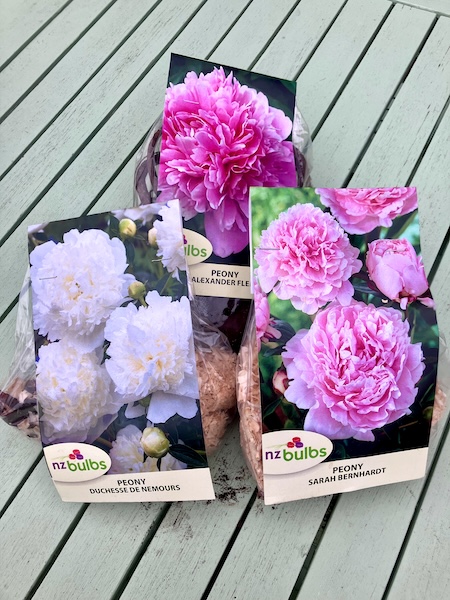
Duchesse de Nemours has ivory white double flowers and the sensational scent of Lily of the Valley.

Dr Alexander Fleming is a double, sweet smelling, pink peony with strong stems and a very good vase life. A very reliable peony variety for cutting.
And finally Sarah Bernhardt has classic double blooms of deep pink petals, which are lighter toward the edges, and has occasional flecks of raspberry throughout.
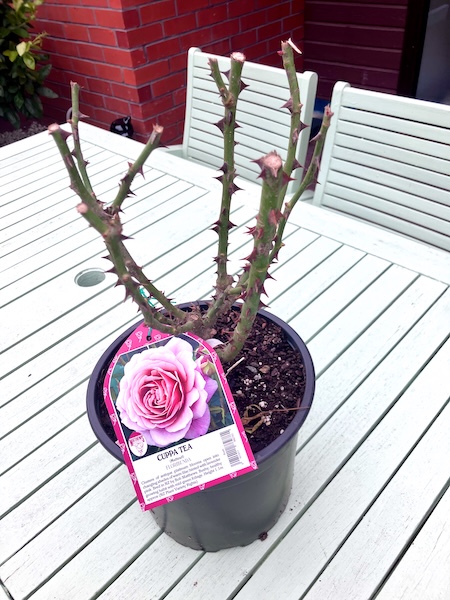
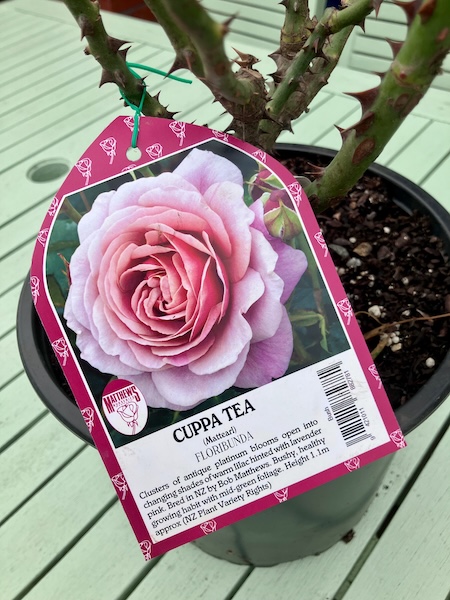
I also recently bought the floribunda rose bush 'Cuppa Tea' from our local garden centre. 'Cuppa Tea' was released for the first time in 2024 as a pre-order online, and it was sold out before it even reached garden centres that winter. I was disappointed to not get one when it first was released, and was pleased to find out our local garden centre had one available for me to buy this year.
'Cuppa Tea' floribunda rose has clusters of antique platinum blooms open into changing shades of warm lilac hinted with lavender pink. Bushy, healthy growing habit with
mid-green foliage. It was bred in New Zealand by Bob Matthews from his popular for picking creation 'Cappuccino'.
Now having acquired both peonies and a new rose bush, the problem was where to put them...but luckily I had an idea about that.
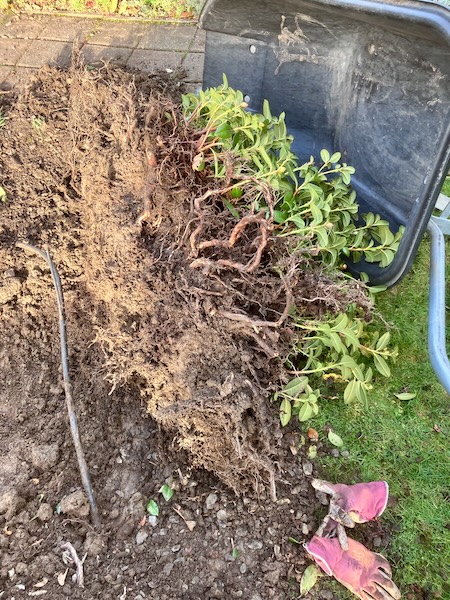
At the very front of garden alongside the driveway was a small section of garden which had two problematic plants, a rhododendron and an azalea. Routinely while growing, they impinged into the driveway, and make it too narrow for us to drive our car down the driveway without brushing up against them with our car. I'm also not fond of azaleas and rhododendrons, so I was more than happy to dig them out over a number of days.
It was a battle to remove them, but it was finally done. After removing both plants, I added compost to the soil and then dug it over.
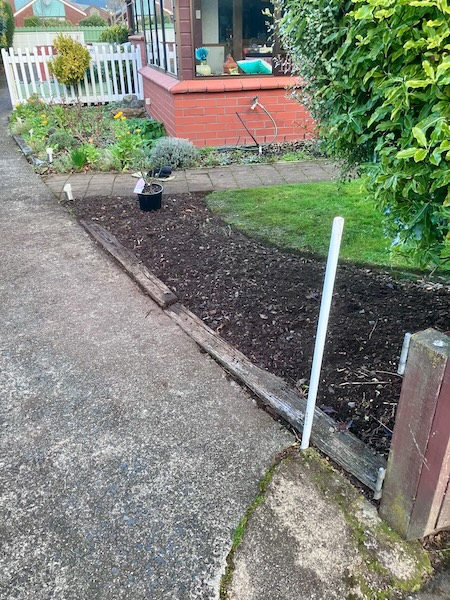
To that space I placed the 'Cuppa Tea' rose bush and the Sarah Bernhardt peony off center, so they stayed well far away from the driveway.
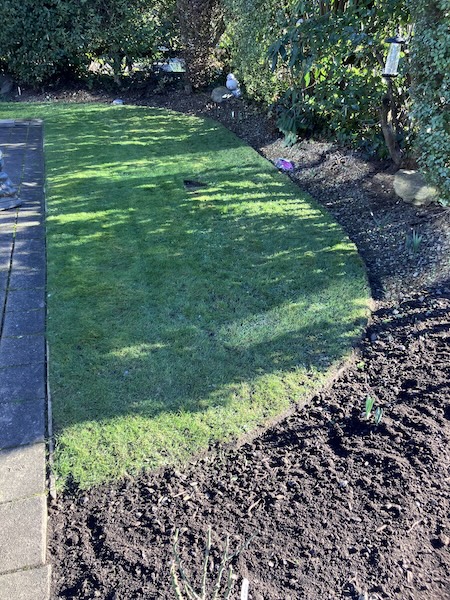
To even the garden bed out, I then dug back into the lawn by 10 cm, to increase the size of the front garden area. If I had to choose between more lawn, or more garden to work with, I'll always choose more gardening space.
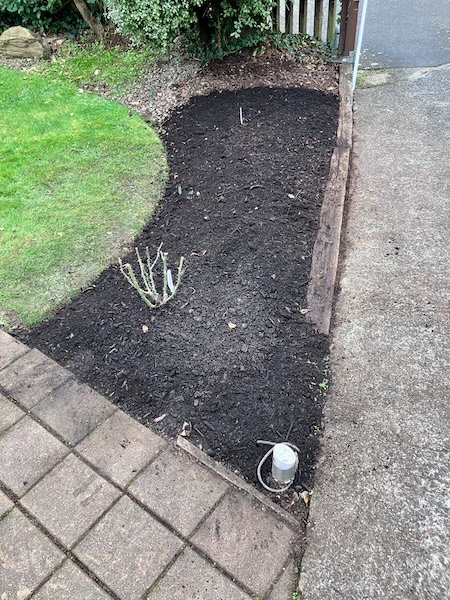
After removing the turf, I then planted out the Duchesse de Nemours and Dr Alexander Fleming peonies into the new space in the front garden.
With that all done, there is nothing do do but wait for spring, for both the peonies and rose bush to start growing. There is also more space now for other plants to be planted into the front garden. And as for the space between the Cuppa Tea rose and the Sarah Bernhardt peony, I plan to plant two dahlias when they arrive in spring.
Have a wonderful day
Julie-Ann
Want to discuss my post? Feel free to chat with me on Instagram
or Mastodon or Bluesky.
Tearing Down The Old Aviary
Hello friends,
Down the south side of our house, in the part of the garden you never get to see on the blog, is an outdoor aviary the previous owners of our home constructed to house their many birds. When we first moved into the house we used this section of the garden to host our strawberry and raspberry plants away from local wild bird life who wanted to eat our fruit.
The aviary was beginning to rot back then, and in the time since, the aviary has been falling further and further apart. Now with pieces of rotten wood falling off it, it was time to tear down the aviary this winter. The first job was to rescue the strawberry plants, and then tie back the raspberry canes to protect them while the aviary was being demolished.
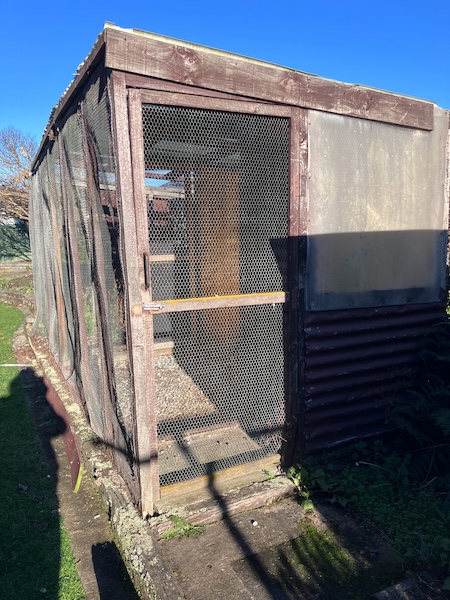
Next up was taking off all the facing boards so we could access the chicken wire, so we could tear it off with brute force using hammers and a prying bar. We also removed the doors to get easier access into the aviary while demolition was under way.
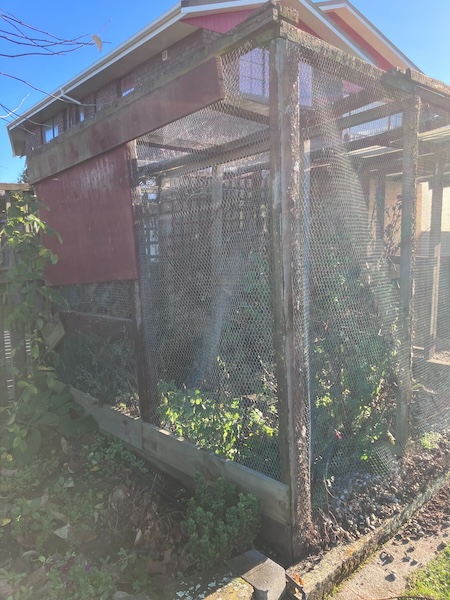

The aviary was far more rotten than we expected, especially on the south side, so we had to leave some wire netting in place so that whole walls wouldn't fall down. In the mean time the pile of rotten wood and chicken netting was steadily growing bigger and bigger in our empty vegetable garden beds.

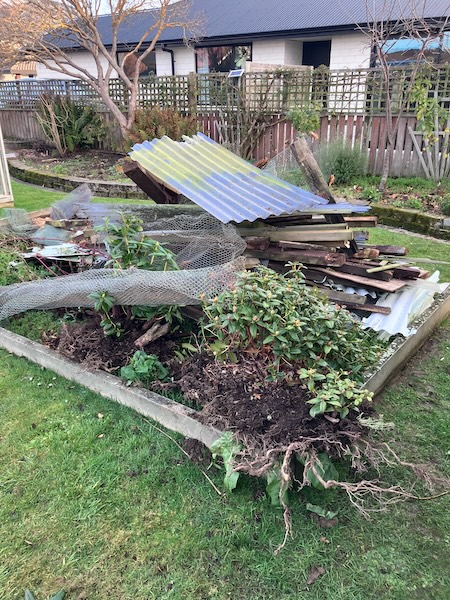
We decided that the best way to go forward was to start taking down the aviary at the most rotten end, which was the south end. It didn't take very long to remove stuff section by section. By the time we got to the northern end of the aviary, the structure became quite unstable. And considering we were due for 100 km/hour gales in the coming days, we made the decision to take an hour off work one day to drop the last of the aviary before it fell down by itself in the wind.

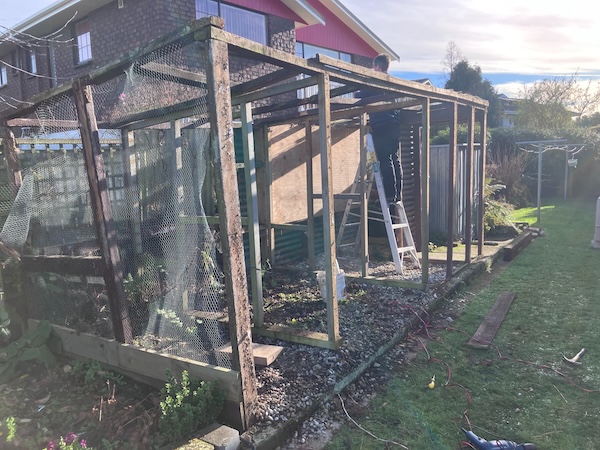
The last wall, which had green corrugated iron covering it, was the last to go, and all it took was a gentle push for it all to collapse. Now all that was left was to finish pulling apart the walls and corrugated iron, and begin hauling it away to the rubbish tip.
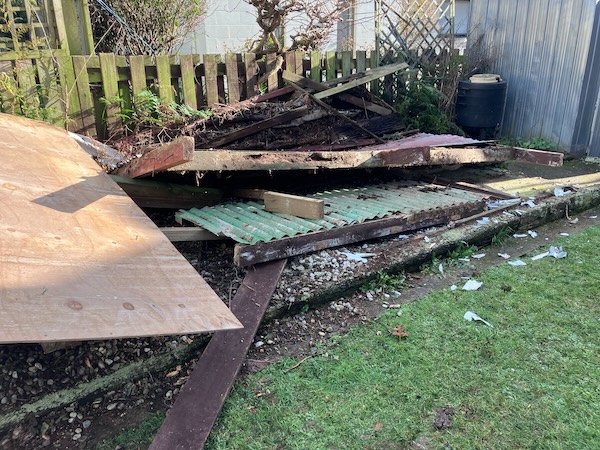
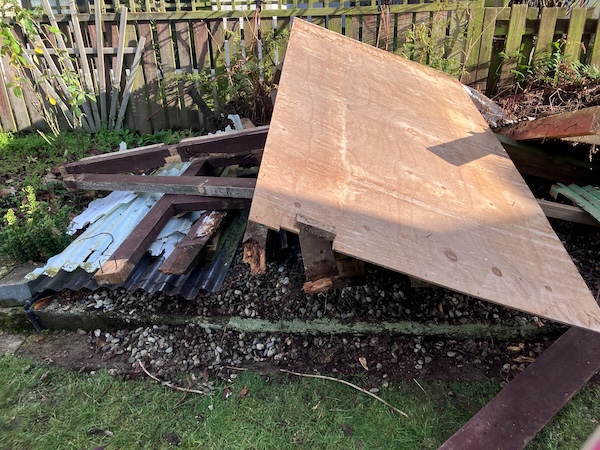
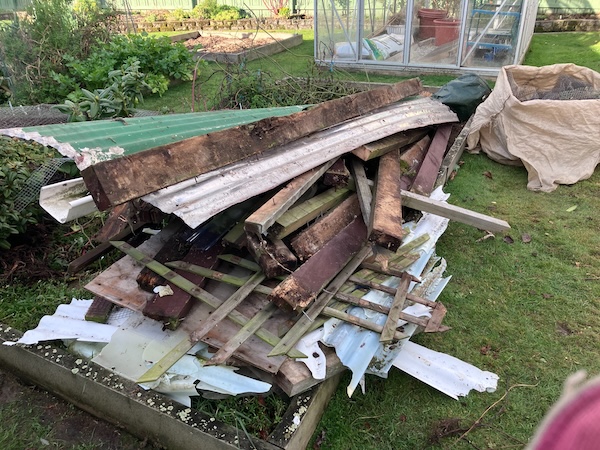
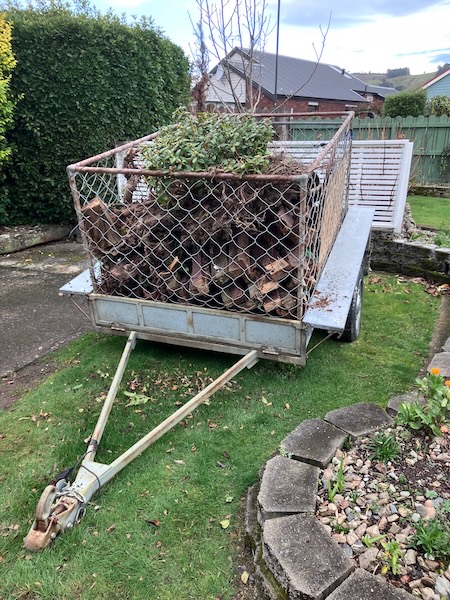
Luckily my dad has a car and a trailer, and left his trailer with us so we could fill it up over a weekend. Between that, and also filling up our car with loads of rubbish, we were able to get it all taken away. We also salvaged some good pieces of wood for other projects around the garden.
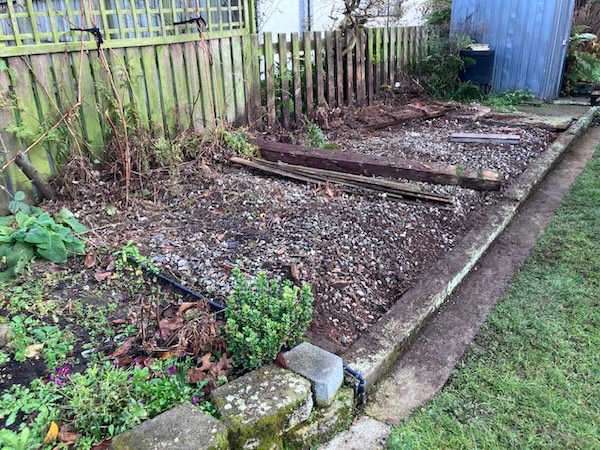
All that remains now is to clean up the area, do some weeding, and I can begin an exciting project in this space. I can't wait to show you my plans in an upcoming blog post.
Have a wonderful day
Julie-Ann
Want to discuss my post? Feel free to chat with me on Instagram or Mastodon or Bluesky.
Social Media


Archives