
Making Lime Syrup With A Glut of Limes
Hello friends,
As it's now winter, it's peak citrus fruit season for our lemon and lime bushes. The lime fruit ripened on the bush first, so we've been using them in various baking and cooking recipes for the last couple of months (wherever citrus is needed), and I've even been giving away limes to anyone who comes to visit us...
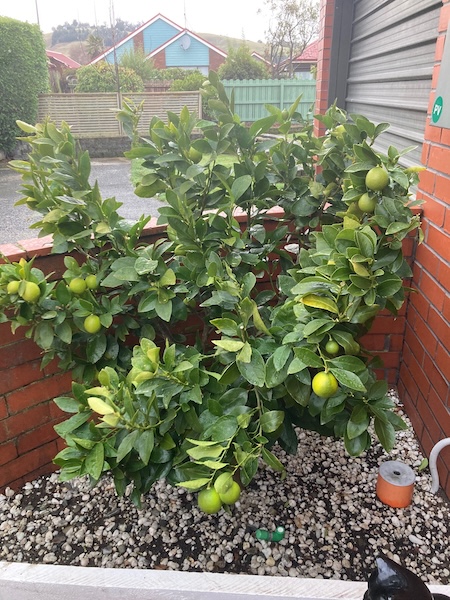
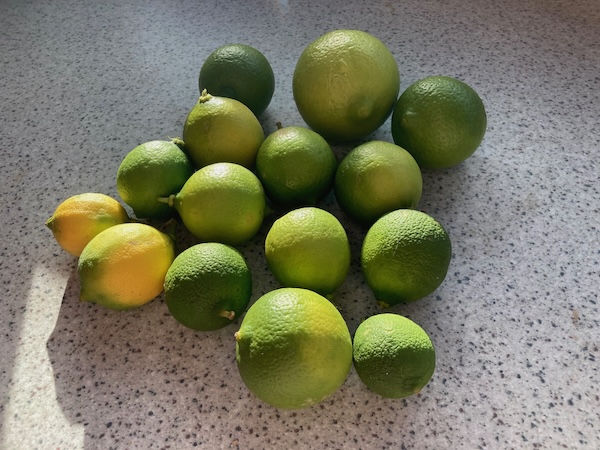
But even after doing all that, we still have too many limes sitting on our kitchen window sill and also on the bush, so I searched the internet for ideas for what to do with all the limes.
After searching for a while, I settled on making some simple lime syrup. It uses up a lot of limes, and it means I have homegrown syrup for hot and cold drinks, and also for using in baking recipes.
Simple Lime Syrup
Ingredients
1/2 Cup of Fresh Lime Juice
Zest of Those Limes
1 + 1/2 Cups of Water
1 Cup of Sugar
1/2 Teaspoon of Citric Acid (citric acid makes the lime syrup flavor more intense)
Recipe
(1) Zest limes one by one before you juice them, aiming to have 1/2 a cup of lime juice, plus the zest from them at the end. This step is not exact, depending on how much juice is in the limes. As I had a lot of limes, I just kept juicing them until I had enough juice and zest. It's always easiest to zest the limes first before cutting them in half and zesting them.
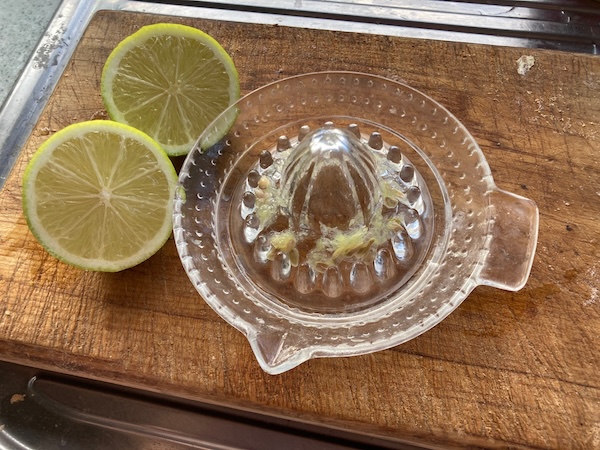
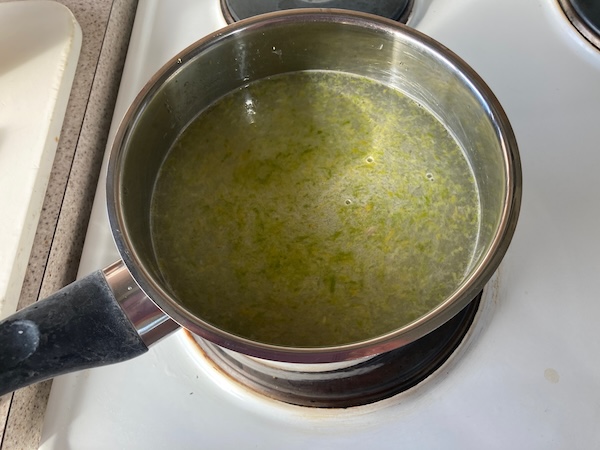
(2) To a pot, add 1 + 1/2 cups of water and heat to a simmer, add the sugar and citric acid, and mix until the sugar is completely dissolved. Add in the lime zest and juice, and cover the pot, and simmer for 15 minutes.
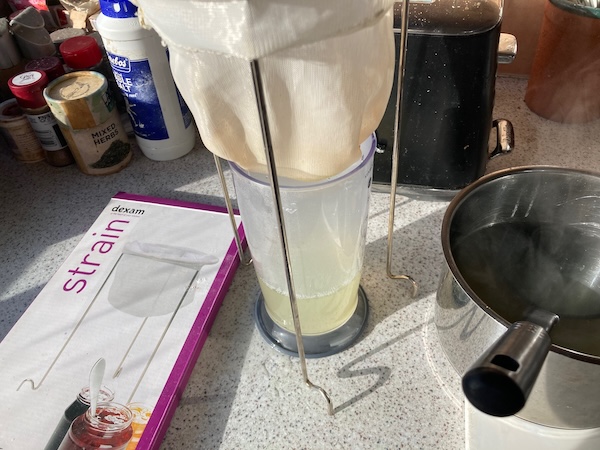
(3) Remove the syrup from the heat and allow it cool. When the syrup is cool enough to handle safely, strain the lime syrup to remove the zest and any stray lime pieces. I used a dexam strainer that I got from Moore Wilsons when we lived in Wellington. (The dexam strainer is very useful for many cooking, bottling, juicing, and jam making projects, as the strainer is super fine.)
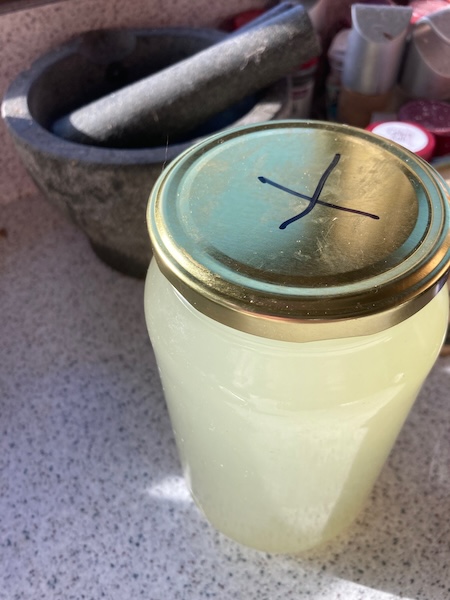
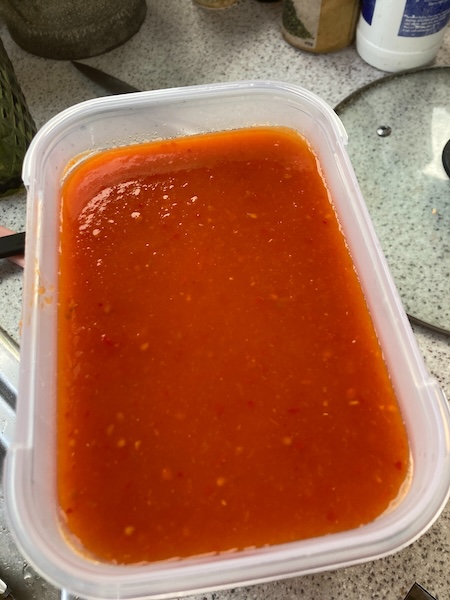
(4) Collect the lime syrup in a container, and store it in the fridge, where it will last for up to a month.
You can also use this recipe to make a simple syrup with other citrus fruit like lemons and mandarins and oranges. I've found that the lime syrup is great for making a hot citrus drink, similar to making a hot lemon, and you can add honey to it as well. It's quite refreshing and warm on a cold frosty day.
Have a wonderful day
Julie-Ann
Want to discuss my post? Feel free to chat with me on Instagram or Mastodon or Bluesky.
Tomato, Capsicum, and Lime Soup Recipe
Hello friends,
Happy winter solstice, soon the days will become much lighter again!
We're heading into the coldest time of the year, so I thought I'd share with you my favorite soup recipe, which is Tomato, Capsicum, and Lime soup. The ingredient list is pretty small, and most years I've grown my own tomatoes, lime, garlic, onion, and chilli for the recipe. I've had a bad run of growing my own capsicums, so I buy frozen capsicums from Frozen Direct for the recipe, as it's much cheaper and it comes pre-chopped.

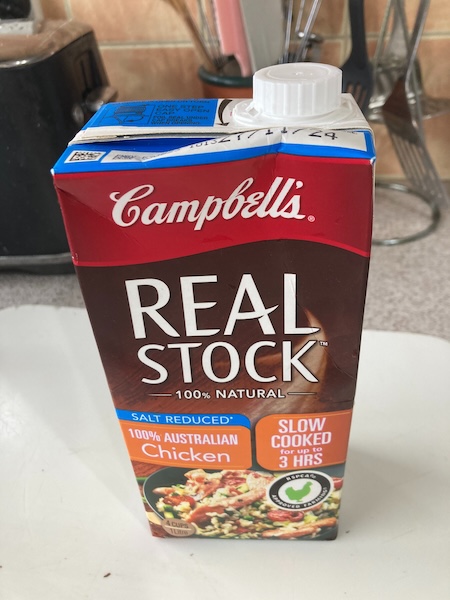
In this recipe you can choose whichever stock you want, we usually use a salt reduced chicken stock, or if you want a vegetarian option, go for a vegetable stock.
Tomato, Capsicum, and Lime Soup
Ingredients
1 tablespoon Olive Oil
1 large Onion
1 clove of Crushed Garlic
1L Chicken Stock (Vegetable stock works great also)
4 Red Capsicums deseeded and chopped, OR
600 grams frozen Red Capsicums
1 small red Chilli or ½ teaspoon Chilli powder (this is approx, it depends on what heat level you like)
3 tins of tinned 400 gram tomatoes OR
one 2L ice cream container of frozen homegrown tomatoes
1 Tablespoon of tomato puree (This is purely optional. It depends on how tasty the tomatoes are in the recipe. My advice is to do the recipe up to step 4 without the tomato puree, and do a taste test, and if it’s not tomatoey enough, then try adding tomato puree by the tablespoon)
1 Lime – Juice + Zest
Salt and Pepper to taste
Recipe
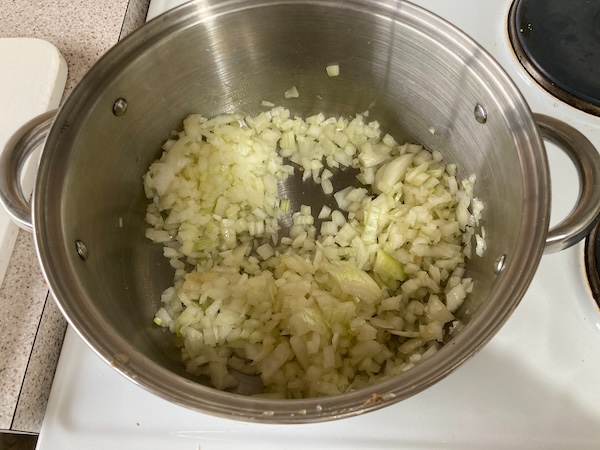
(1) Cook chopped onion and garlic gently in olive oil in a covered pot for approximately 5 minutes until softened, stirring occasionally.
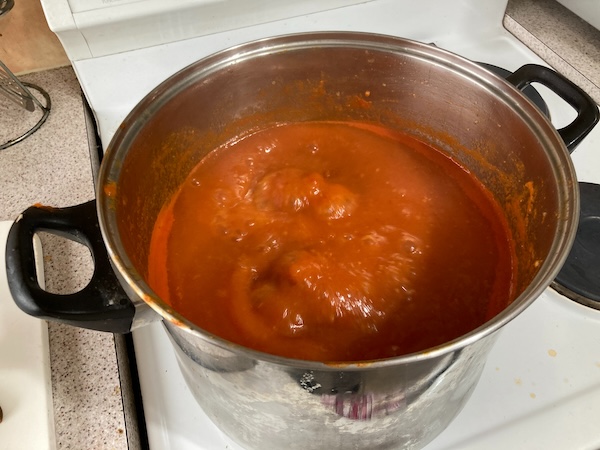
(2) Stir in chopped capsicum, chilli, tomatoes, and chicken stock. Bring to the boil and simmer for 20 minutes.

(3) Puree the mixture with a stick blender until smooth.
(4) Do a taste test once the soup is at a smooth consistency, to see if tomato puree needs to be added. Add the juice and zest of the lime.

(5) Simmer for 10 minutes, and then do a taste test to see if salt and pepper is needed. Add salt and pepper and simmer for 5 more minutes.
(6) Enjoy the soup straight away, or freeze if you have any excess. This recipe gives approximately 4 - 6 serves depending on how big your soup bowl is.
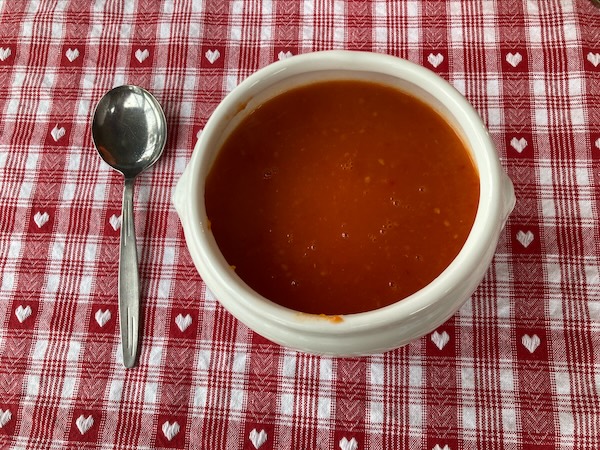
This soup recipe, is my favorite of all time, and I look forward to eating it each autumn and winter. We usually have it with toasted ciabatta and a sprinkling of Parmesan cheese, but it is wonderful just on it's own. I usually also make a double batch, so that we have plenty of this soup over winter whenever I have a hankering for it. I hope you give this wonderful soup a go, and please let me know what you think of the recipe...
Have a wonderful day
Julie-Ann
Want to discuss my post? Feel free to chat with me on Instagram
or Mastodon or Bluesky.
Milling and Baking Our Own Homegrown Bread
Hello friends,
After harvesting and processing the 2023/2024 season's wheat, we were ready to mill our grain, and then bake our own homegrown bread.


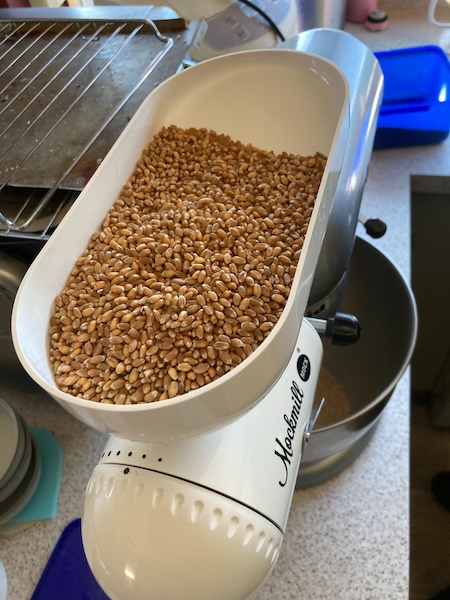
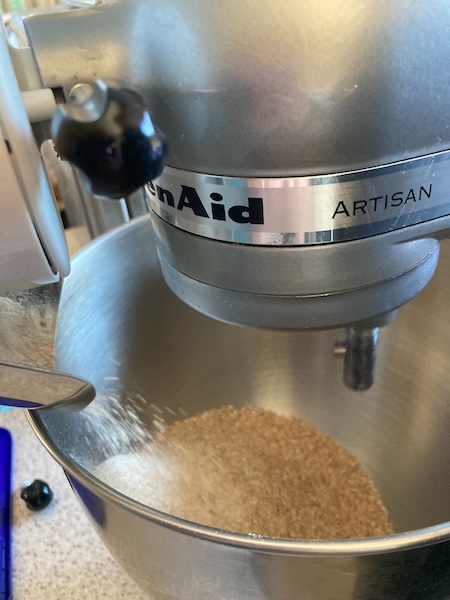
The first step was to mill the wheat grain using our Mockmill Stone Mill which attaches to our Kitchenaid stand mixer. You can find out more information about our Mockmill milling set up in last year's blog post.
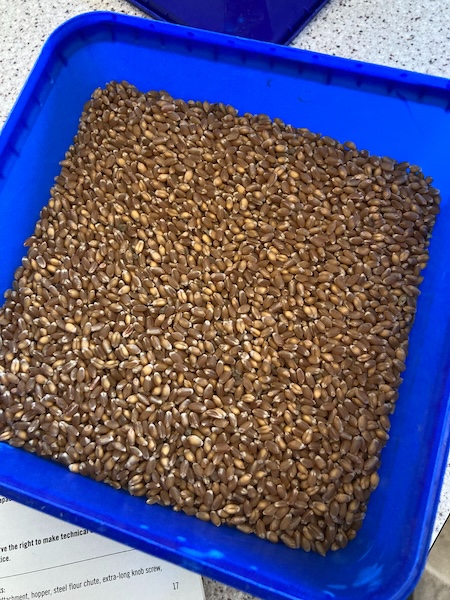
It only took a few minutes to mill all of this year's grain into flour (and some of last year's leftover grain), in the stone mill using a fine milling setting.
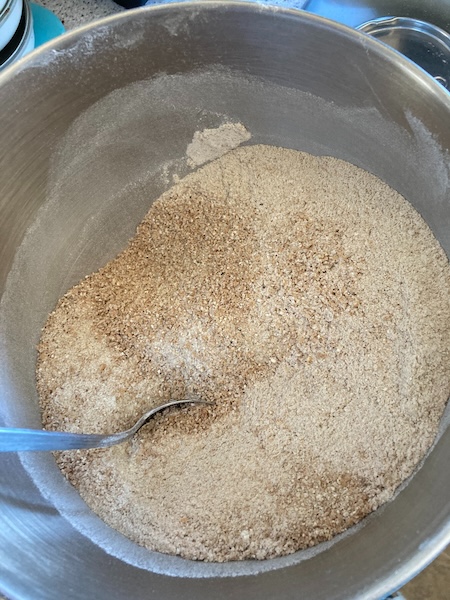
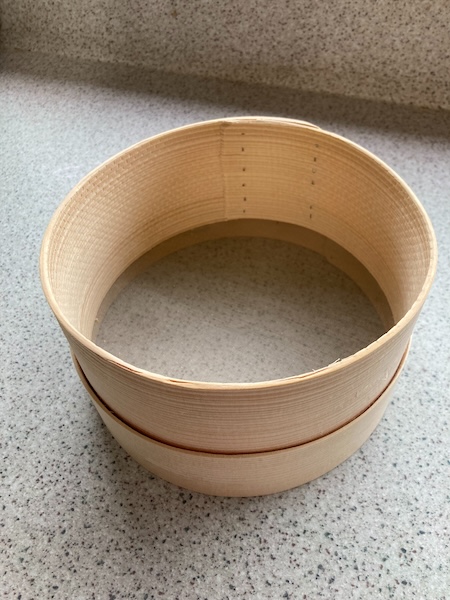
The next step was to separate the white flour from the majority of the wheatgerm and bran. Last year we used the sieve we have at home, but the sieve was too coarse, and most of the wheat germ and bran still got through. So this year we invested in a super fine manual flour sieve from Flour Power Mills. When sieving was completed we were left with a light brown super fine flour, which still contained some fine wheatgerm and bran. The coarser wheatgerm and bran is now stored away for other baking and cooking projects during the year.
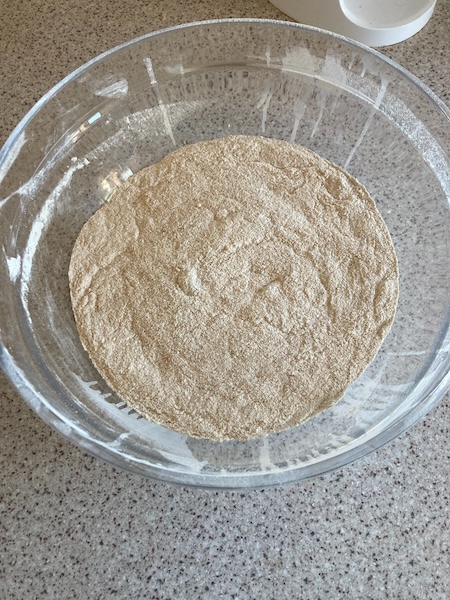
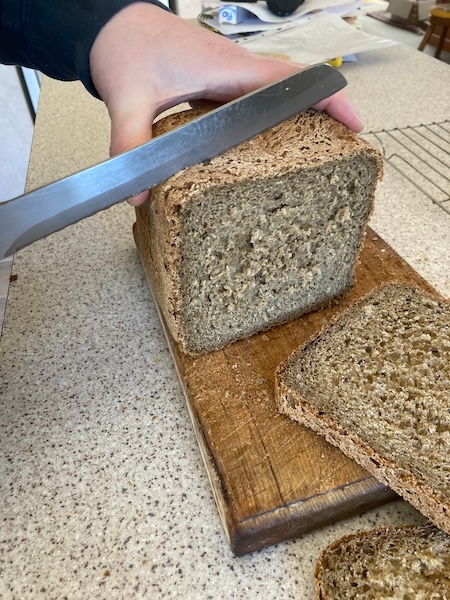
All that remained was to bake a loaf of bread. After milling we had 4 cups of flour, which we used in our standard wholegrain bread recipe.
Wholegrain Bread Recipe for use in a Bread Maker
Ingredients
1.25 cups of hot tap water
1 teaspoon of salt
1 tablespoon + 1 teaspoon of sugar
2 tablespoons of vegetable oil (canola or any other neutral seed oil)
1/3 cup of milk (can be from milk powder, but the liquid volume is important)
1/3-1/2 cup of 7-seed-mix, whole-grain, or other similar tasty grains (we get ours from Bin Inn)
3 cups of strong/bread flour (or in our case homegrown and milled flour)
2 teaspoons of supabake yeast (i.e. mixed yeast with bread improver)
Recipe
(1) Place in the baking tin in the order above, it is important to have:
* The grains *in* the liquid (to soak)
* The flour on top of the first 6 ingredients
* The yeast on top of the flour (so it's not in the water, or in contact with the salt or sugar until it starts mixing)
(2) Place the baking tin in the bread maker, and set the bread maker to the "wholegrain" program in your bread maker. Start baking your bread.
(3) We have a 10+year old Sunbeam bread maker, but we have reports this recipe works well in others. The bread maker should have a first period where it keeps the water warm to soak/soften the grains (which is why you do not want the yeast in the water, with warmth and sugar it'll activate far too soon).
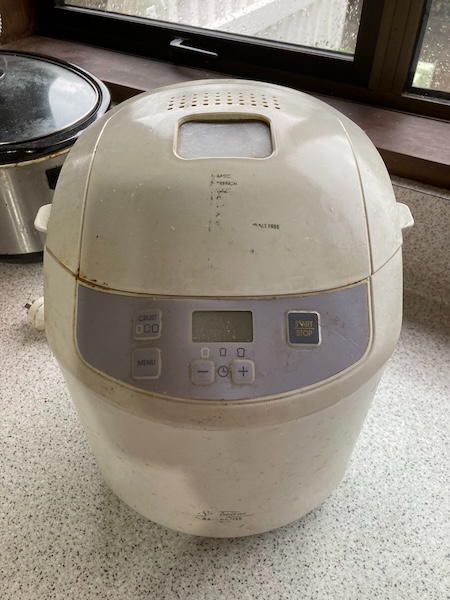
And two hours and twenty minutes later our homegrown bread was out of the bread maker. It wasn't quite as fluffy as commercially grown bread, but the bread had a wonderful nutty flavor which was great fresh, as well as toasted.
We've found that growing our own wheat, and then processing and milling our own flour is a very fulfilling thing to do. It's nice to see how processed food is made, and to appreciate the hard work that goes into making flour and bread.
Have a wonderful day
Julie-Ann
Want to discuss my post? Feel free to chat with me on Instagram or Mastodon or Bluesky.
This Year's Wheat Harvest and New Harvesting Methods
Hello friends,
We grew wheat again in the 2023/2024 season with the hope to grow enough flour to make a loaf of homemade bread. We planted out our wheat seeds back in November 2023, and had a great harvest in February 2024 this year. If you want to learn more about growing wheat at home you can read it in this blog post.
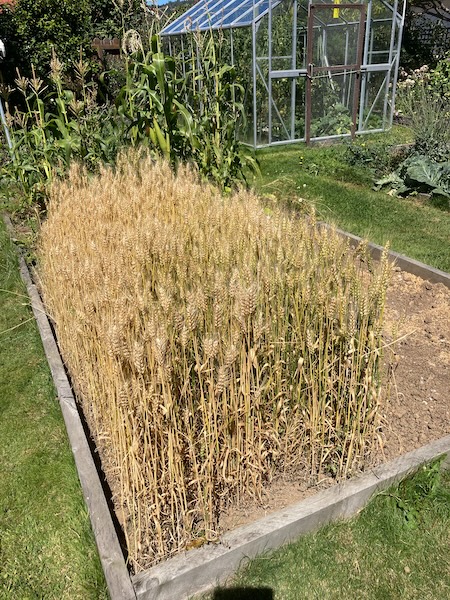
With the wheat harvested, I dried it in readiness for processing. This year I wanted to try some new processing methods, to see if they would be more efficient than last year's methods. The first new method was to try removing the wheat heads from the stalks using a garden chipper/shredder. You can see footage on Youtube of this happening here.
Luckily we had a garden shredder in our garage, so we got to work. It didn't take very long at all to harvest the wheat heads from the stalks. The wheat heads fell into the hopper below, and the stalks were dug back into the garden bed from where they came from. I had hoped that the garden chipper would break open the wheat heads, but unfortunately they were still mostly intact afterward.

The next step was to thresh the wheat. Last year we just bashed the wheat heads with a piece of wood, but it was a lot of work. But I found this video on YouTube recently of someone threshing wheat with a flail.
Eager to try this method out, I bought two broom handles from Mitre 10 (broom handles are much cheaper than dowel), two metal eyes, and a length of rope. Once I got home I sawed off the ends of the two broom handles so that one handle was 1.5 m long, and the other 1 m long. I then tied them together with a length of rope.
Hubby got to work threshing the wheat heads on an old sheet. It turns out that the 1 m length of flail that was hitting the wheat heads was too long, so we cut it down to 75 cm. Another problem was that the wheat heads were flying off in every direction when hit, so we wrapped the wheat heads up into the sheet like a burrito, to keep them all in one place. After a couple of minutes of threshing using this method, it was completed. We separated the bigger pieces of plant material by hand, and then used a large sieve to further remove the medium-sized pieces of plant material.
When we thresh the wheat again next year I think we will alter the flail, and use leather strips to connect the two broom handles. The rope had a tendency to come undone, and the short piece of broom handle doing the threshing would fly off. I would also love to invest in a seed saving screen from Crafty Gatherer NZ, but it's pretty pricey.
After that, all that remained was the wheat berries and the chaff. The next step was winnowing. After watching the videos above, we saw that most people used small fans to separate the wheat from the chaff. Luckily it was now autumn, and most places were selling off fans very cheaply. Hubby took a trip to our local Mitre 10, and purchased a fan at a decent price.
He set up the fan, and got to work winnowing. The videos above suggested working a slow speed for the first pass, to remove dust, and then work your way up to faster speeds to get rid of bigger material. With the help of the fan we got the winnowing done a period of less than five minutes. With a constant breeze, it made the job so much easier.
With the winnowing done, the processing of the wheat was complete. Overall, these new wheat processing methods saved us a lot of time, and it also made the process so much easier. We'll be using this method again next year when we grow our own wheat. In a future blog I will be showing the wheat milling process, and also our recipe for making bread in a bread maker.
Have a wonderful day
Julie-Ann
Want to discuss my post? Feel free to chat with me on Instagram or Mastodon or Bluesky.
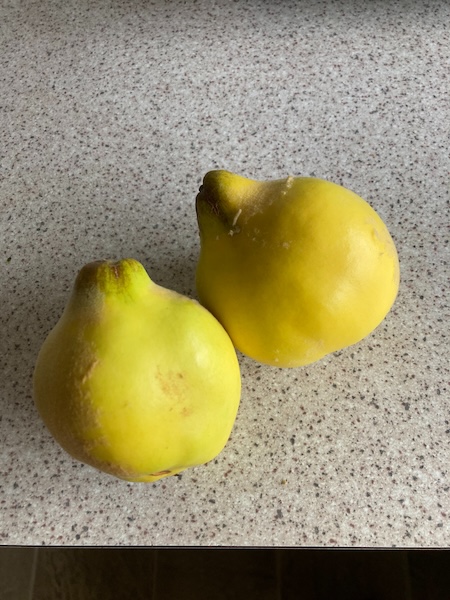
Our First Quince Harvest
Hello friends,
We have finally have had our first quince harvest. We planted a quince Smyrna tree back in the winter of 2022, and we've been waiting impatiently for a harvest since then.
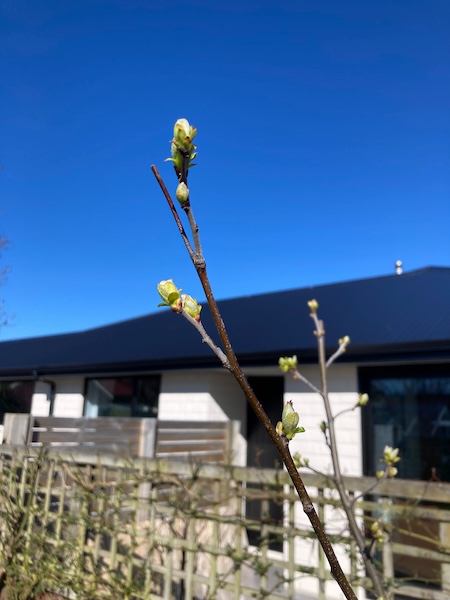
The first year after sitting there as a stick over winter, the leaves budded, and then it flowered. But nothing became of the fruit, and we weren't worried because the tree was too small to bear the big quince fruit anyway. Over the spring and summer it grew slowly, which was fine with us, as it needed to develop it's root system.
Winter came again, and once more it became a stick. And then the spring of 2023 the leaves unfurled, and the tree flowered again, but this time little quince fruit began to form. At the start there was about 10 fruit, but over the following weeks they started to drop off. Eventually 4 quince fruit remained.
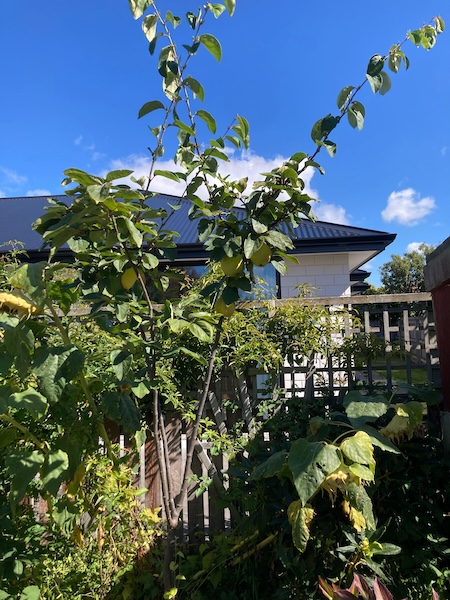
Over the spring and summer the fruit began to grow bigger on the tree. I was realistic in the fact that strong winds could knock them off, so I left them all there. By the time this autumn came, the 4 fruit remained, and they began to ripen to a pretty lemon colour.
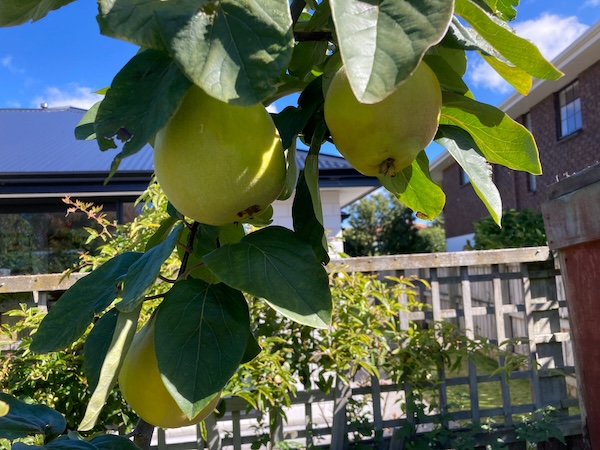
Ever since then we've been impatiently waiting for them to be ready to pick. I tested the fruit regularly to see if they were ready to harvest, by gently holding them and tipping them sideways. At first all four did not budge, so they were not ready. But then one day the two smallest fruit dropped into my hand when tested.
We had a couple of weeks more wait for the two biggest fruit to be ready to harvest. Luckily quince store well in the fridge, so when the last two quince were finally ready, it was time to poach the quince. We used our poached quince recipe, which you can find in a blog post here. This year we chose the vanilla and cinnamon combination for flavoring.
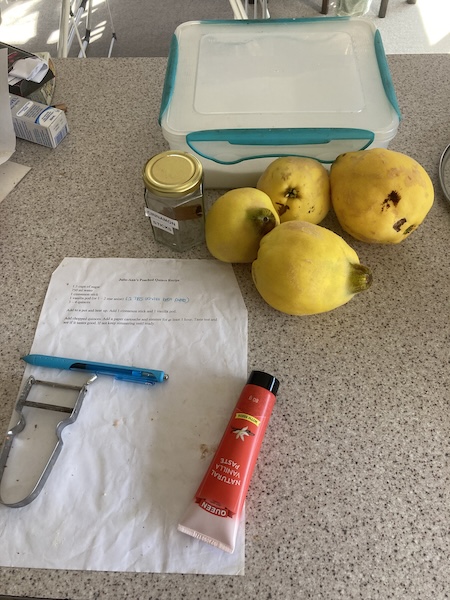
And the long wait for our own quince fruit was totally worth it, the poached fruit was aromatic and very tasty. And as a bonus we have lots in the freezer to enjoy over the year. And our quince tree is only a small tree, as it gets bigger much more fruit will ripen. My plan is to share them with family and friends and neighbours, and hopefully swapping them for other fruit we can't grow in the garden.
Have a wonderful day
Julie-Ann
Want to discuss my post? Feel free to chat with me on Instagram
or Mastodon or Bluesky.
Social Media


Archives