
Digging Up, Dividing, and Storing My Seedling Dahlias
Hello friends,
With winter fast approaching, it was finally time to dig up the seedling dahlias from my dahlia breeding project. Back in spring, I planted them wherever I could squeeze them into the garden, but now that the growing season has come to an end, it was time to lift the tubers, divide them, and store them safely away over winter. The last thing I wanted was for any of my seedling dahlias to rot over winter. Each one is unique, so I was keen to lift and store them carefully to give them the best chance of growing again next season.
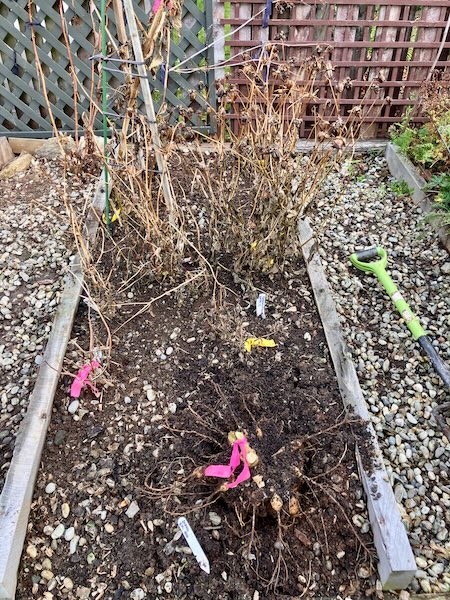
The first step was to get out my trusty garden fork and carefully lift each dahlia from the garden. To avoid damaging the tubers, I inserted the fork about 50 cm away from the base of the plant and gently levered the soil upwards. Working my way around the clump a little at a time, I gradually loosened the soil until the tubers lifted free.
Once each tuber had been lifted, I placed it into its own plastic tray along with two labels to ensure the different seedling dahlias didn't get mixed up. Having a backup label also gave me a little extra peace of mind in case one was accidentally lost during the cleaning and dividing process.
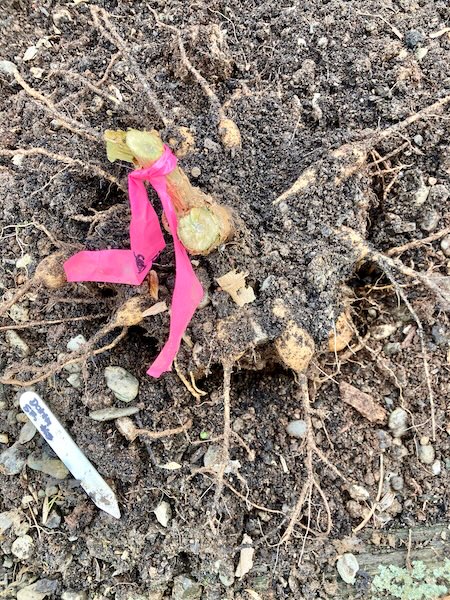
The next step was to wash the excess soil from the dahlia tubers. To keep the mess to a minimum, I placed each tuber into an empty garden bed and used the hose to gently wash away the soil. Once clean, the tubers were returned to their labelled trays and left to dry in the sun before the next stage of the process.
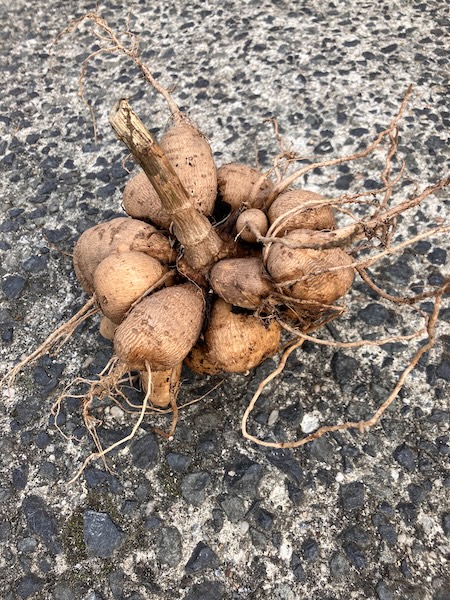
With the tubers dry, it was time to divide them. The first step was to remove the old mother tuber, along with the long, thin feeder roots attached to the new tubers. This made it much easier to see the individual tubers and identify where they could be carefully divided.
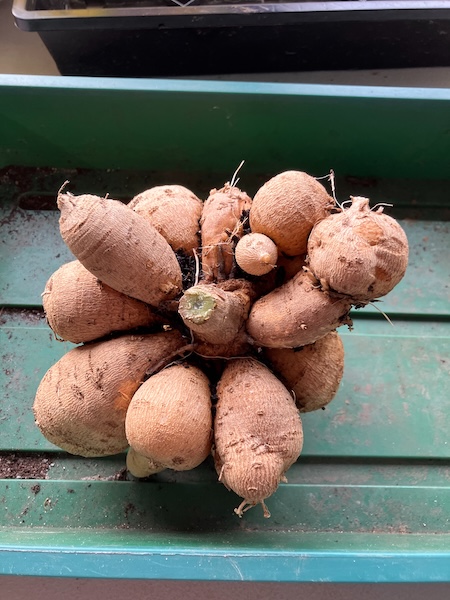
Using a combination of secateurs, scissors, and a few other garden tools, I carefully broke each clump into smaller, more manageable sections. From there, I looked for the dahlia eyes on the crown and divided each section into individual tubers, making sure each division had at least one healthy eye attached. Once divided, I left the tubers to dry overnight. This allows the freshly cut surfaces to callus over, helping to reduce the risk of rot during winter storage.
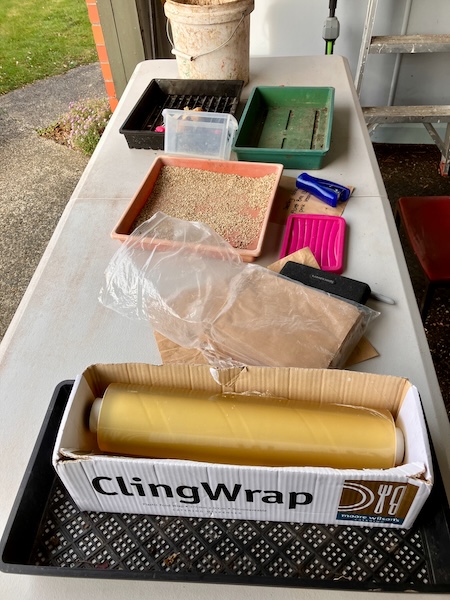
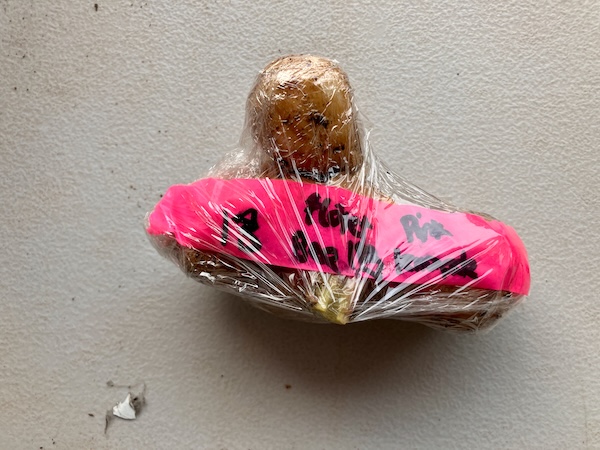
The following day, it was finally time to put the dahlia tubers away for winter. Each tuber division was labelled twice, with one label attached to the outside and a second placed inside as a backup, giving me peace of mind that none of the seedlings would lose their identity over the coming months. This year I decided to trial two different storage methods that I learnt during the Floret Flower Farm Flower Farming Workshop earlier this year. Some of the tubers were placed into paper bags filled with vermiculite, while others were individually wrapped in plastic wrap. I was curious to see how the two methods would compare after winter.
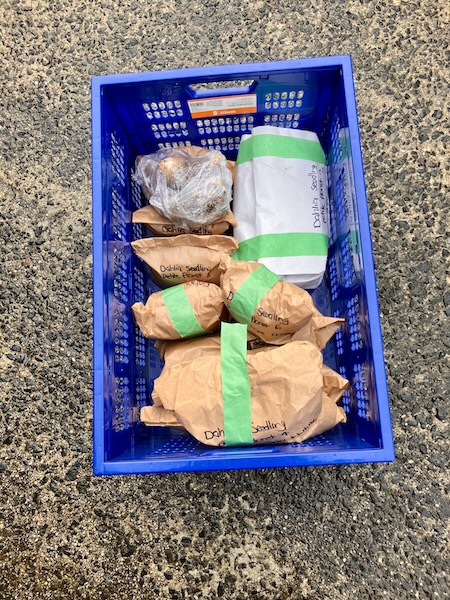
To give each method the best chance of success, I stored them in two different locations in our garage. We also have a temperature sensor in the garage, allowing me to keep an eye on the conditions over winter and make sure the tubers don't get too cold. It will be interesting to compare the results in spring and see which storage method worked best.
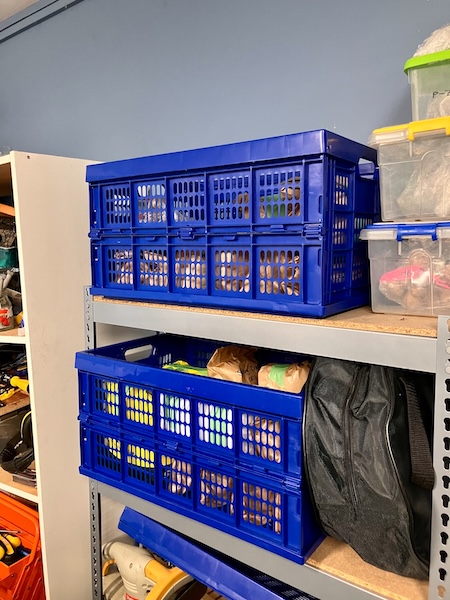
With the tubers now safely tucked away for winter, this year's dahlia breeding season has come to an end. Although it always feels a little strange lifting the plants just as they've finished growing, there's something exciting about knowing that each carefully labelled tuber holds the promise of next season's flowers.
Now all that's left to do is keep an eye on them over the coming months and wait for spring to arrive. I'm already looking forward to planting them out again and discovering how they perform in their second season.
Have a wonderful day,
Julie-Ann
Harvesting, Cooking, And Then Eating A Dahlia Tuber
Hello friends,
Yes, I finally did it. I finally had the opportunity to try harvesting, cooking, and then eating one of my dahlia tubers.
I've been growing dahlias from seed this year as part of my dahlia breeding program, and a lot of the dahlias that flower just don't have the characteristics I'm looking for in a great seedling. Either they're single dahlias, or they have very plain and boring colours, or their flower heads are weak (and they droop), so I pull them out of the ground once I'm sure I know what sort of dahlia they are like.
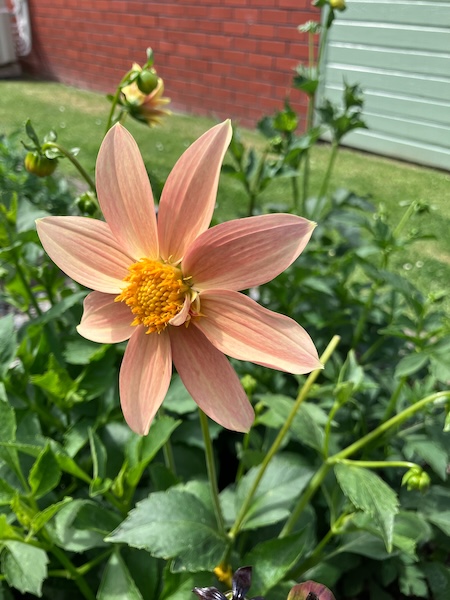
I plant my dahlia seedlings very close together for spacing reasons, and when I decide that a dahlia is not what I'm looking for, that's when the dahlia seedling is pulled out of the ground, giving more space for other dahlia seedlings to grow in the garden bed.
All ornamental dahlias are edible, particularly the tubers, and their taste apparently is reminiscent of a potato crossed with celery, depending on which dahlia variety you harvest and cook. Dahlia tubers contain inulin (a prebiotic carbohydrate), other carbohydrates, have four times the amount of potassium than bananas have, and are high in fiber, making them a great food source if needed (Dahlia nutrition information (Nsabimana and Bo Jiang 2011).

With all this in mind, the next time I had to remove an unwanted dahlia seedling, I decided it was the time to try cooking and then eating a dahlia myself. The seedling dahlia donating its tubers was Dahlia SR 11, a boring single apricot dahlia variety that had flowered a few times, but its flower hadn't improved at all...
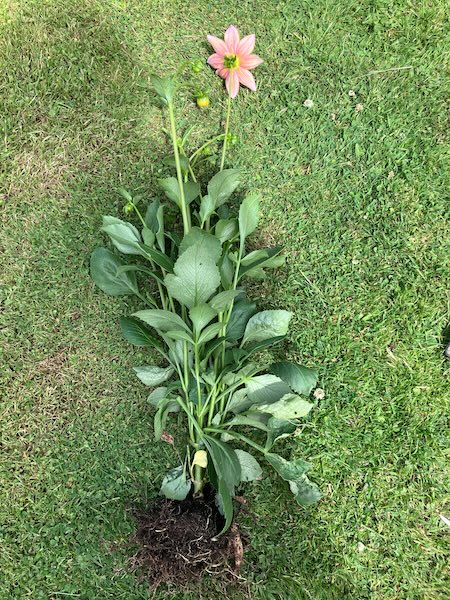
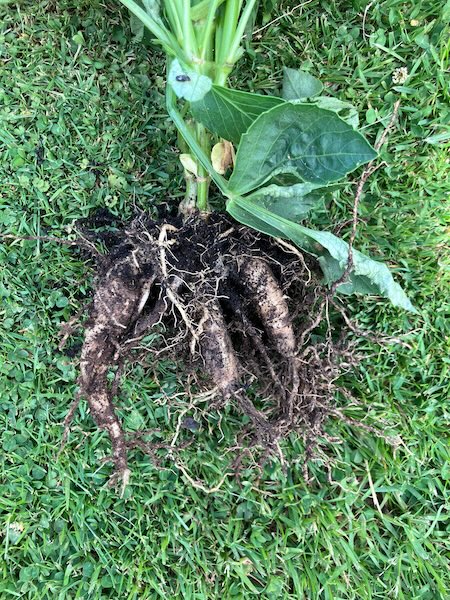
I dug the dahlia out of the ground, removed the stems and leaves, and then washed out as much dirt as possible from the tubers and roots. After bringing the root system of the dahlia into our kitchen, I cut off the small tubers the dahlia seedling had begun to grow. Small dahlia tubers we thought would be less fibrous, and more easy to cook with, compared to older and bigger tubers.
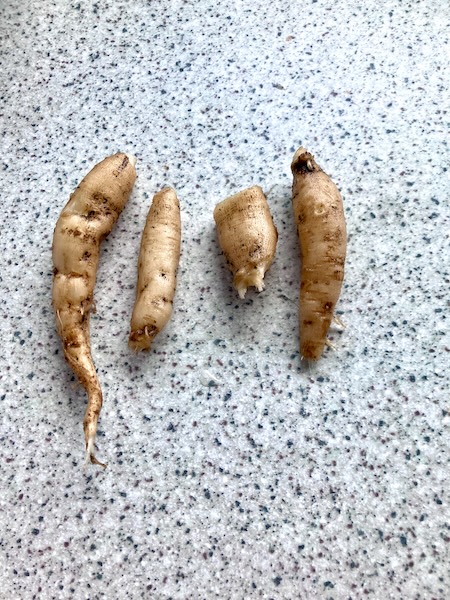
After giving the tubers another wash to remove all the dirt, I peeled the dahlia tubers as was suggested on the internet by other sources. With them now clean, I put the tubers into a small pot containing water, and added a bit of salt (similar to when boiling potatoes).
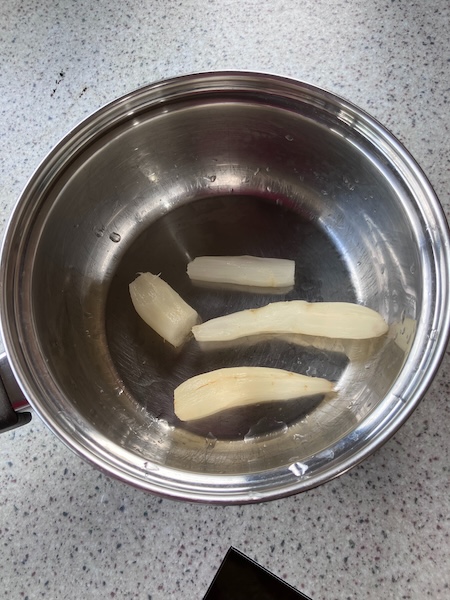
We brought the pot of water up to a boil, and let the dahlia tubers simmer for 10 minutes. At that point we tested the tubers with a knife and found them to be al dente, which was what my research suggested meant that the dahlia tubers were ready for eating. We cut one of the dahlia tubers up into thin slices and ate the slice plain...
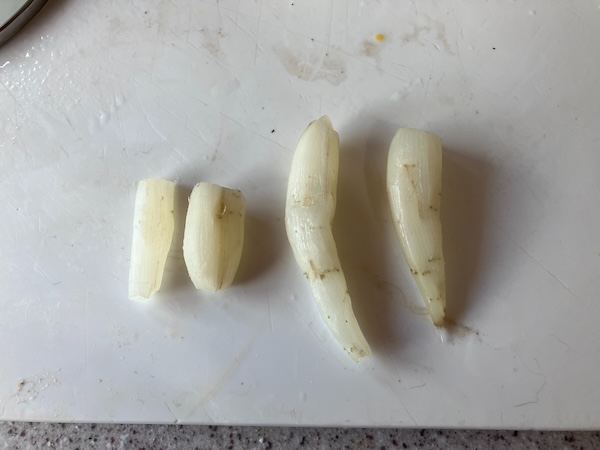
The dahlia tuber was okay to eat, and did indeed taste like a potato crossed with celery (and it was a little earthy tasting too, a bit like beetroot). A bit plain, but okay. We sprinkled a little salt on top of the dahlia tuber slices, and it definitely improved the taste.
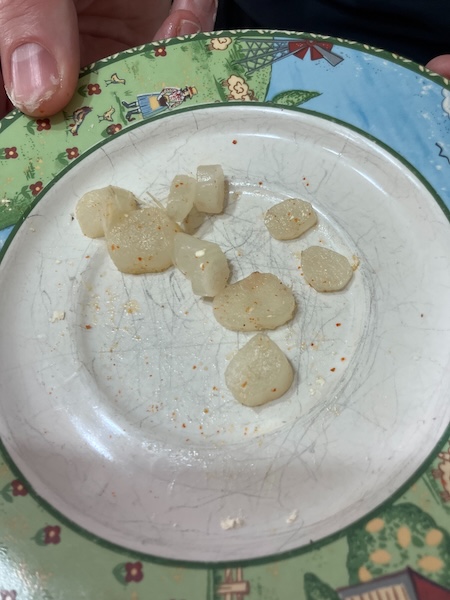
Wanting to explore eating the dahlia tubers further, we decided to pan fry the rest of the cooked and sliced tubers, to try out other flavor combinations with them, using ingredients we already had in the kitchen...
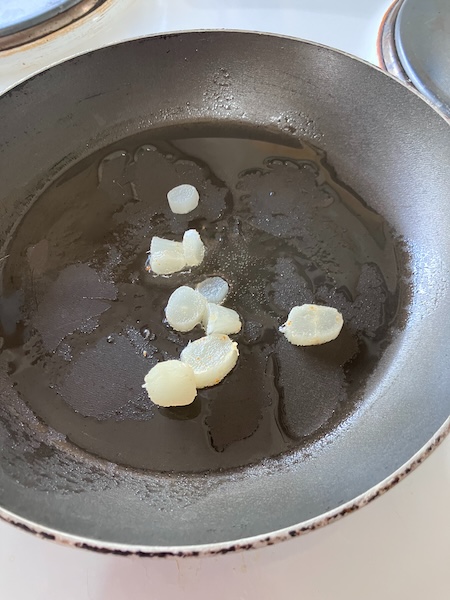
Here are the dahlia tuber flavor combinations we tried:
- Chilli and Garlic - Definitely more tasty than plain, the flavor was improved by sprinkling a tiny bit of salt on top to finish.
- Parmesan and Salt - Super tasty when fried plain and then sprinkled with parmesan and salt at the end.
- Basil and Olive Oil and Salt - Quite pleasant, but not as nice as the Parmesan and Salt.
- Fried in Butter with Chilli and Lemon Juice and Garlic - Definitely my favorite. The chilli and lemon and garlic combination made the dahlia tuber super tasty. We think it would've been better with lime juice instead of lemon, but we didn't have any available at the time.
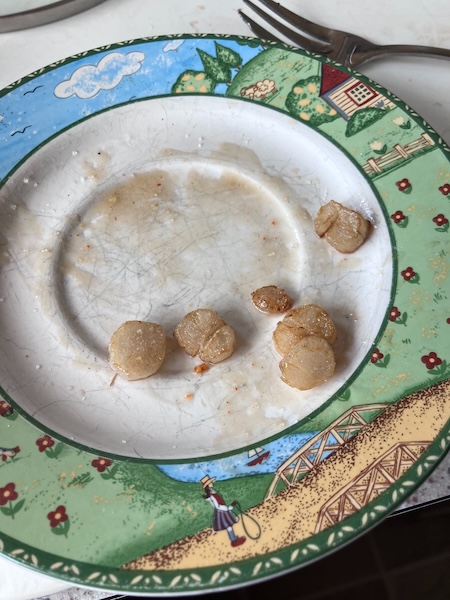
With all those flavor combinations completed, we were out of dahlia tubers to eat, and that was perfectly okay for ending our experiment in dahlia cooking and eating.
I think that doing this experiment in dahlia cooking and eating was a good experience to try once. It was okay to eat, but if it came to a choice between eating potatoes and eating dahlia tubers, potatoes would be my choice every single time. If it ever came to a point that there was no choice but to eat dahlia tubers to survive (like during a zombie apocalypse), I would very happily do it, as long as I didn't need to eat any of my precious named dahlia varieties to do so. Those are sacrosanct, but they would make great seed producing dahlias, and those seeds could then go onto produce seedling dahlias tubers which I would happily to eat in the long term...
Have a wonderful day
Julie-Ann
Want to discuss my post? Feel free to chat with me on Instagram or Mastodon or Bluesky, and now also Facebook.
Dahlia Experiments 2025 - Growing Dahlia Seedlings
Hello friends,
As part of my dahlia growing experiments this year, one of my goals is to grow my own dahlia plants from seed. I have a stash of dahlia seed available, including the Bee's Choice dahlia variety from Floret in the USA (which I bought from Emerden last year), Beeline I and II dahlia seeds from the breeder Doctor Keith Hammett in New Zealand, dahlia seeds from Susie Ripley's garden in Dunedin, and also open pollinated seeds from my own garden.


At the end of August, once I was able to garden again after my second cataract surgery, I sowed my dahlia seeds into two covered seed trays, and sprinkled them with enough seed raising mix to cover them.


With them watered, and kept moist in the trays, the dahlia seeds stayed in our dining room in the warmth while they germinated. To my surprise, most of the dahlia seeds I planted germinated, at a rate of about 95%, which is way more dahlias than I expected to plant in my garden this year.


They grew nice and strong, and soon they were ready to transplant out into bigger pots with potting mix. They've been growing safe and sound in my glasshouse since then, growing bigger each week. My plan is to plant them in the garden after the last frost, but for now I have to figure out where I'm going to put 43 dahlia seedlings...

I can't wait to see what dahlia flowers appear from these seedlings over the summer. My plan is to be quite harsh with them, and I'll pull out any flowering plant that I'm not happy with, to give other dahlias room to grow. I'll give you updates as I go...
Have a wonderful day
Julie-Ann
Want to discuss my post? Feel free to chat with me on Instagram or Mastodon or Bluesky.
Side Garden Project - Planning and Building Raised Garden Beds
Hello friends,
After we had taken down the old aviary/berry cage, it was time to get to work turning this space into garden beds.
The first task was to weed the area, tidy up the fence line, and move two concrete pavers. Once I pulled out all the weeds and then tidied the fence line by putting old pieces of wood up against it for protection, hubby and I maneuvered the pavers into the space next door, where I have my worm farm located.

With all that done I ordered macrocarpa sleepers from our local garden centre for creating the new garden beds. The sleepers are 1.8 m long, which was the exact size we needed for that space.

The next step was to first put up some old trellises for our raspberry bushes, so we could train them along the fence line. We then create 90 cm wide beds using the macrocarpa sleepers, with 50 cm pathways in between for easy access to the garden beds. It was a lot of hard work considering there was a lot of river pebbles in the area. We transferred those river pebbles into the pathways between the garden beds when we were finished.


Once all the beds were in place, hubby did the hard work of digging over the garden beds and adding compost. The first bed closest to the garden shed was set aside for the strawberry plants I had put into pots in the glasshouse before the aviary was removed.


The next garden bed was set aside for my natural dyeing plants including Madder, Woad, St John's Wort, Tomentil, and Lemon Sorrel, which I had squeezed in another garden bed down the side of the house. While transferring the plants I was able to harvest some of the madder roots for natural dyeing. I have enough space leftover now to put more natural dyeing plants in the other half of the garden bed this spring.


Garden beds 3 and 4 are currently empty, and they still need to have compost added, before being prepared to a fine tilth for spring.


My plan is to grow Linen and Japanese indigo plants in bed 3: I have my own homegrown flax linen seeds in storage from last year, and I bought Japanese indigo seeds from Growing Textiles last autumn with the intention to grow my own indigo plants for natural dyeing, and also for indigo seed production.


In bed 4 I want to start my own breeding experiments with dahlias. I've wanted to do my own plant breeding for ages, and I now have the space to start this. I have dahlia seeds set aside from last year's plants to do this. I'm very excited about this project and can't wait to get started in spring.
Have a wonderful day
Julie-Ann
Want to discuss my post? Feel free to chat with me on Instagram or Mastodon or Bluesky.
Social Media



Archives