
White Daffodil Project : Planting My Collection
Hello friends,
I've become completely obsessed with white daffodils, also known as white narcissus, and it all began with a single observation.
While taking the Floret Flower Farm Workshop last summer, I came across a comment from Erin Benzakein during the daffodil section of the course. She explained that at her flower farm, traditional yellow daffodils didn't sell nearly as well as the white varieties. She suggested that white daffodils have an elegance that appeals to many people. They are also so much harder to find than the traditional yellow varieties, making them feel a little more unusual and distinctive.

The more I thought about her observations, the more I realised I agreed with her. I already had a few white daffodil varieties growing in my garden, but I'd never really paid much attention to them. Once I started researching the different varieties available in New Zealand, I discovered an incredible diversity of flower forms, colours, and fragrances. Before long, I wanted to see whether my own experience with white daffodils would support Erin's observations, and that curiosity soon grew into a project of its own.

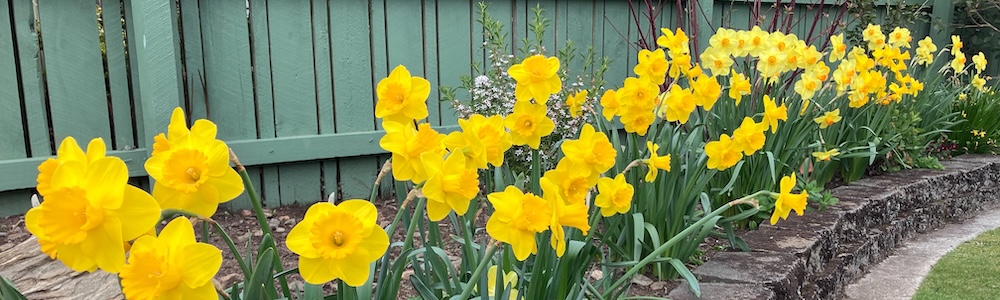
I've included some photos of white daffodils already growing in my garden. I no longer remember the names of these varieties, but they've given me a starting point for what I hope will become a much larger collection over the coming years.

When spring bulb pre-orders opened on the NZ Bulbs and Bulbs Direct websites this past summer, I bought the following white narcissus varieties for my garden:
- Annalise
- Bridal Crown
- Cheerfulness
- Earlicheer
- Ice Follies
- Mint Julep
- Pure White
- Thalia
- Watch Up
Together they represent a mix of single and double flowers, pure white and cream-toned varieties, a range of sizes, and varying flowering forms. I'm looking forward to watching them grow over the coming months, observing their characteristics, and discovering which ones become my favourites.
With the daffodils chosen and delivered to my doorstep, it was finally time to plant them. Wanting to compare the different varieties side by side as they emerged and flowered, I planted them together in one of the empty dahlia seedling beds in early winter (yes, I was a little late!).


I planted the bulbs according to their mature height, with the tallest varieties at the back of the bed and the shortest at the front. My trusty bulb planter made quick work of digging the planting holes before each bulb was safely tucked into place.


It's now been about a month since I planted the daffodil bulbs, and some of the varieties have already begun emerging through the soil. It's always exciting to see those first green shoots appear, knowing the flowers won't be too far behind.

I'm looking forward to discovering the unique character of each white daffodil variety, seeing how they perform in my garden, and finding out whether my own experience supports Erin's observations as my white daffodil project unfolds over this gardening season.
Have a wonderful day
Julie-Ann
If you'd like to continue the conversation, you can find me on Instagram, Mastodon, Bluesky, and Facebook.
I'd love to hear if you grow white daffodils, or if you have a favourite variety that I should add to my collection in the future.
Digging Up, Dividing, and Storing My Seedling Dahlias
Hello friends,
With winter fast approaching, it was finally time to dig up the seedling dahlias from my dahlia breeding project. Back in spring, I planted them wherever I could squeeze them into the garden, but now that the growing season has come to an end, it was time to lift the tubers, divide them, and store them safely away over winter. The last thing I wanted was for any of my seedling dahlias to rot over winter. Each one is unique, so I was keen to lift and store them carefully to give them the best chance of growing again next season.
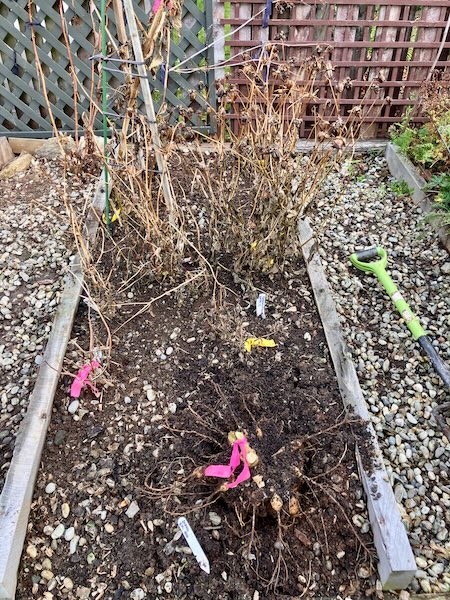
The first step was to get out my trusty garden fork and carefully lift each dahlia from the garden. To avoid damaging the tubers, I inserted the fork about 50 cm away from the base of the plant and gently levered the soil upwards. Working my way around the clump a little at a time, I gradually loosened the soil until the tubers lifted free.
Once each tuber had been lifted, I placed it into its own plastic tray along with two labels to ensure the different seedling dahlias didn't get mixed up. Having a backup label also gave me a little extra peace of mind in case one was accidentally lost during the cleaning and dividing process.
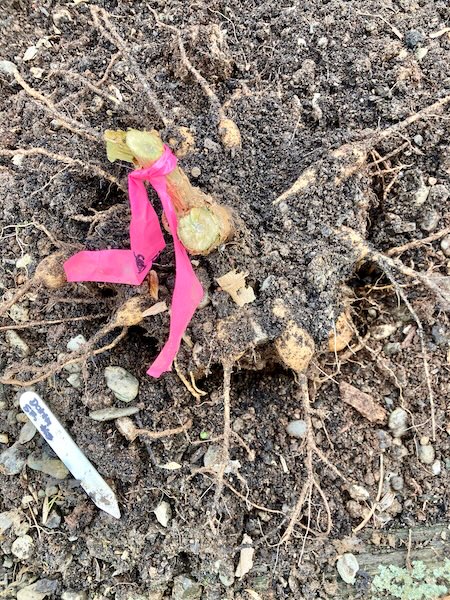
The next step was to wash the excess soil from the dahlia tubers. To keep the mess to a minimum, I placed each tuber into an empty garden bed and used the hose to gently wash away the soil. Once clean, the tubers were returned to their labelled trays and left to dry in the sun before the next stage of the process.
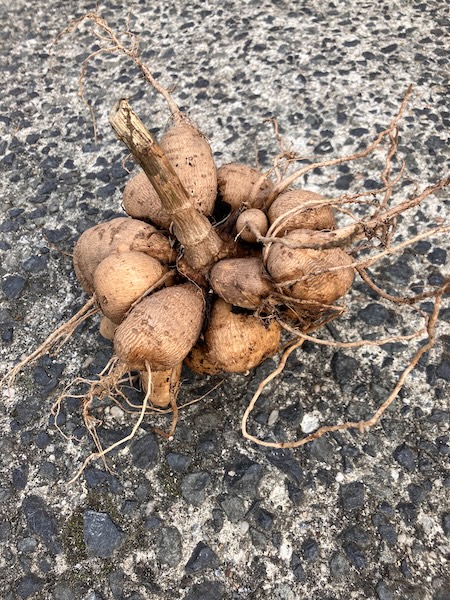
With the tubers dry, it was time to divide them. The first step was to remove the old mother tuber, along with the long, thin feeder roots attached to the new tubers. This made it much easier to see the individual tubers and identify where they could be carefully divided.
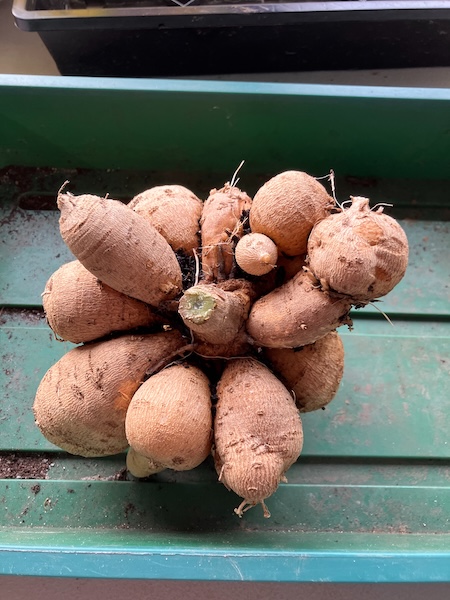
Using a combination of secateurs, scissors, and a few other garden tools, I carefully broke each clump into smaller, more manageable sections. From there, I looked for the dahlia eyes on the crown and divided each section into individual tubers, making sure each division had at least one healthy eye attached. Once divided, I left the tubers to dry overnight. This allows the freshly cut surfaces to callus over, helping to reduce the risk of rot during winter storage.
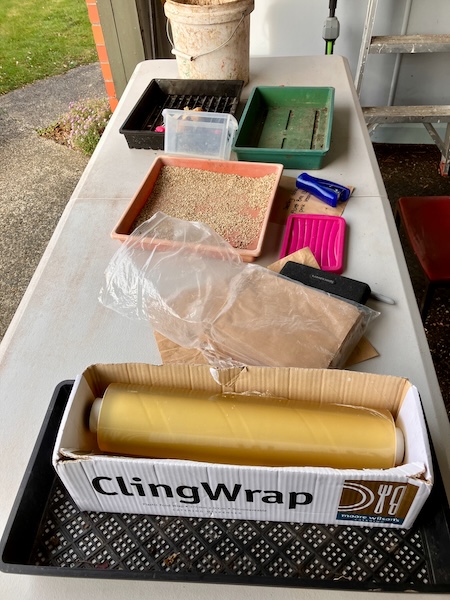
The following day, it was finally time to put the dahlia tubers away for winter. Each tuber division was labelled twice, with one label attached to the outside and a second placed inside as a backup, giving me peace of mind that none of the seedlings would lose their identity over the coming months. This year I decided to trial two different storage methods that I learnt during the Floret Flower Farm Flower Farming Workshop earlier this year. Some of the tubers were placed into paper bags filled with vermiculite, while others were individually wrapped in plastic wrap. I was curious to see how the two methods would compare after winter.
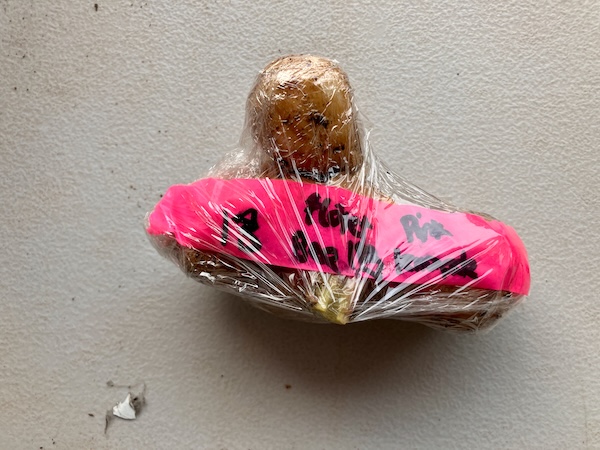
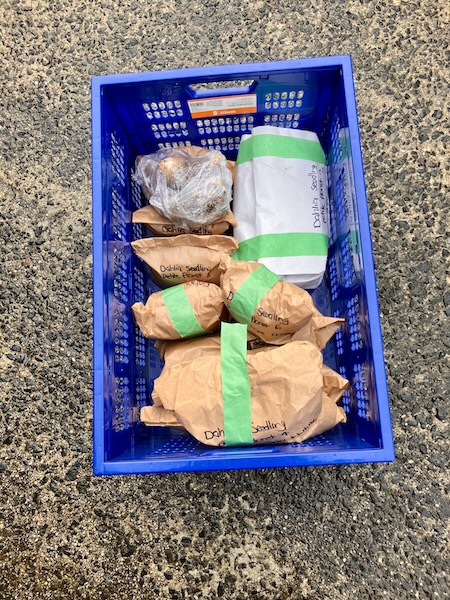
To give each method the best chance of success, I stored them in two different locations in our garage. We also have a temperature sensor in the garage, allowing me to keep an eye on the conditions over winter and make sure the tubers don't get too cold. It will be interesting to compare the results in spring and see which storage method worked best.
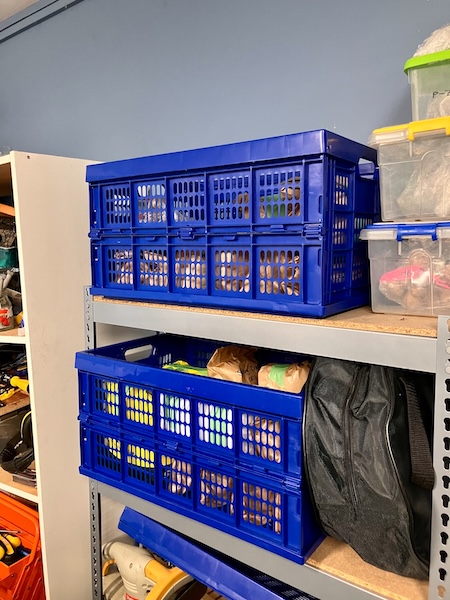
With the tubers now safely tucked away for winter, this year's dahlia breeding season has come to an end. Although it always feels a little strange lifting the plants just as they've finished growing, there's something exciting about knowing that each carefully labelled tuber holds the promise of next season's flowers.
Now all that's left to do is keep an eye on them over the coming months and wait for spring to arrive. I'm already looking forward to planting them out again and discovering how they perform in their second season.
Have a wonderful day,
Julie-Ann
Saving Dahlia and Zinnia Seeds for Next Season
Hello friends,
Over late summer and early autumn, I spent many happy hours collecting seeds from the dahlias in my garden, and from the Floret zinnia varieties growing in my zinnia patch.
This year, my focus was on saving seeds from as many collarette and anemone dahlias as possible, along with seeds from some of my favourite seedling dahlias from this season. There's always something hopeful about saving dahlia seeds. Unlike tubers, the seedlings won't grow true to their parents, and that's part of the magic. Every seed has the potential to produce something completely new, making each growing season full of anticipation and surprises.
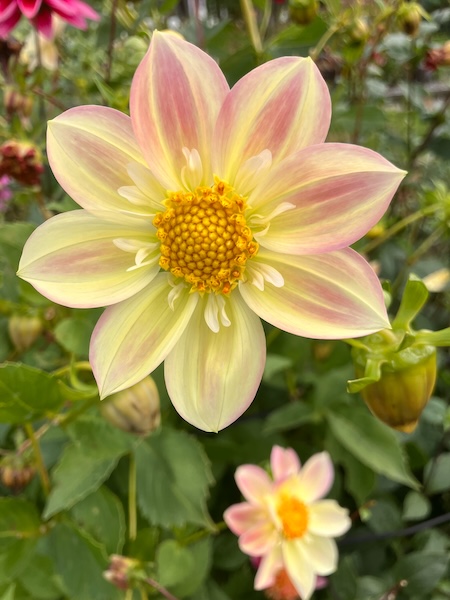
The process of saving dahlia seeds takes a little time and patience. Once a flower has finished and the petals have fallen, the waiting begins. Not every flower produces a good seed head, so I watch carefully for those that develop into plump, full seed heads.
Once I find one, I mark it with a piece of flagging tape and leave it on the plant to mature. Depending on the weather, this can take anywhere from a couple of weeks to a month. As the seed head ripens, it gradually turns a mid to dark brown colour, becomes dry and crunchy to the touch, and the outer sepals begin to pull back, revealing the inner parts of the seed head.
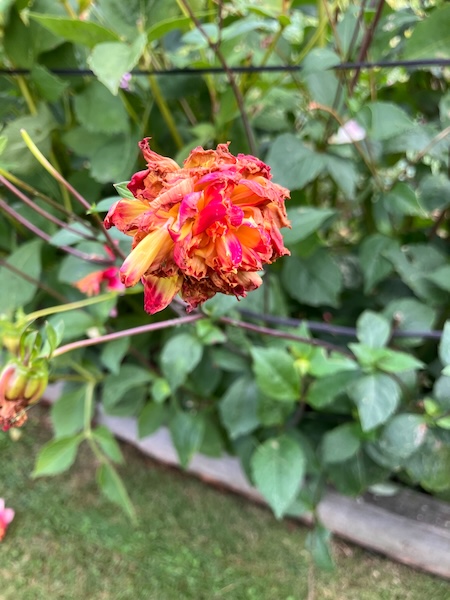
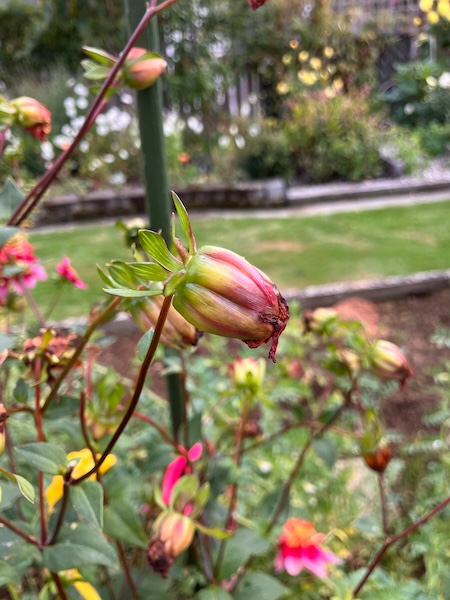
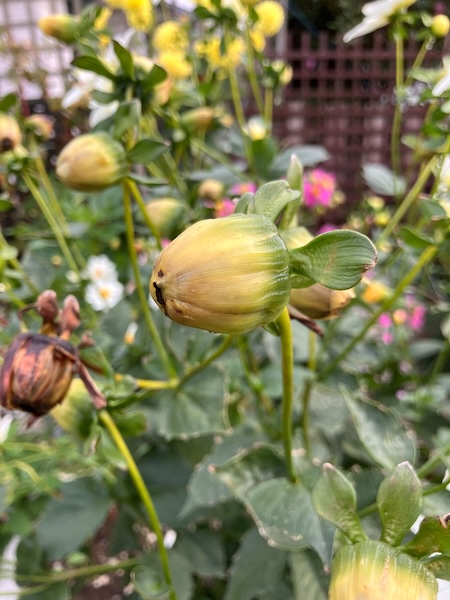
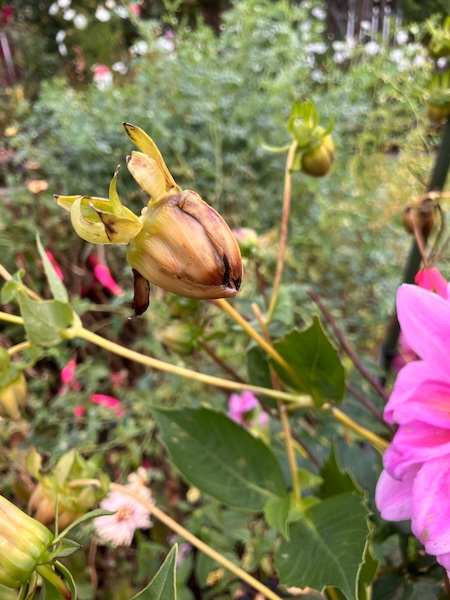
At this stage, I remove the seed heads from the dahlia plant and place them in an open container labelled with the variety name. I then gently break up the seed heads by hand to increase the airflow around the seeds. As the seed head falls apart, the dahlia seeds begin to separate from the chaff, and I leave everything together in the container to dry for a couple of weeks.
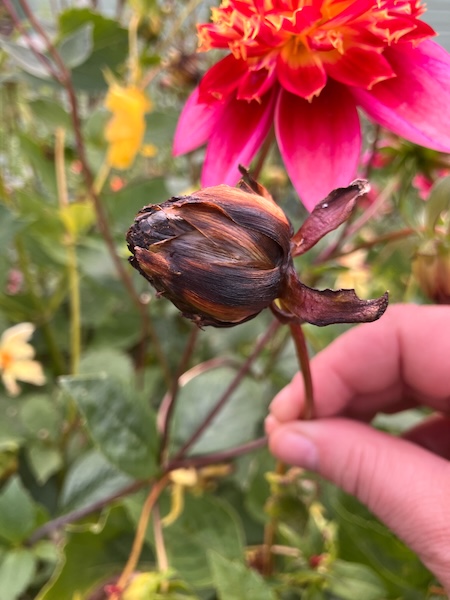
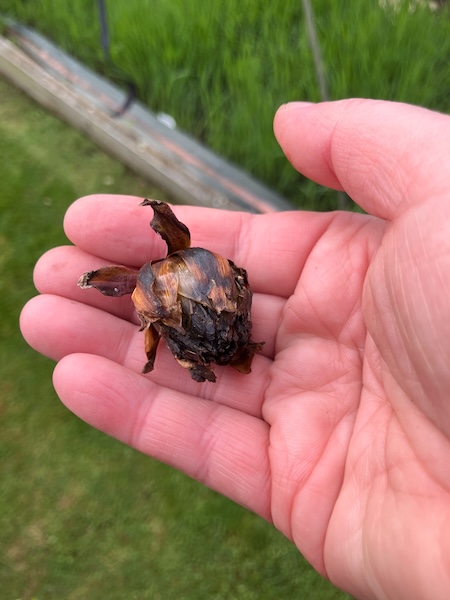
Once the seed heads are completely dry, it's time to separate the dahlia seeds from the chaff. Fortunately, the chaff is both larger and lighter than the seeds, which makes the job a little easier.
There are a number of ways to do this. One method is simply to shake the container, allowing the heavier seeds to settle to the bottom while the chaff sits on top. Another option is to winnow the crushed seed heads on a windy day, or in front of a fan. The heavier seeds drop into a waiting container, while the lighter chaff blows away. A third method is to use a soil sieve, which screens out the larger pieces of chaff while allowing the seeds to fall through.
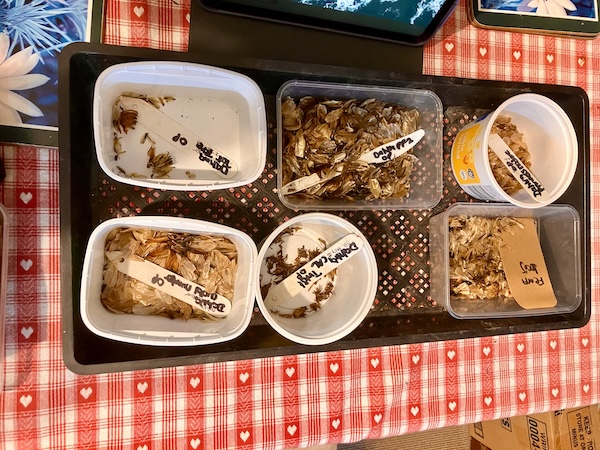
Most of the time I use the first method, as I've found that viable dahlia seeds can sometimes remain attached to the chaff. If I wasn't paying attention, it would be all too easy to throw away perfectly good seeds.
Before I begin, I make sure the seed heads are crushed up as much as possible. I then gently shake the container from side to side, allowing the heavier seeds to settle to the bottom while the chaff rises to the top. As I remove the chaff, I quickly check it for any viable seeds that are still attached and carefully pry them off by hand.
It takes a little extra time, but I'd rather spend a few extra minutes cleaning the seeds than accidentally lose some future potential favourite dahlia varieties.
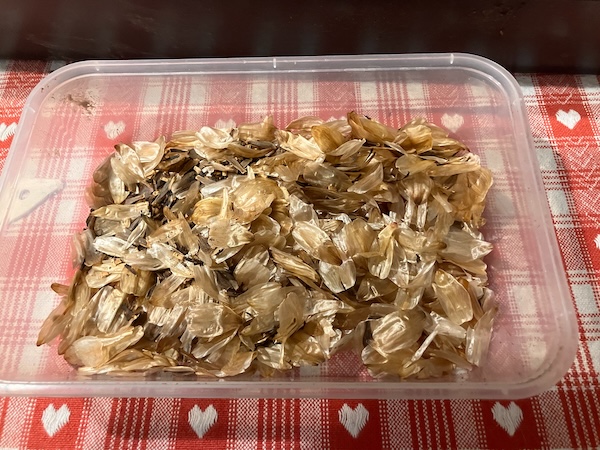
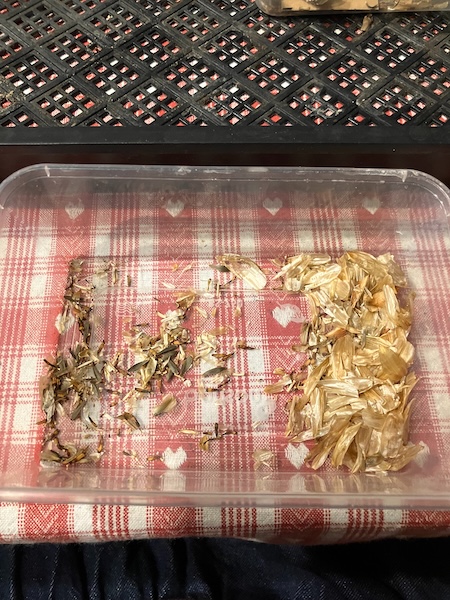
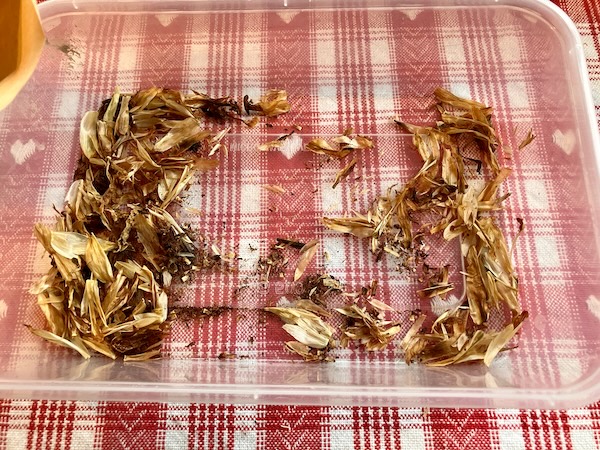
Once all of this is done, I pop the dahlia seeds into labelled paper seed envelopes. I like to include the dahlia variety, the flower type, whether the seed was open or closed pollinated, the pollen parent (if I know it), and the date the seed was collected.
With everything labelled and safely stored away, the seeds are tucked away until spring, when the whole process begins again. One of the things I love most about growing dahlias from seed is that each seed holds the possibility of something completely new, and I can't help but wonder what surprises next season will bring.
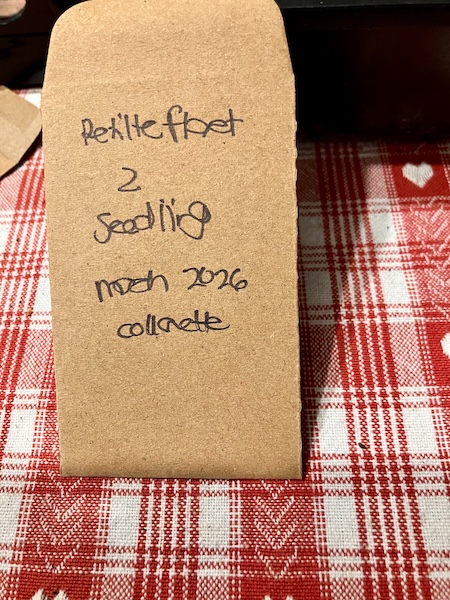
My approach with the Floret zinnias in my zinnia patch (Precious Metals, Unicorn and Blush) was a little different. Rather than selecting individual plants, my aim was simply to collect as many viable seeds as possible from across the patch.
Because Floret zinnia seeds were only available in New Zealand for one season in 2024, I have no way of purchasing more seed. If I want these beautiful varieties to remain part of my summer garden, seed saving is really my only option.
Thankfully, zinnias are generous plants, and with a little effort I hope to carry these favourites forward for many summers to come.
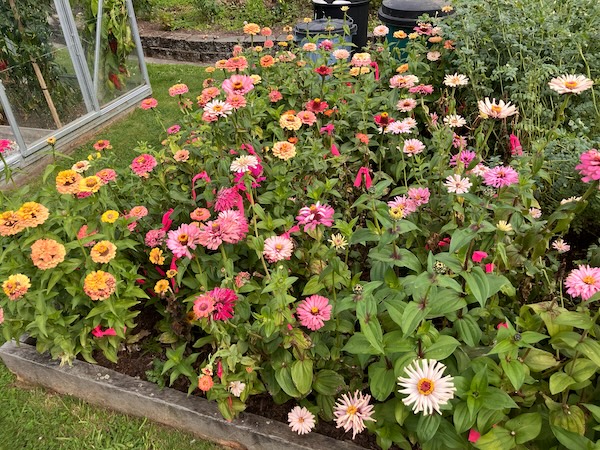
Last spring, I sowed all of the remaining Floret zinnia seeds I had in storage and grew them on through the season. By late January the first flowers were appearing, and I began saving seed in February.
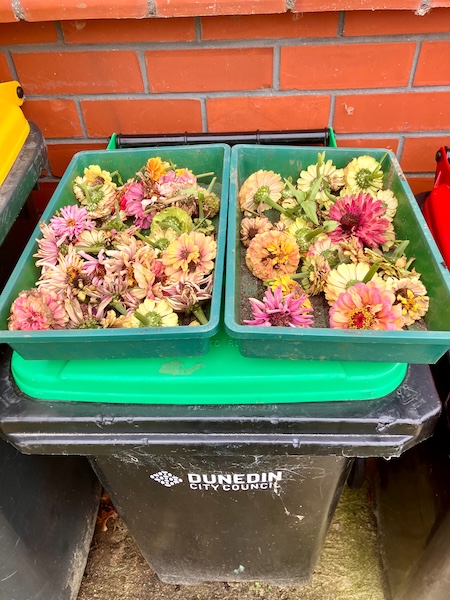
Fortunately, many of the plants set seed well, and before long I had collected trays of mature brown seed heads. Then, in April, just before our first decent frost, I harvested as many flower heads that had begun setting seed as possible, hoping that some of them would continue to mature and provide a few extra seeds as well.
With Floret zinnias no longer available, I was keen to make the most of every opportunity to save seed and carry these beautiful varieties forward into future summers.
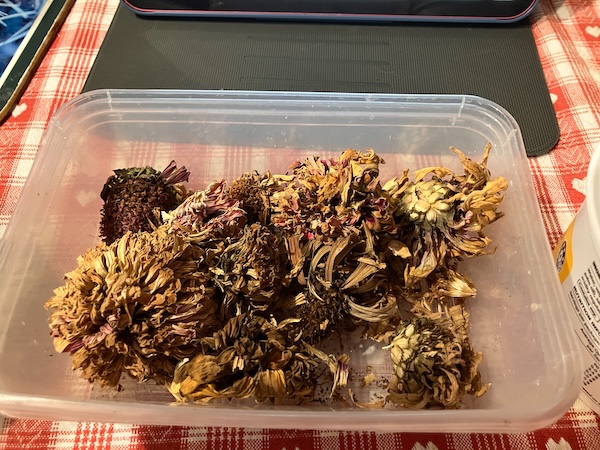
The process for collecting zinnia seeds is pretty much the same as with the dahlia seeds. I allow the seed heads to dry out completely before gently crushing them by hand. The seeds naturally fall to the bottom, and I use the same shaking method to separate them from the chaff.
One of the interesting things about zinnias is that they produce two different types of seeds. Seeds from the ray flowers are larger and rounder in shape, while the seeds from the disk flowers are much smaller and narrower. Some growers believe that the larger ray flower seeds are self-pollinated, while the smaller disk flower seeds are more open-pollinated, producing different flowers in the next generation. I haven't found any definitive evidence for this, though.
As I've collected both seed types, it would be easy enough to grow them separately and see what happens. Perhaps that's a future Crafty Gardener project waiting to happen...but that's a story for another growing season.
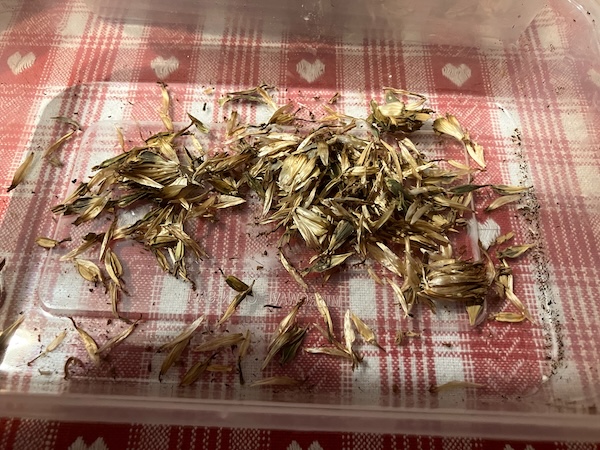
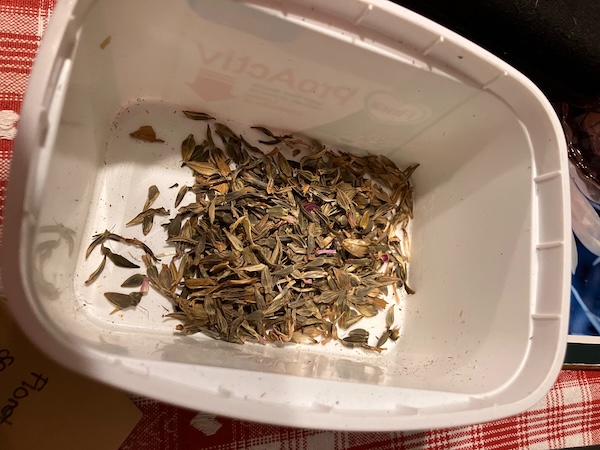
Overall, I managed to harvest over half a margarine container full of Floret zinnia seeds. They are now safely stored away, waiting patiently for spring and another season in the garden.
Both dahlia and zinnia seed saving have taken up a lot of my time throughout autumn and now into early winter, but I have many seed packets safely stored away ready for sowing in spring.
Winter has arrived, and although it is often thought of as a quieter time in the garden, I know there is still much to do. There is tidying and weeding to tackle, dahlia tubers to dig up, and a new back garden project waiting in the wings.
This will be my last blog post for the next fortnight. My husband and I have a medieval-themed wedding to attend (which means we finally get to wear our new cloaks!), and afterwards we're taking a short holiday to relax after a busy growing season.
So, until then, I'll wish you all a happy winter solstice. I'll see you again in July, at the beginning of a new gardening year, and the start of another season of stories.
Have a wonderful day
Julie-Ann
Want to discuss my post? Feel free to chat with me on Instagram or Mastodon or Bluesky, and now also Facebook.
Sewing Two Overland Cloaks For A Wedding
Hello friends,
In June this year our nephew is getting married, and him and his wonderful fiance are having a Medieval/Renaissance Faire themed wedding. Since they encouraged everyone to dress up in Medieval/Renaissance Faire inspired outfits for the event, it was time for me to pull out my sewing machine and get to work.
Now was the chance for me to finally make a medieval winter cloak of my dreams, which I've wished to own for a very long time. After a lot of searching on the internet, and asking some knowledgeable friends online, my friend Karyn suggested the Overland Cloak by Twig + Tale pattern, which is a "luxurious hooded cloak designed for hiking and adventure, with a generous dash of dreaminess". When I bought the Overland Cloak pattern, and showed it to my husband, he got very excited and wanted a cloak of his own, and so it was now up to me to now make two cloaks for the upcoming wedding...

As this wedding is happening in the middle winter, in a community hall, which more than likely is going to be a little chilly, I thought it best to make cloaks with some heft, so we could would stay warm and toasty on the wedding day and into the evening festivities.
First up was finding the fabric needed for the project. I needed 5 metres of outer fabric for each cloak, and the same for lining. From Spotlight we picked up two satin linings in midnight blue and gold. For the outer cloak fabric, the pattern suggested fabrics including wool coating, linen, cashmere and twill. I went hunting in our local secondhand stores to see if I could find any fabric treasures, and came across a steal, 10 metres of vintage gold velvet fabric for $80. This fabric came home with me to be used for my cloak.


For hubby's cloak, I couldn't find any more appropriate secondhand fabric which would work for him, so I ordered some black 100% pure wool coating from the The Fabric Shop in Auckland. When the fabric arrived I was so pleased with it, it wasn't too thick, but it was warm and very good quality. The only bad thing about the fabric is that it was so warm and cosy that Rosie cat became enamored with it and wanted to snuggle with it, and so the fabric quickly became covered with her cat fur...

With all that done it was time to cut out the fabric and then start sewing. I sewed my cloak first, and to be honest the vintage gold velvet was horrible to sew. Even with a Brother Walking Foot the velvet fabric shifted and bunched while sewing, and it took me a long time to make this cloak because it was so difficult, and I was getting very frustrated with it. I eventually finished it, but the cloak has lots of small flaws which are thankfully mostly hidden inside the linings.


On the other hand, hubby's cloak was a dream to sew, and the outer pure wool coating fabric was boiled and felted, which meant I could skip the overlocking steps since the fabric didn't fray at all. I managed to finish hubby's cloak in about a week with Rosie cat's help.


Hubby's cloak look's amazing on him in his favorite colours of black and midnight blue. It sits really great on his shoulders (size 5 pattern), and is the perfect length for all your Medieval/Ren Faire, and Lord of The Rings needs. He chose silver buttons which we got from Spotlight. As you can see from all the photos hubby's cloak is covered in Rosie Cat fur, because she just won't leave it alone.


My cloak looks amazing in shades of gold velvet and satin, along with gold buttons which I also chose from Spotlight. My cloak was sewn in a size 4, which was based on my shoulder width. Due to the incredible difficulty in sewing the cloak, I was unable to insert buttonholes into the velvet fabric, because the buttonhole foot on my sewing machine kept slipping while trying to make the buttonhole. Instead I had to sew on snap fasteners under the top section, and then just sew buttons on top to look like they had buttonholes.


Hubby and I both chose the oversized hood for the Overland Cloak, but they ended up being huge on us, so much so that it completely covered my face if I wore it. I think next time I make an Overland Cloak, I'll choose the smaller rounded hood available.


All in all I'm very pleased with both of the Overland Cloaks that I've made for the wedding. And I certainly now have the Medieval cloak of my dreams. But I am already planning on making another cloak, this time in pure wool coating in shades of purple like hubby's one, with silver buttons, and a smaller rounded hood. And I already have all the fabric and buttons that I need, I just need to find the time and energy to make it...
Have a wonderful day
Julie-Ann
Want to discuss my post? Feel free to chat with me on Instagram or Mastodon or Bluesky, and now also Facebook.
Social Media



Archives