

I've Gone Completely Dahlia Crazy
Hello friends,
If you were to ask me about my top 5 favorite flowers of all time, the list would be something like this: Roses, Lavender, Dahlias, Daffodils, and Cosmos.
But over the last couple of years dahlias have crept up to the top that list, as each of the gardening projects around our home ended up giving me more and more space to grow dahlias. It also didn't help that I started following a bunch of dahlia growers on social media, and also especially, Floret Flower Farm in the USA, on both Instagram and YouTube. I became especially fond of anemone dahlias, collarette dahlias, and single dahlia varieties, of course in a large number of colours and sizes.

It got to a point that I had developed a wish list of some very cool, but rare dahlias I just had to have...and come dahlia bulb pre-sale time this winter I went a little nuts buying them.
The next problem was figuring out where to put them, so out came my trusty Instax photo printer, and I got to work printing out photos of all the dahlia varieties I had, and also the ones on their way to me, and then I got to work organizing them. First up was developing a dahlia database based on type and colour and size.

The colour coding in the database give me a quick idea of where my dahlias are in terms of where they are in the world. Sage green are dahlias already in place. Bright green are dahlias which have to be moved. Apricot means that the dahlia is in storage in the garage. Peach means that the dahlia has not arrived yet.
Next up was to break down our garden into sections, and then arrange the dahlia photos in each area of the garden to get an overall plan. I'm going to use the following abbreviations for the different dahlia types: Anemone (A), Collarette (C), Decorative (D), Dinner Plate (DP), and Single (S), Waterlily (W).
Front Garden Right: Peaches and Cream (D), Penhill Dark Monarch (DP), Totally Tangerine (A). I grouped these based on similar colouring.

Front Garden Middle: Iced Tea (D), Keith Hammett Dream Seeker (C), Joal Kaitlyn (D), and Sweet Nathalie (D). These all have similarish apricot colouring.

Front Driveway Road: Yelno Harmony (W), Cafe Au Lait (DP). These have light apricot colouring.

Front Driveway Middle: Lucky Number (D), Aporo Road Strawberry (D), Molly Raven (D), Cafe Au Lait Twist (DP). All these have dark pink shades, and should look amazing together.

Patio: Zahra (A), Floorinoor (A), Misses Amy (A). Three anemone dahlias I bought very recently, so they go into pots this year because I have no more space in the garden.

Back Driveway: Silver Years (D), Strawberry and Cream (D), Dutch Pearl (D), Muchacha (D). A gradient from light pink to dark pink.

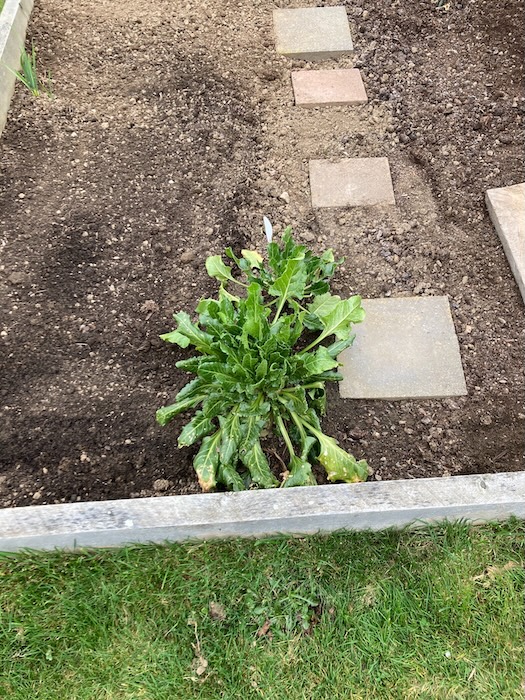
Back Garden Back Fence: Rosemary Webb (W), Islander (DP), Bonesta (D), Bumble Rumble (C), Cafe Au Lait Royal (DP), Sweet Sanne (D), Cafe Au Lait Rose (DP), Arthur Hammerly (DP), Mambo (A), Misses Miley (D), Impression Famoso (C), Fenna Baij (A), Julie-Ann (S, a dahlia I hybridised last year), Keith Hammett Mystic Sparkler (S). A gradient of colour from left to right along the back fence. It's a bit more loose in terms of shading toward the right side, with dahlias I didn't know where to put elsewhere.


Back Garden Far Right Corner: Keith Hammett Butterscotch (C), The Phantom (A), Dark Tiger (C). Collarette and anemone dahlias that are small and fit under the small tree in that space.

Back Garden Right Fence Back: Keith Hammett Protegee (S), Keith Hammett Delicacy (C), Pink Magic (D), Keith Hammett Tranquility (C), Lady Liberty (D), and Polka (A). Shades of pink and white.

Back Garden Right Fence Front: Great Silence (D), Fancy Pants (C), Salmon River (D), and Fairway Pilot (DP). More peachy tones.

As you can see I now have 48 dahlias in my garden (which don't include the seedling dahlias I'm growing in pots right now). In this second spreadsheet I've organised the dahlias based on where they are in the garden, and which direction they are in. It's a good idea for when labels come off the dahlias, and I can't figure out which ones they are after they die back in winter...

With this large amount of dahlias in my garden, I now have no space for any more dahlias (or any other plants really), even though I do have some more dahlias on my wish list like Rhubarb and Cream, Appleblossom, Thomas Edison, Marshmallow Baby, Negroni Sunset, Klara Zak, Dutch Delight, Breakout, Purple Flame, and Labyrinth.
Either I need to dig up what little grass space we have left, or I would need to get rid of our long, side hedge, and then build a new fence between us and the neighbours, and then make another garden...
For now I'll just have to pit the dahlias up against each other Hunger Games style, and see which plants survive each year.
Have a wonderful day
Julie-Ann
PS - After this post was written I got word from NZ Bulbs that one of the dahlias that hadn't arrived yet, Dark Tiger, was unavailable, so I had to choose another dahlia to replace it with. I chose the waterlily dahlia "Twiggy", but then had to rearrange a couple of dahlias in that area of the garden to fit this change, as Twiggy grows much bigger in size than the space I had chosen Dark Tiger for...
Want to discuss my post? Feel free to chat with me on Instagram or Mastodon or Bluesky.
King Seeds And Egmont Seeds Seed Haul
Hello friends,
Over the course of this winter I bought seeds from both Kings Seeds and Egmont Seeds, for growing vegetables, herbs, and flowers in the garden this growing season.
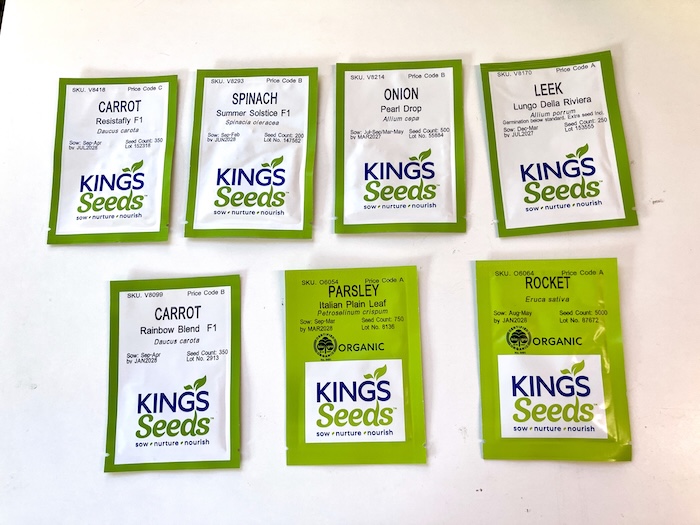
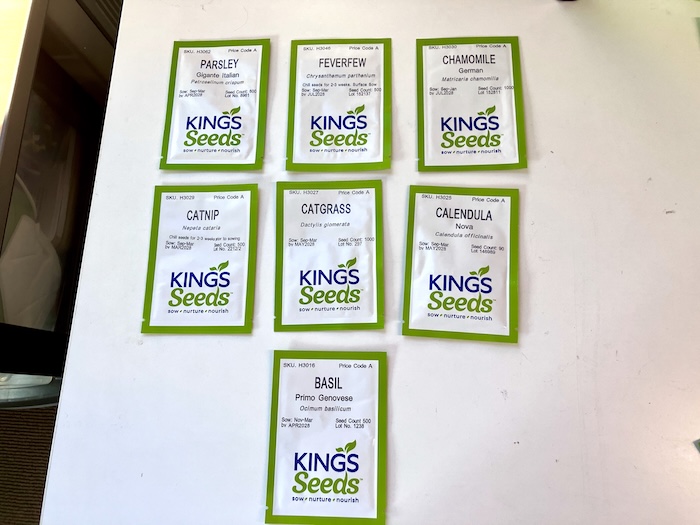
First up are the seeds from Kings Seeds, where I bought carrot, spinach, onion, and rocket vegetable seeds for the vegetable garden this spring. I also got a bunch of herb seed varieties including, parsley, feverfew, chamomile, catnip, catgrass, calendula, and basil seeds. I also bought a few flower seeds including zinnia, cosmos, yarrow, and dwarf lupin.

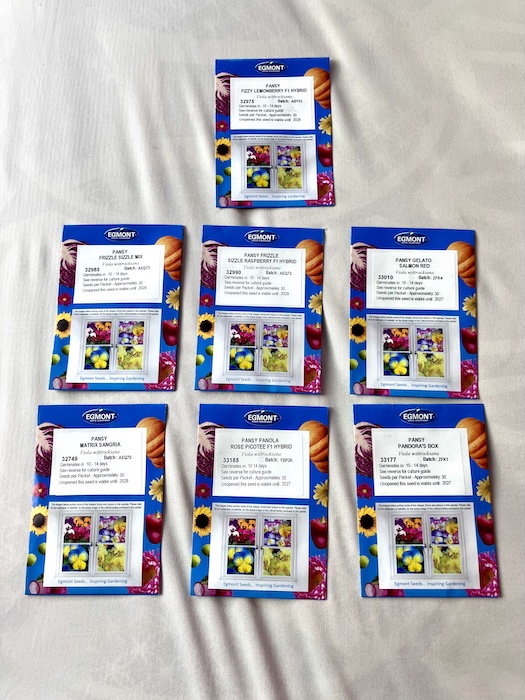
From Egmont Seeds I bought a pile of seeds including cucumber, capsicum, chickpea, stevia, thyme, and lavender, along with a bunch of new pansy varieties after I fell victim to the pansy mania hitting the world at present. Egmont seeds have a great range of pansy seeds available, with lots of varieties with frills and pretty colours that I haven't seen before.


I can't wait to see the plants that grow from all these seeds in the coming spring and summer, and then the harvests and flowers I will get from them...
Have a wonderful day
Julie-Ann
Want to discuss my post? Feel free to chat with me on Instagram or Mastodon or Bluesky.
Harvesting My Own Sugar Beet Seeds
Hello friends,
Back in the Winter of 2024 I was perusing the Kings Seeds website looking for seed packets to buy for the upcoming spring season. One of the packets I was looking to purchase was Sugar Beet seeds, which Kings Seeds had supplied for many years. As you may have seen in my blog, I grow Sugar Beet plants as a source of my own sugar. You can read all about my Sugar Beet extraction method in this blog post from 2023.
Except there wasn't any Sugar Beet seed packets available on their website. So I contacted Kings Seeds and asked them if they were going to be selling Sugar Beet seeds that year, and they told me they were no longer going to be stocking them. I had a little panic, but then went online to see if anyone else in New Zealand was selling Sugar Beet seeds for the home gardener. Unfortunately, I wasn't able to find any Sugar Beet seed suppliers, and all of the big commercial seed companies were only selling fodder beet for farmers.
So now I was panicking big time. All I had left was one packet of Sugar Beet seeds, and it was only half full. The expiry date had run out as well, and Sugar Beet are biennial, which meant that seed harvesting from any plants was two years away.
Determined not to give up, in Spring I direct sowed all the Sugar Beet seeds I had left, and impatiently waited for them to germinate. I managed to get a small number of seedlings dotted around the vegetable garden, with each plant growing under slightly different conditions, with the hope that some of the plants would survive the two year wait to collect my own Sugar Beet seeds.
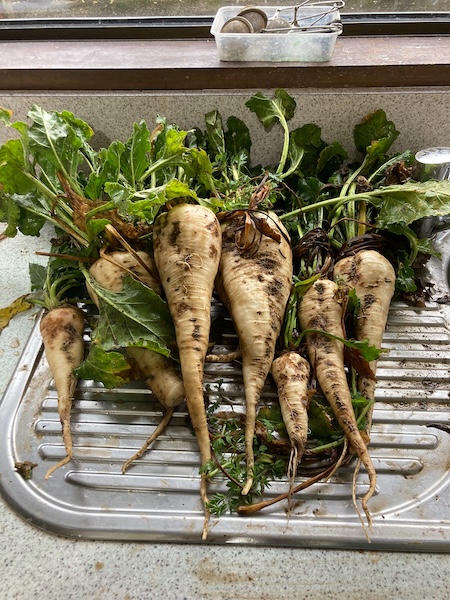
A number of Sugar Beet plants managed to survive the first growing season, including a very cold winter with -6˚C frosts, and then started growing again in their second year. The Sugar Beet plants began bolting over summer, and started flowering in February of 2025. By this time the plants were very tall, about 1.5 m high, and were prone to toppling over in the wind. A number of plant supports were erected to keep the plants upright until the Sugar Beet seeds were ready to be harvested.
In late March 2025 it was finally time to start harvesting the Sugar Beet seeds, and I made the decision to harvest them by hand, picking off each of the seeds one by one as they became brown. This long and drawn out period of harvesting the seeds took around two months, and then once they were nice and dry, I stored them away over this winter.
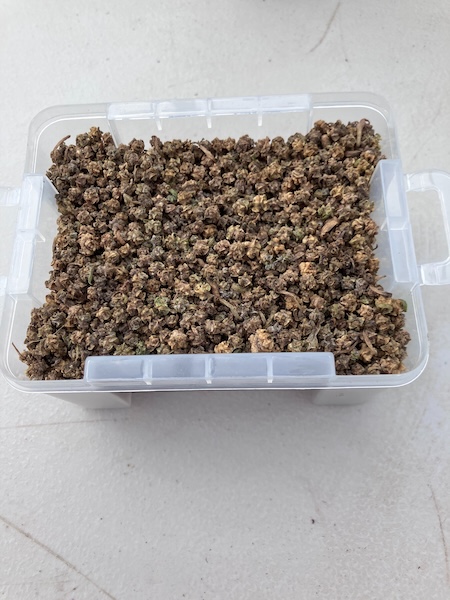
Now I have my own Sugar Beet seeds to use year by year to make my own sugar, and to collect my own seed in Autumn, whenever I need to. And I'm also pleased to say that I have enough Sugar Beet seeds at the moment to sell my excess to other home gardeners through my small business Hearth & Oak. If you are interested in buying some of my Sugar Beet seeds so you can grow your own Sugar Beet, and then collect your own Sugar Beet seeds in the years to come, please follow this Sugar Beet seed packet link to my Felt Store.
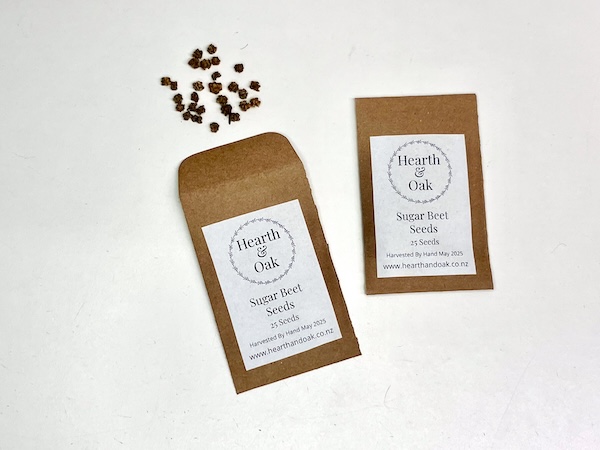
I had not intended to use this blog commercially to sell anything through my small business Hearth & Oak, but the thought of home gardeners in New Zealand not having access to Sugar Beet seeds and plants in the coming years, was too much to bear. Rare and interesting seed varieties in New Zealand deserve to be saved, and this is my attempt at doing this for Sugar Beet at least. I hope that if you do buy some of my seeds, my blog posts on Sugar Beet will help you grow your own plants, and then collect seeds, so that you can grow Sugar Beet every year.
Have a wonderful day
Julie-Ann
Want to discuss my post? Feel free to chat with me on Instagram or Mastodon or Bluesky.
A Pair of Socks Finally Finished
Hello friends,
Back in May of 2024, my friend Karyn and I traveled down to Gore for the 45˚Fibre Festival. And while we were there, she bought me a 100 gram skein of 4 ply
Bluefaced Leicester sock yarn in the colourway Meadow Mornings (Almost) from the company Purple Sprouting, as a gift for hosting her for a week.

I really loved the shades of pink, teal, and lime green, so of course I turned the skein into a ball of wool straight away, with the intention to knit them into a pair of socks using my plain sock pattern I've developed over the years.

But when I started knitting the socks up, I wasn't happy with the progress I'd made. I really didn't like how they looked knitted up in this pattern...so I frogged the sock I was working on, and put it away for many months. In the meantime I knitted and finished my On the Porch blanket by Fifty Four Ten Studios, and also my Gro Hat by Fiber Tales.
After I finished those projects I pulled out my sock knitting bag and looked at the Purple Sprouting sock yarn once again. Over the coming weeks I did a whole lot of searching on the internet looking at various sock patterns to see what would fit the yarn. I eventually settled on Tin Can Knit's Rye Light sock knitting pattern, which I had already bought previously. It's a simple sock pattern that I've always wanted to try.
Once I got started the socks knitted up very quickly, and within 3 weeks I had a new pair of socks. The socks ended up being a little big for me, but they're perfect as slouchy socks for around the house. I think next time I use this knitting pattern, I'll go down a smaller size.
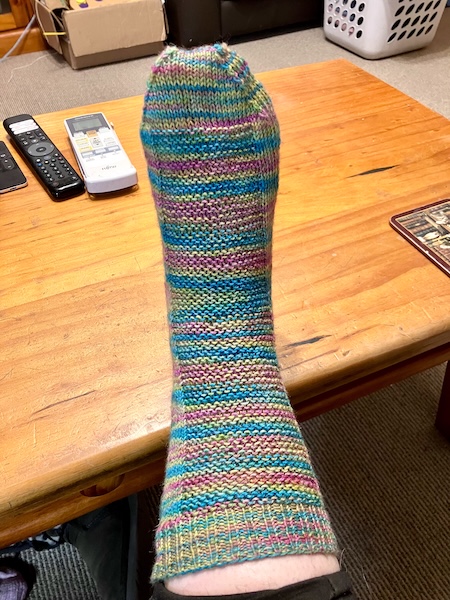
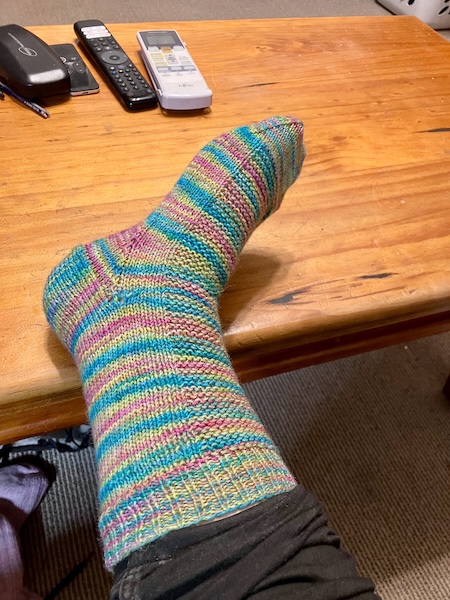
The socks are super warm, and very soft, and I really liked knitting up the Blue Faced Leicester yarn.


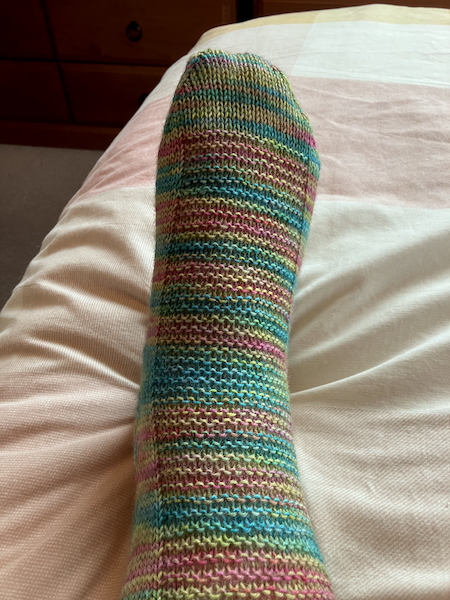
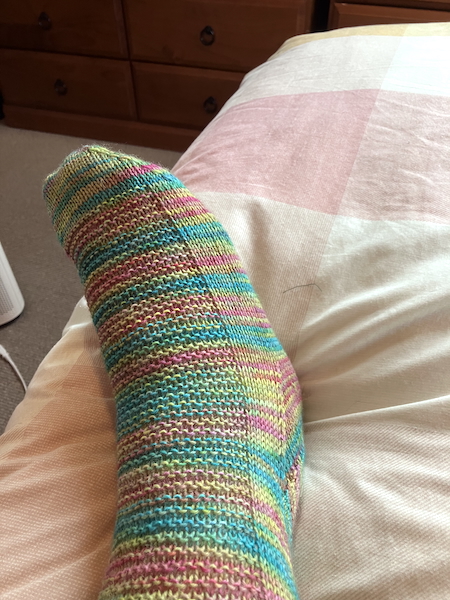
I haven't had a chance to wear these socks yet, but I'm sure they'll keep my feet toasty while wearing them in gumboots while gardening.
Have a wonderful day
Julie-Ann
Want to discuss my post? Feel free to chat with me on Instagram or Mastodon or Bluesky.
Social Media


Archives